Make A Yarn Monogram
Create a yarn monogram by wrapping yarn around a cardboard letter, secure with glue, add decorations, and learn patience, patterning, and fine motor skills.

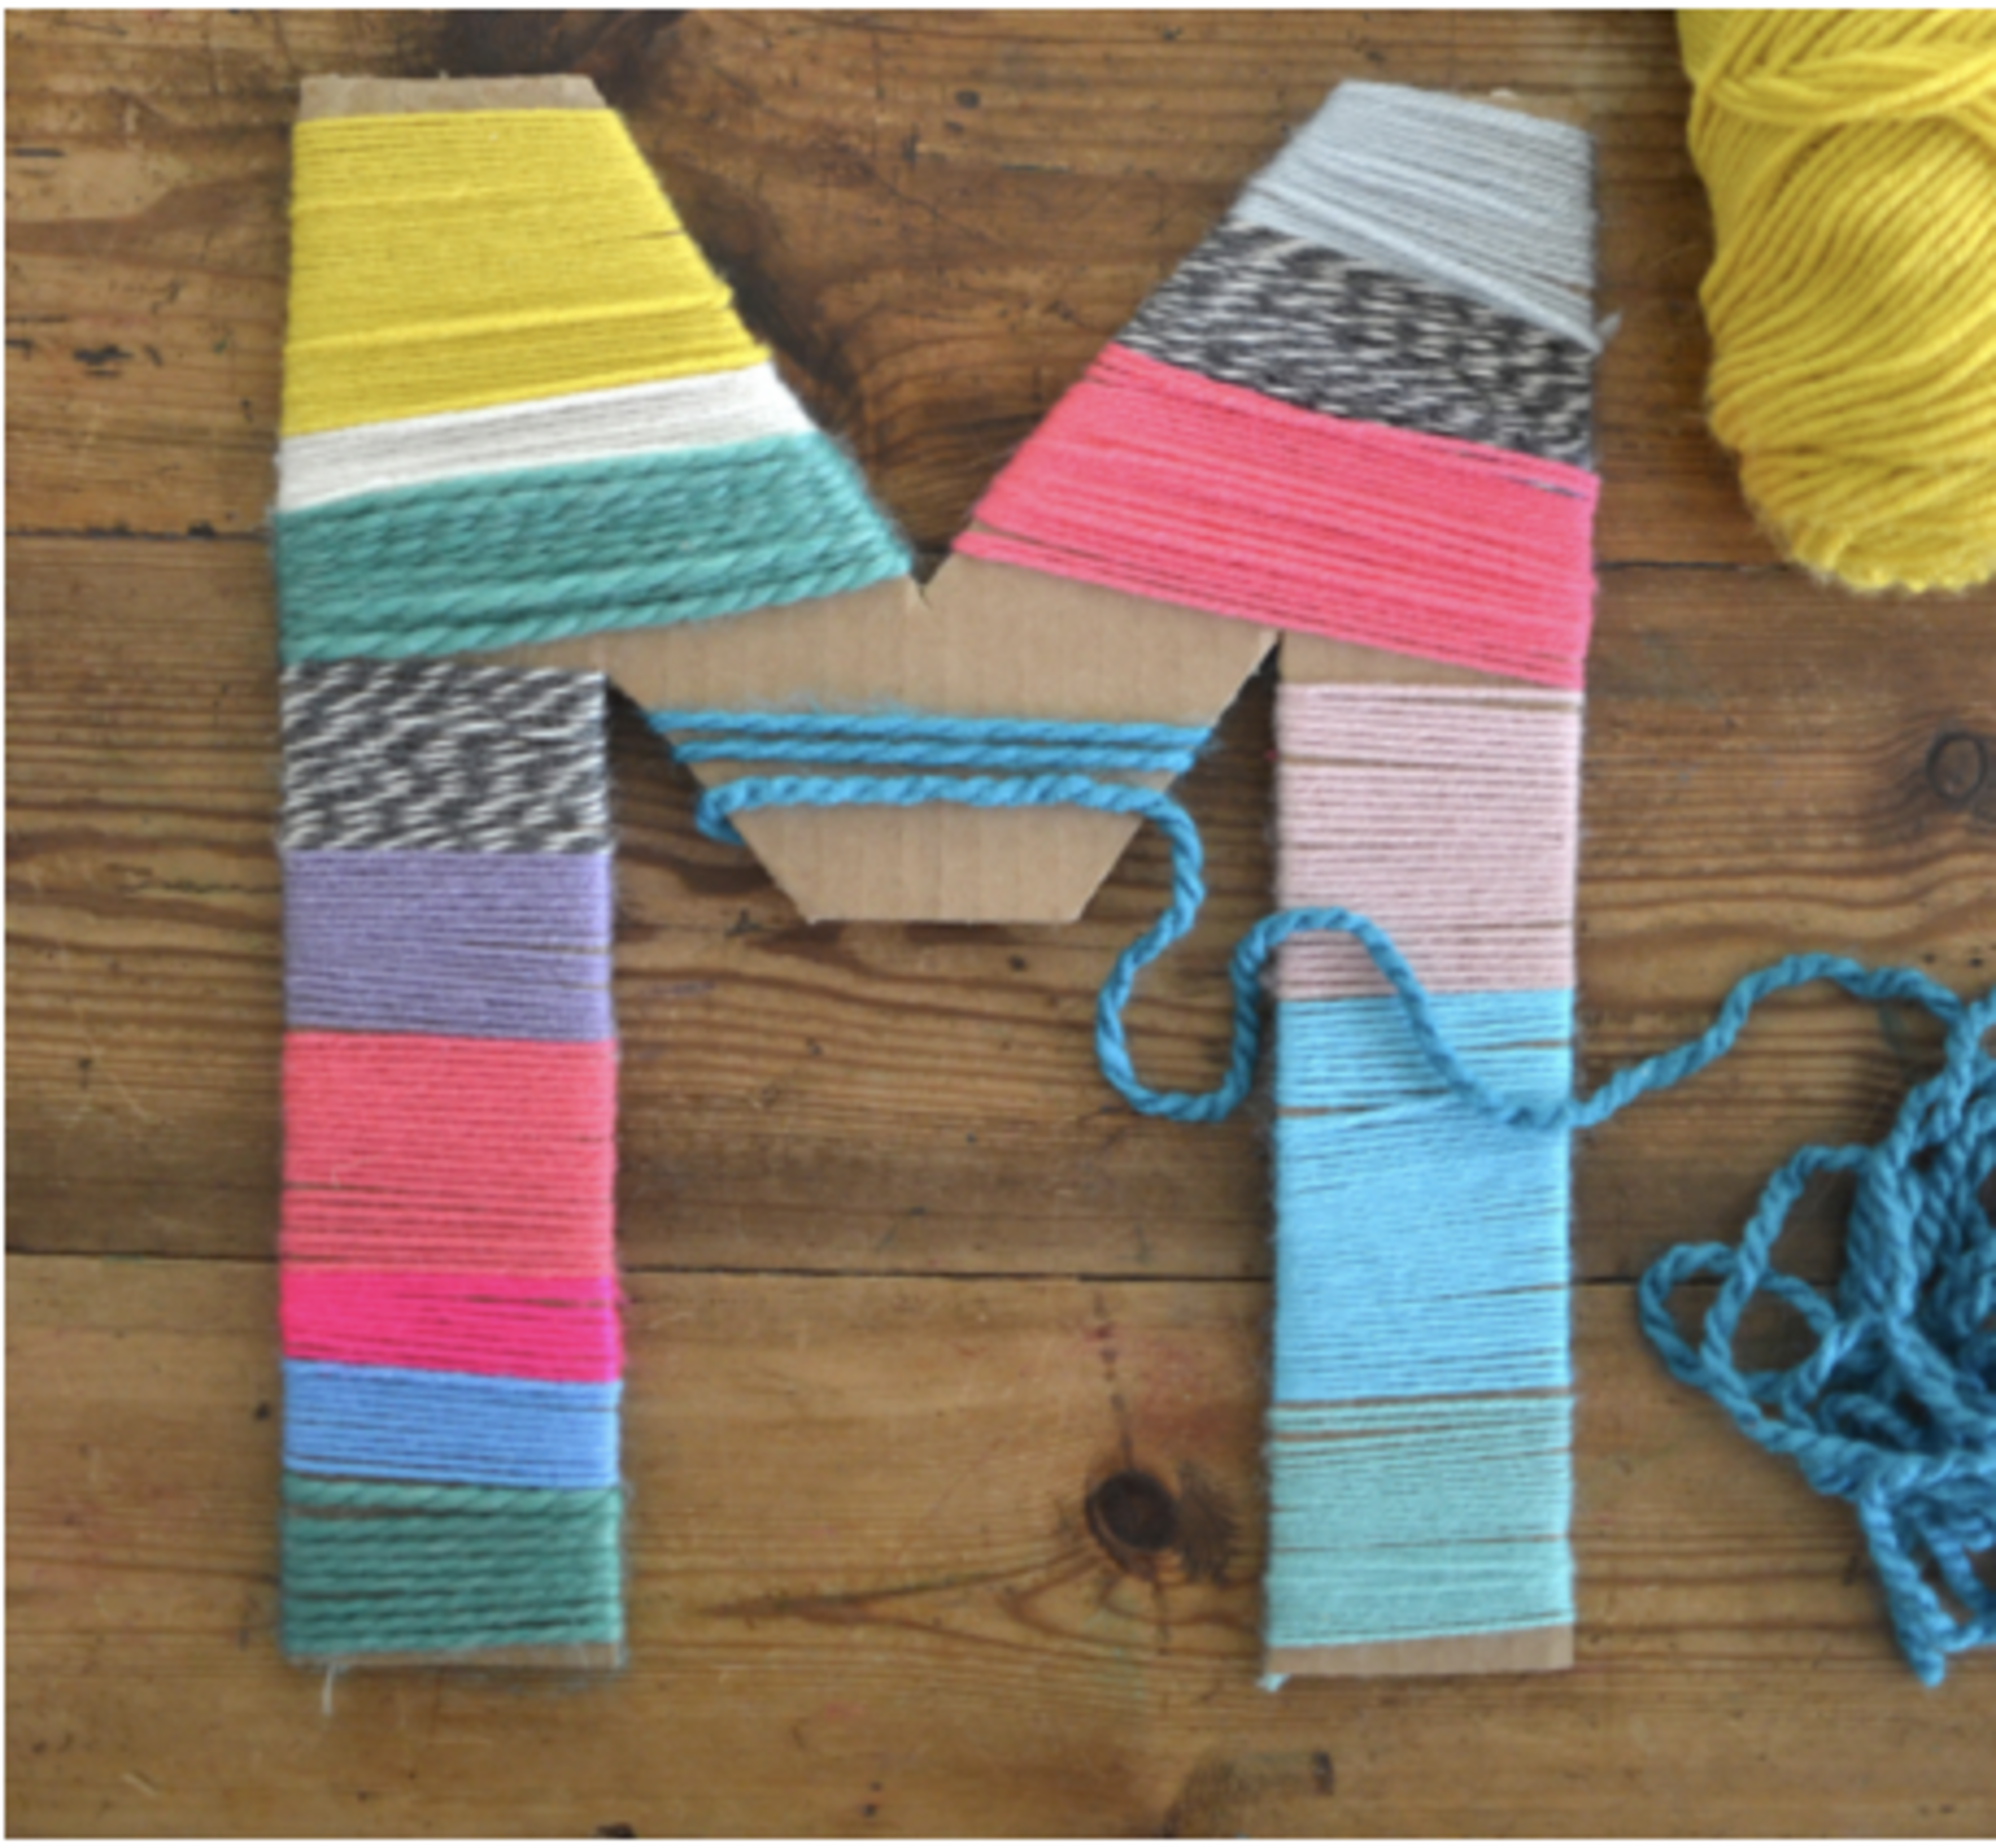

Step-by-step guide to make a yarn monogram
Cricut Monogram Maker: The Easy Way to do Monograms
Step 1
Gather all materials and clear a flat workspace to work on.
Step 2
Choose the cardboard letter you want to wrap and lay it flat on the table.
Step 3
Cut a short starter piece of yarn about 6 inches long with the scissors.
Step 4
Put a small dot of craft glue on the back edge of the letter where you will begin wrapping.
Step 5
Press one end of the starter yarn onto the glue and hold it in place for a few seconds so it sticks.
Step 6
Wrap the yarn around the letter neatly and snugly, keeping each coil close to the last.
Step 7
When the yarn piece finishes, cut a new piece of yarn to continue wrapping.
Step 8
Put a small dot of glue where the old yarn ends and press the new yarn onto that glue to join them.
Step 9
Keep wrapping the new yarn over the join until the whole letter is covered in yarn.
Step 10
Cut the yarn leaving a short 1-inch tail when the letter is fully wrapped.
Step 11
Tuck the tail under nearby wrapped yarn and press a tiny bit of glue to hold it down.
Step 12
Decorate your yarn monogram by gluing on stickers buttons beads or ribbons as you like.
Step 13
Let all the glue dry completely before moving your monogram, about 15 to 30 minutes.
Step 14
Share a photo of your finished yarn monogram on DIY.org.
Help!?
What can we use if we don't have a cardboard letter or craft glue?
If you don't have a cardboard letter, cut a letter from a cereal box or use a foam or wooden craft letter, and if you lack craft glue use school white glue or double-sided tape for Step 4 and Step 7 (or a glue gun with adult help).
My yarn keeps slipping or there are gaps while wrapping—how can I fix that?
If yarn slips or leaves gaps while wrapping in Step 6, press a slightly larger dot of craft glue where the gap starts, hold the yarn for a few seconds until tacky, and wrap coils snugly while joining new pieces as described in Step 7 to secure them.
How can we adapt this activity for different ages?
For toddlers (3–5) have an adult pre-wrap the letter and let them add stickers in Step 12, for ages 6–9 use thicker yarn and supervised cutting/gluing in Steps 3–5, and for 10+ try thinner yarn, planned color patterns, or using a glue gun with permission to speed up Steps 6–9.
What are some ways to personalize or extend the yarn monogram?
Personalize by gluing on beads, buttons, or ribbons in Step 12, switch yarn colors as you wrap in Steps 6–9 to make stripes or an ombré effect, and attach a ribbon loop or magnet to the back after Step 13 to hang or display it.
Watch videos on how to make a yarn monogram
This Yarn Monster is TOO CUTE to Handle! 🧶💙 | Easy DIY Kids Craft
4 Videos

This Yarn Monster is TOO CUTE to Handle! 🧶💙 | Easy DIY Kids Craft
Yarn Drawing Hack ✨ Easy Kids Craft
DIY Personalized Sweater - How to Embroider with Yarn (UPDATED Tutorial)
DIY Yarn Art | Easy Yarn Painting
Facts about yarn crafts for kids
🧶 A single sheep can produce enough wool in a year to make several sweaters — that’s a lot of yarn for wrapping letters!
🔤 Monograms are ancient: people in Greece and Rome used them to mark coins and pottery as a signature.
📦 Corrugated cardboard, the sturdy stuff used for boxes and craft letters, started being used for shipping in the late 1800s.
🧴 Glue has been used for thousands of years — ancient Egyptians used tree gums and animal glues to stick things together.
🖐️ Wrapping yarn is a fun way to practice fine motor skills, the small hand movements kids need for writing, cutting, and buttoning.
How do you make a yarn monogram?
What materials do I need for a yarn monogram?
What ages is this yarn monogram activity suitable for?
What are the benefits and variations of making a yarn monogram?
