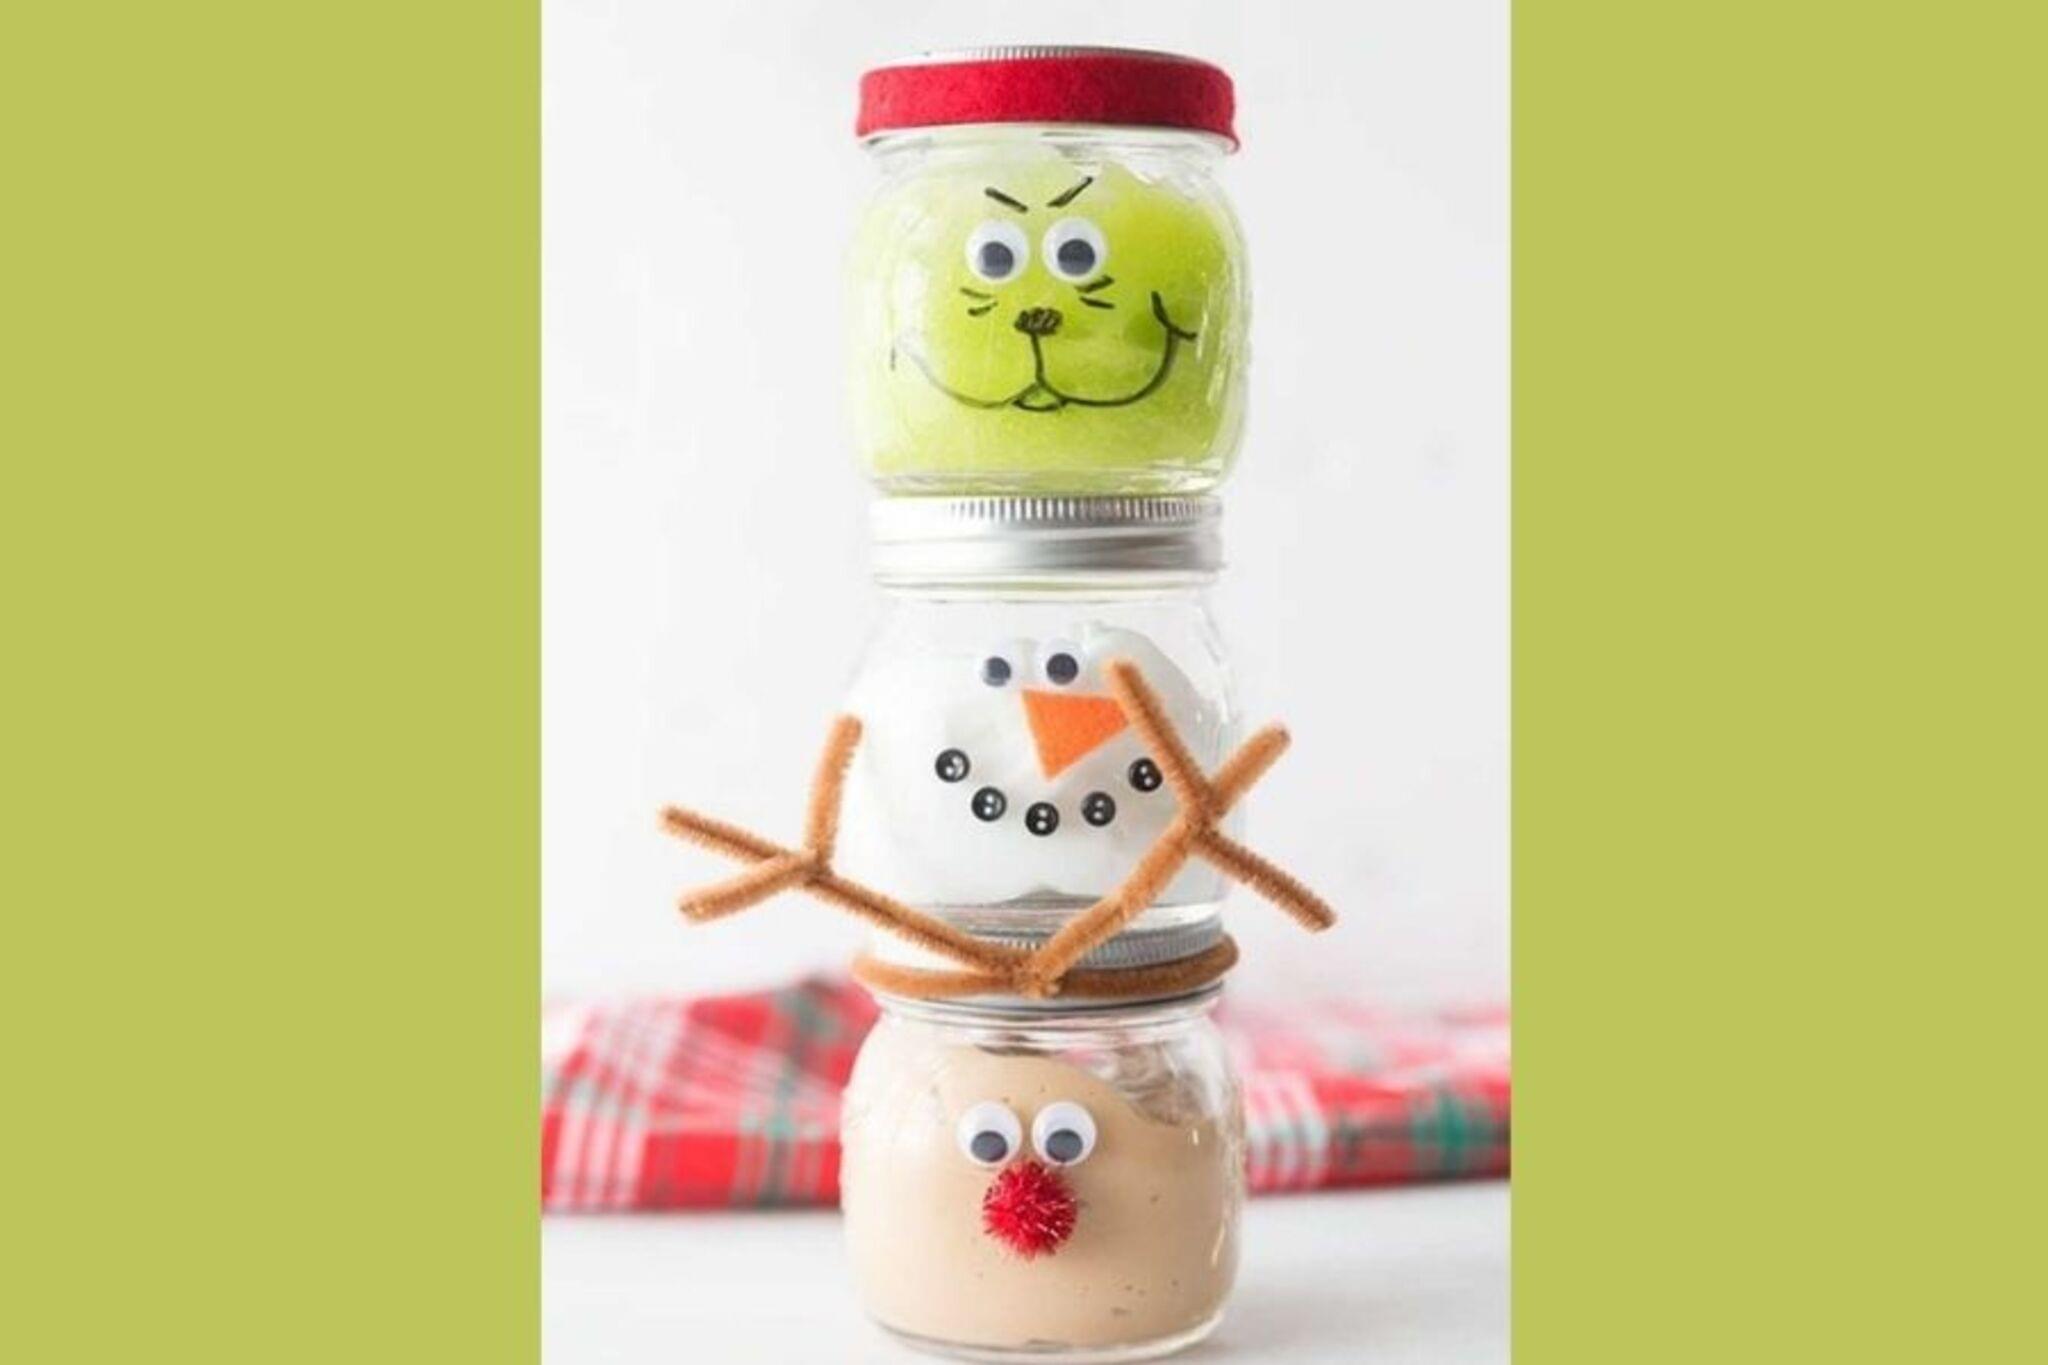
Make a Trio of Christmas Slime Jars: The Grinch, Olaf, and Rudolph
Make three Christmas-themed slime jars inspired by The Grinch, Olaf, and Rudolph using safe colors, decorations, and simple mixing for sensory play.


Step-by-step guide to make a trio of Christmas slime jars: The Grinch, Olaf, and Rudolph
Make Grinch Slime for Christmas!
Step 1
Gather all materials and spread newspaper or a table cover to protect your workspace.
Step 2
Pour 1 and 1/2 cups of white glue into a large mixing bowl.
Step 3
Sprinkle 1 and 1/2 teaspoons of baking soda over the glue.
Step 4
Add 3 tablespoons of contact lens solution to the bowl and mix until the glue pulls together into a single blob.
Step 5
Knead the blob with clean hands for about one minute until it becomes stretchy and not sticky.
Step 6
Divide the slime evenly into three smaller bowls using a spoon.
Step 7
Make the Grinch slime by adding 3 to 4 drops of green food coloring to one bowl and knead until the color is even.
Step 8
Decorate the Grinch slime by pressing green glitter and a small red heart sequin onto the surface then place it into an airtight jar and close the lid.
Step 9
Make the Olaf slime by squeezing about 1/2 cup shaving cream into the second bowl and knead it in to make fluffy white slime.
Step 10
Decorate the Olaf slime by pressing on two googly eyes and a small orange pom pom for a carrot nose then place it into an airtight jar and close the lid.
Step 11
Make the Rudolph slime by adding 2 to 3 drops of brown food coloring to the third bowl and knead until the color is even then press a red pom pom onto the surface and fold brown pipe cleaner antlers into the slime before placing it into an airtight jar and closing the lid.
Step 12
Share photos of your finished trio of Christmas slime jars on DIY.org.
Help!?
I can't find contact lens solution — what can I substitute in step 4?
Use 3 tablespoons of liquid starch as a direct substitute for the 3 tablespoons of contact lens solution in step 4 and follow the same mixing and kneading steps.
My slime stayed sticky or wouldn't pull together after step 4; how do I fix it?
If the glue doesn't form a blob or the slime stays sticky after kneading in steps 4–6, add contact lens solution one teaspoon at a time while kneading until the slime pulls away from your hands.
How can I adapt the activity for different ages?
For preschoolers have an adult complete steps 1–6 and let them press on large decorations instead of the small heart sequin and small pom poms, for elementary kids let them follow all steps including kneading and decorating, and for older kids add challenges like shaping detailed pipe cleaner antlers for Rudolph or mixing scents into the Olaf slime.
How can we enhance or personalize the finished slime jars?
Personalize and extend the activity by adding a drop of peppermint or vanilla extract into the Olaf shaving-cream slime in step 7 for scent, gluing a ribbon and name tag to each airtight jar lid, or mixing in foam beads or extra glitter into the Grinch or Rudolph slimes before sealing as described in the decoration steps.
Watch videos on how to make a trio of Christmas slime jars: The Grinch, Olaf, and Rudolph
The Ultimate Christmas DIY: Grinch Mason Jar
3 Videos
The Ultimate Christmas DIY: Grinch Mason Jar
How the Grinch Stole Christmas Slime ASMR - Mixing Makeup Eyeshadow Into Satisfying Slime
Jaw-Dropping Grinch Christmas DIYs Revealed! Christmas in July 🎄
Facts about slime making and sensory play
💚 The Grinch first appeared in Dr. Seuss’s 1957 book 'How the Grinch Stole Christmas!' and became a holiday icon.
🦌 Rudolph was created in 1939 by Robert L. May as a department-store promotion and later inspired a hit song and TV special.
☃️ Olaf, from Disney’s Frozen, is voiced by Josh Gad and was written to be a lovable, silly snowman who dreams of summer.
🧪 Toy slime’s gooey stretchiness comes from polymers that link together—changing ingredients or ratios makes it firmer or stretchier.
🎨 Sensory play like squishing slime helps develop fine motor skills, creativity, and calm focus in children.
How do I make three Christmas slime jars inspired by The Grinch, Olaf, and Rudolph?
What materials and tools do I need to make Grinch, Olaf, and Rudolph slime jars?
What ages are Christmas slime jars with The Grinch, Olaf, and Rudolph suitable for?
What safety tips should I follow when making holiday slime jars?
