Make a string instrument
Build a simple string instrument using a cardboard box, rubber bands, and a straw bridge, then explore how string tension and length change pitch.


Step-by-step guide to make a cardboard-box string instrument with rubber bands and a straw bridge
🎻 How to Play the Violin (Beginner Tutorial)
Step 1
Gather all the materials and bring them to a clear table or floor space.
Step 2
Put the box on the table with the open side facing up so the top is flat.
Step 3
With adult help use the scissors to cut two small matching slits on opposite sides of the box near one short end.
Step 4
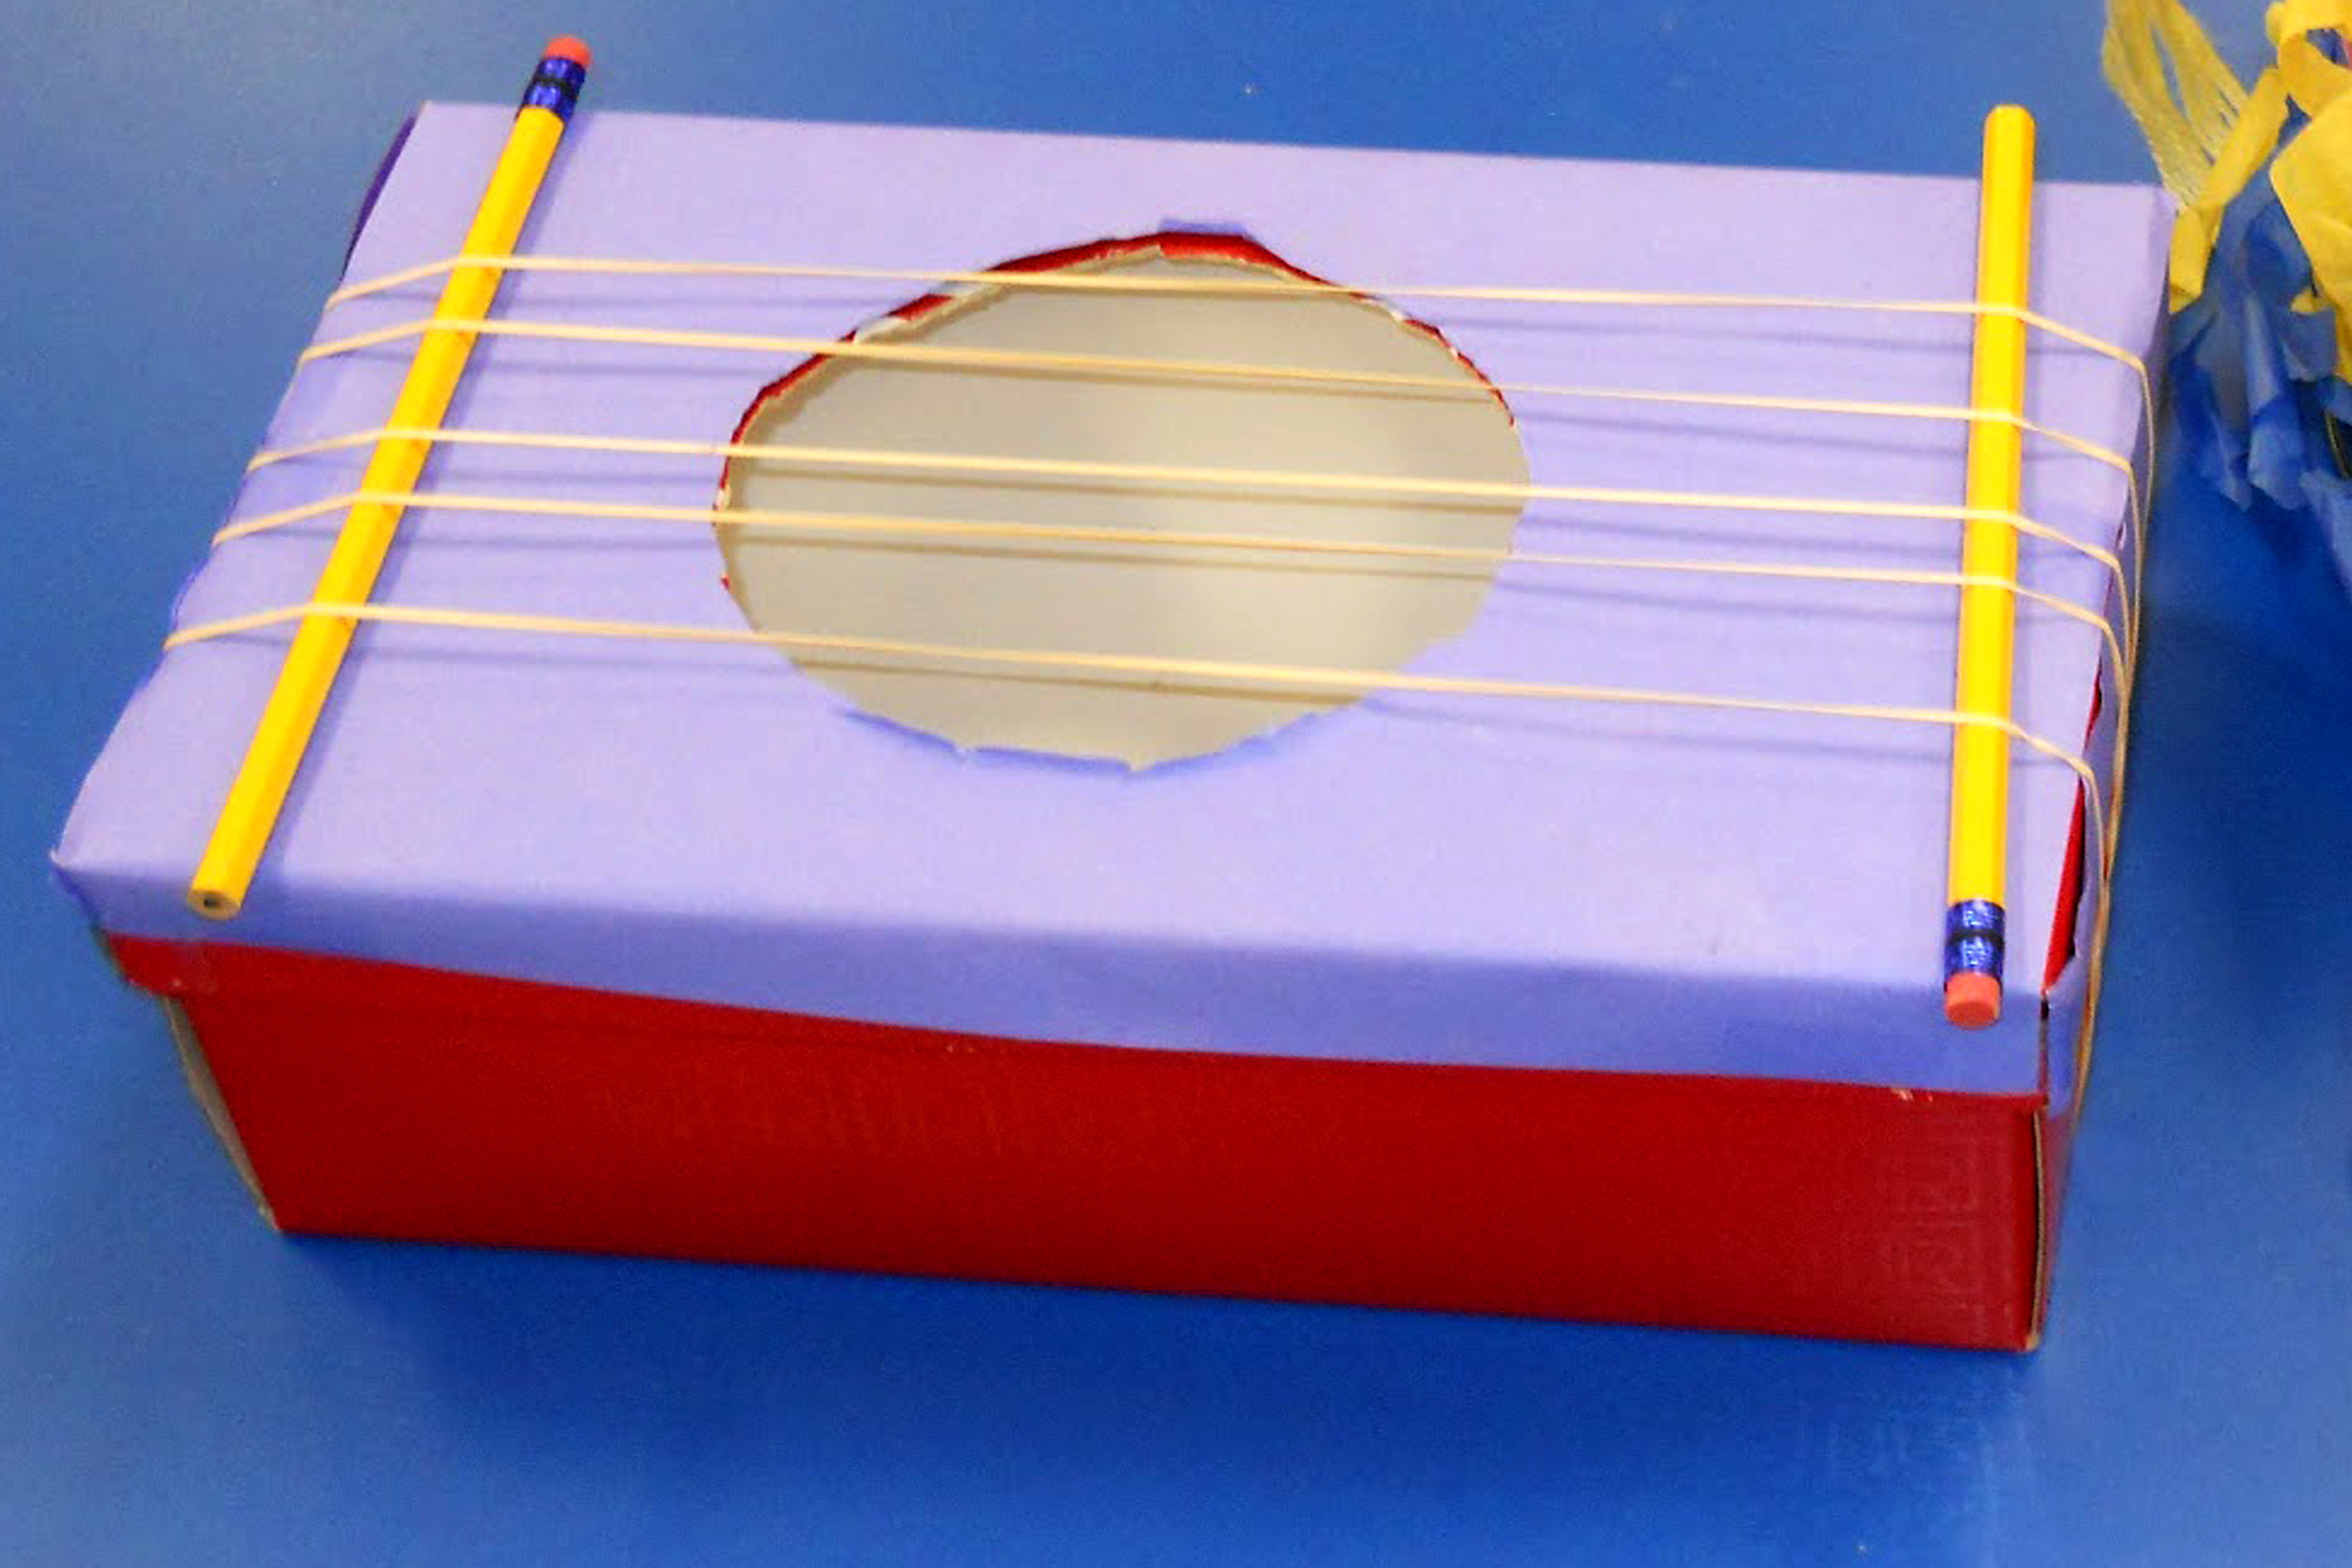
Thread the straw through the slits so it sits across the top as a bridge and trim any extra straw if needed.
Step 5
Stretch 3 or 4 rubber bands lengthwise over the box so each band rests on top of the straw bridge.
Step 6
Move the rubber bands with your fingers so they are spaced evenly across the box top.
Step 7
Pluck one rubber band with your finger and listen carefully to the pitch it makes.
Step 8
Make that same band tighter by pulling its end and looping it once around the box edge to increase tension then pluck it again.
Step 9
Loosen that same band by undoing the loop so it is less tight then pluck it again.
Step 10
Slide the straw bridge closer to the middle of the band to shorten the vibrating length then pluck the band.
Step 11
Slide the straw bridge farther toward the end of the box to lengthen the vibrating length then pluck the band.
Step 12
Compare the sounds and say which change made the pitch higher or lower.
Step 13
Share your finished instrument and what you discovered about pitch on DIY.org.
Help!?
What can we use if we don't have a straw or the exact box called for in the instructions?
Use a pencil, chopstick, or wooden skewer threaded through the slits as the bridge and substitute a shoebox, cereal box, or other small cardboard box placed open side up for the instrument body.
The straw bridge keeps falling out or the bands make almost no sound—how can we fix that?
If the straw slips or wobble, make the two matching slits from step 3 smaller or tape the straw from step 4 in place and, if bands are quiet, tighten them by looping the end around the box edge as in step 7 or trim and retension them.
How can we adapt this activity for younger or older children?
For ages 3–5 have an adult pre-cut the slits and hold the box while the child stretches and plucks 1–2 rubber bands, for ages 6–9 let them thread the straw bridge and test tightening/loosening, and for 10+ challenge them to add more bands, measure pitch changes when sliding the straw per steps 11–12, and record observations.
What are simple ways to extend or personalize the string instrument activity?
Decorate the box with paint or stickers, try different widths or colors of rubber bands and add a second straw bridge to make chords, then compare how each change affects pitch and share your discoveries on DIY.org as the final step.
Watch videos on how to make a cardboard-box string instrument with rubber bands and a straw bridge
Violin Lessons for Kids 18 Months to 3 Years Old | Lesson #1 | Certified Suzuki Violin Teacher
4 Videos

Violin Lessons for Kids 18 Months to 3 Years Old | Lesson #1 | Certified Suzuki Violin Teacher

Violin Lesson 1: For kids by kids - Explained by a 7 years old Violinist

Start Your Musical Journey with the Violin | Kids' Music Lessons

Beginner's Violin School Lesson 1: Holding the Violin!
Facts about sound and vibration
🎸 Plucked strings vibrate hundreds to thousands of times per second — that's what makes different musical notes!
🔧 Tightening a string raises its pitch because more tension makes it vibrate faster.
📏 Shortening a string raises the pitch — halve the length and you roughly double the vibration frequency.
🟤 Thicker or heavier strings (and rubber bands) produce lower notes, while thinner ones make higher notes.
👂 Humans usually hear between ~20 Hz and ~20,000 Hz, a range that covers most musical instrument pitches.
How do you build a simple string instrument with a cardboard box?
What materials do I need to make a simple string instrument?
What ages is this string instrument activity suitable for?
What are the benefits, safety tips, and fun variations for the cardboard string instrument?
