Make a robot follow a line
Build a simple line-following robot using motors, sensors, and a battery. Assemble parts, program basic logic, and test on a track.


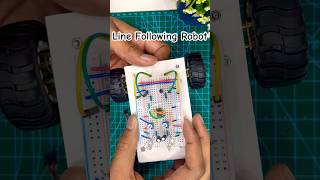
Step-by-step guide to make a robot follow a line
DIY Line Following Robot Using Arduino - Let's Build Your First Robot!
Step 1
Clear a flat workspace and lay out all the materials so everything is easy to grab.
Step 2
Cut a hand sized rectangle from the cardboard to make the robot chassis base.
Step 3
Attach the two DC motors to the rear corners of the chassis using hot glue or strong tape.
Step 4
Push the wheels onto the motor shafts until they fit snugly.
Step 5
Stick the bottle cap or pen cap near the front center of the chassis to act as a front support.
Step 6
Secure the motor driver module and the microcontroller board onto the chassis with tape or glue.
Step 7
Use jumper wires to connect the two motors to the motor driver output pins.
Step 8
Connect the motor driver power and ground to the battery pack and make sure the microcontroller ground is shared with the driver ground.
Step 9
Mount the two reflectance line sensors at the front of the chassis about one centimeter above the ground and secure them with tape.
Step 10
Wire each sensor to the microcontroller inputs and to the power and ground pins on the breadboard.
Step 11
Use a computer to upload a simple program that reads both sensors and drives the motors so the robot moves forward on light surface and turns away from dark line signals.
Step 12
Make a test track by laying a wide strip of black electrical tape on a light floor to form a line for the robot to follow.
Step 13
Place the robot on the track and power it on to see how it reacts to the line.
Step 14
Adjust the sensor height or tweak the code thresholds until the robot reliably follows the black line.
Step 15
Take a photo or video and share your finished line following robot on DIY.org
Help!?
I can't find reflectance line sensors or the exact motor driver—what can I use instead?
If you don't have reflectance sensors or the named motor driver module, substitute homemade IR LED + phototransistor sensor pairs for the reflectance sensors and use an L293D H-bridge chip or a two-channel motor shield in place of the motor driver while using toy DC motors and bottle-cap wheels as described in the steps.
The robot won't follow the line or doesn't move reliably—what should I check?
If the robot doesn't move or veers off, first verify the motor driver power and ground are connected to the battery pack and that the microcontroller ground is shared with the driver ground, then check jumper wire connections, ensure the wheels are pushed snugly onto the motor shafts, and adjust sensor height or tweak the code thresholds as instructed.
How can I adapt this activity for different age groups?
For preschoolers have an adult pre-cut the cardboard chassis and attach motors and sensors while letting the child place the tape track and position the robot, for elementary kids let them assemble the motors, mount sensors, and upload block-style code, and for teens add challenges like multiple sensor arrays and PID tuning of the code thresholds.
What are simple ways to extend or personalize the line-following robot?
Enhance the project by adding LED indicators to show each reflectance sensor state, mounting a Bluetooth module to control or log runs from a phone, creating an adjustable sensor mount to fine-tune height, or expanding the track with branches to program decision-making behavior before sharing your photo or video.
Watch videos on how to make a robot follow a line
How to make a Line Following Robot || Arduino Project || Line follower robot making tutorial
4 Videos
How to make a Line Following Robot || Arduino Project || Line follower robot making tutorial
【Tutorial】How to Create a LEGO Line-Following Robot: Full Tutorial
How to Make a Line Follower Robot Car with Arduino UNO, L298N Motor Driver, IR Sensor
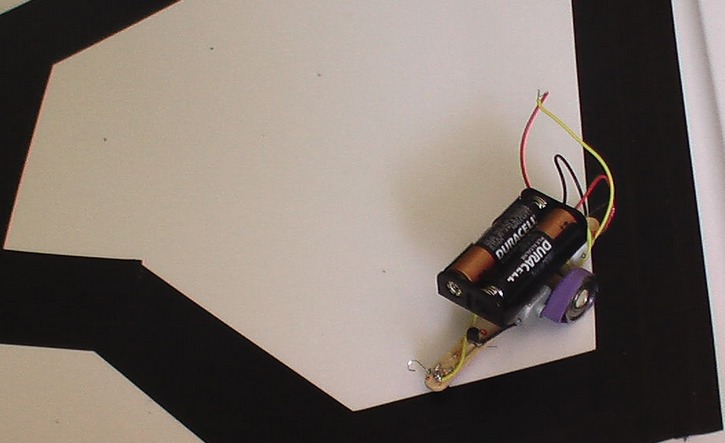
Line Following Robot without Microcontroller || DIY|| Engineering
Facts about robotics and electronics for kids
🤖 The simplest line-following robots date back to hobbyist kits from the 1980s and often used just two light sensors and two motors.
🔋 Many beginner line-followers run on 2–4 AA batteries or a single small rechargeable Li-ion/LiPo pack for lightweight power.
🕹️ The Arduino platform became popular with makers because its easy programming and many libraries make controlling sensors and motors simple.
⚙️ Most small line-followers use differential drive (two independent wheels) so they turn by changing each wheel's speed.
🎯 Using a PID controller instead of simple on/off logic lets a robot follow curves more smoothly and accurately.
How do I build a simple line-following robot?
What materials do I need to build a line-following robot?
What ages is this line-following robot activity suitable for?
What safety tips should I follow when building and testing a line-following robot?
