Make a quarry profile
Build a scaled quarry profile model using clay, cardboard, and colored paper to show rock layers, benches, and the water table while labeling features.


Step-by-step guide to build a scaled quarry profile model
MINECRAFT TUTORIAL: How to make a QUARRY - step by step - well explained - Java 1.16 - 1.21.8
Step 1
Gather all the materials on a clear table so everything is easy to reach.
Step 2
Choose a scale for your model (for example 1 cm = 1 m) and draw a labeled scale bar along one edge of the cardboard with your ruler and pencil.
Step 3
Lightly sketch the side-view quarry profile on the cardboard showing the top surface slope and several stepped benches.
Step 4
Decide how thick each rock layer should be using your scale and mark those thicknesses on the colored paper with your ruler and pencil.
Step 5
Cut the marked strips from the colored paper to make the rock-layer pieces.
Step 6
Glue the colored-paper strips onto the cardboard following your sketched profile so the strips stack and show different rock layers.
Step 7
Roll and shape modeling clay to form the bench faces and edges and press the clay onto the cardboard where the benches are drawn.
Step 8
Flatten a thin strip of blue clay and press it into the model at the correct elevation to show the water table across the profile.
Step 9
Smooth and trim any extra clay or paper so the benches and layers look neat and stepped.
Step 10
Write feature names (for example “bench” “rock layer A” “rock layer B” “water table”) on small pieces of colored paper and tape or fold them onto toothpicks to make labels.
Step 11
Insert the labeled toothpicks into the correct places on your model so each feature is clearly identified.
Step 12
Use a marker to add a title and write the scale clearly on the cardboard next to the scale bar.
Step 13
Share a photo and a short description of your finished quarry profile model on DIY.org
Help!?
What can we use if we don't have modeling clay, colored paper, toothpicks, glue, or cardboard?
Substitute rolled aluminum foil or tape-wrapped newspaper for modeling clay bench faces, painted printer paper or fabric strips for colored-paper layers, folded paper tabs or short skewers for toothpick labels, white glue, glue stick or double-sided tape for adhesive, and a flattened cereal box or poster board instead of cardboard.
The paper strips keep peeling and the clay won't stick — how can I fix that?
Roughen the cardboard where each strip and clay bench will go, apply a thin layer of white glue under the colored-paper strips and press firmly, slightly dampen or score the clay edges to improve adhesion, and let everything dry flat under a heavy book so layers stay neat and stepped.
How do we adapt this quarry profile for different ages?
For ages 4–6 use a larger scale (for example 1 cm = 2 m), pre-draw the quarry profile and pre-cut thick colored-paper strips for simple gluing and clay pressing, for ages 7–10 have them measure and cut strips themselves and place labeled toothpicks, and for 11+ require precise scale calculations, thinner layers, more benches, and full labeling of features and the water table.
What are some ways to extend or personalize the quarry model after finishing the basic steps?
Enhance the model by adding sand or textured paint to rock layers, making removable layers with small Velcro dots, varnishing the flattened blue-clay water table for shine, creating a neat legend and scale bar with the marker, and photographing the finished quarry profile with a short caption about the scale and features for DIY.org.
Watch videos on how to build a scaled quarry profile model
How to Make Soil Profile Project for school/college students
4 Videos
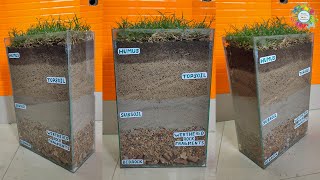
How to Make Soil Profile Project for school/college students
SUPER EASY QUARRY (NO DRILLS) - Minecraft Create Mod Tutorial
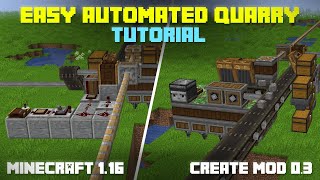
Easy Automatic Quarry Tutorial - Create Mod 0.3 Minecraft 1.16
Topo Maps - How To Draw A Cross Sectional Profile
Facts about quarries and geology
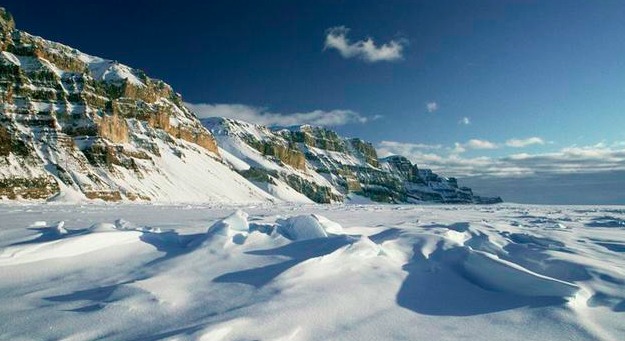
🪨 Quarries cut into the Earth to remove rock — some famous quarries are large enough to be seen from space!
⛏️ Benches (the step-like levels) make quarry walls safer and help machines reach each layer.
🌊 Many abandoned quarries fill with groundwater or rain to become clear blue lakes — the water table decides how full they get.
📏 Scale models often use easy ratios like 1:100 (1 cm = 1 m) so big quarries fit on a tabletop.
🦕 Each rock layer is a time capsule — sedimentary layers can record millions of years of Earth’s history.
How do I build a scaled quarry profile model?
What materials do I need to make a quarry profile model?
What ages is the quarry profile activity suitable for?
What are the benefits of building a quarry profile model?
