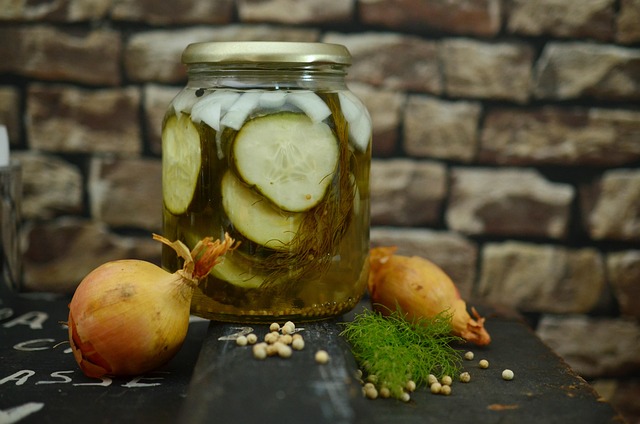
Make a nature sound jar
Make a nature sound jar by filling a jar with leaves, pebbles, seeds, and water to explore and compare gentle natural sounds through shaking.


Step-by-step guide to make a nature sound jar
5 Nature Crafts for Kids | 5 Nature Activities for Kids | Nature Activities
Step 1
Gather all the materials from the list.
Step 2
Ask an adult to help and stay nearby.
Step 3
Spread the towel flat on a table.
Step 4
Place the jar upright on the towel.
Step 5
Put a small layer of pebbles into the bottom of the jar.
Step 6
Add a small layer of seeds or dry beans on top of the pebbles.
Step 7
Add several dry leaves into the jar on top of the seeds.
Step 8
Use the funnel to slowly pour water into the jar until it is about one-third full.
Step 9
Screw the lid onto the jar tightly.
Step 10
Shake the jar gently three times.
Step 11
Hold the jar to your ear and listen carefully to the gentle sound.
Step 12
Shake the jar more firmly three times.
Step 13
Hold the jar to your ear and listen carefully to the louder sound.
Step 14
Make a second jar with one different material and repeat the listening steps to compare sounds.
Step 15
Share your finished nature sound jar on DIY.org.
Help!?
What can I use instead of a funnel or pebbles if I can't find them?
If you don't have a funnel, roll a piece of paper into a cone or use a small measuring cup to pour water in the step 'Use the funnel to slowly pour water into the jar until it is about one-third full', and swap pebbles for dry pasta shells or rice as the bottom layer.
My jar sounds quiet or sounds the same when shaken gently and firmly; what could be wrong?
Check that the lid is screwed on tightly, that you added a small layer of pebbles, seeds, and crisp dry leaves in the order listed, and that the jar is only about one-third full of water so the layers can move differently when shaken gently versus more firmly.
How can I adapt this activity for younger toddlers or older kids?
For toddlers, have an adult do the pouring and tightening steps and use larger items like big pasta or chunky pebbles for safety while the child listens, and for older kids follow the 'make a second jar' step to create multiple jars, compare sounds, and record observations.
How can we extend or personalize the nature sound jar project?
Make several jars each with one distinct material such as pebbles, seeds, sand, or pine needles, decorate and label the lids, follow the shaking and listening steps to make a sound chart, and then share your favorite jars on DIY.org as the instructions suggest.
Watch videos on how to make a nature sound jar
DIY ideas from Recycled Glass Jars | JAM JAR CRAFTS
4 Videos
DIY ideas from Recycled Glass Jars | JAM JAR CRAFTS
DIY Sensory Bottles Children's Activity
How to make a Sensory Bottle | Easy + Quick | DIY

DIY Sensory Bottles | Discovery Bottles | Calm Down Jars
Facts about sound and sensory exploration
🍃 Thin leaves make soft rustles while thick or dry leaves crackle louder — leaf type changes the sound!
🪨 Pebbles clinking together produce bright, quick 'tink' sounds; bigger or rougher stones make duller thuds.
🌱 Tiny seeds rattle at higher pitches — adding more seeds makes the shake louder and busier.
💧 A little water turns rattles into sloshing, lower-pitched sounds because liquid muffles and shifts vibrations.
🥁 Shakers are ancient instruments: people have used natural rattles made from seeds, shells, and stones for thousands of years.
How do I make a nature sound jar with my child?
What materials do I need to make a nature sound jar?
What ages is a nature sound jar activity suitable for?
What are the benefits and variations of nature sound jars?
