Make a #minecraftirl video
Create a short #MinecraftIRL video by building a real-life Minecraft scene from boxes and paper, film it, and explain your steps clearly.


Step-by-step guide to make a Minecraft IRL video
10 Creative and Easy Kids Craft | Fun Crafts for Kids | Handmeyd Treasures
Step 1
Pick a Minecraft scene idea you want to build like a house farm cave or volcano.
Step 2
Draw a simple plan on paper showing where the blocks and characters will go.
Step 3
Gather the cardboard boxes you will use for blocks.
Step 4
Flatten the boxes so they are ready to cut.
Step 5
Use the ruler and pencil to mark square faces for your Minecraft blocks.
Step 6
Cut out the marked squares carefully with scissors.
Step 7
Color the squares with your colouring materials to make pixel-style faces.
Step 8
Glue or tape matching colored faces together to build cardboard cube blocks.
Step 9
Arrange the finished blocks into your scene following your plan.
Step 10
Place small toys or figures into the scene as characters or items.
Step 11
Set up a stable camera or phone position so the whole scene fits and is well lit.
Step 12
Record a short clip that shows the completed scene from one or two angles.
Step 13
Record a short clip where you clearly explain each step you took to build the scene.
Step 14
Use a simple editing tool to trim and combine your clips and export the final short video.
Step 15
Share your finished MinecraftIRL video on DIY.org.
Help!?
What can we use if we don’t have large cardboard boxes, scissors, or specific colouring materials listed in the steps?
Use flattened cereal, shoe, or delivery boxes in place of large cardboard boxes, cut with safety scissors or a butter knife (with adult help), and substitute markers, crayons, or colored paper for other colouring materials.
My cubes keep coming apart or won’t stack evenly after cutting and gluing—what should I do?
Re-measure each square with the ruler and pencil before cutting, trim uneven edges so faces are flat, and reinforce glued seams with extra tape or a dab of glue while pressing the faces together until they dry so the arranged scene holds its shape.
How can I adapt the build and filming steps for different ages or skill levels?
For younger kids, pre-cut larger squares, simplify the plan, and let them stick or color faces with crayons and assemble a small two- or three-block house, while older kids can draw detailed pixel plans, make smaller cubes, place figures, and use the editing tool to create narrated clips.
What are some creative ways to extend or personalize our MinecraftIRL video after arranging and recording the scene?
Personalize the video by hollowing some glued blocks to add LED tea lights for glow effects, create a short stop-motion sequence by recording many small reposition clips, add a voiceover explaining each step during editing, and then export and share the finished MinecraftIRL video on DIY.org.
Watch videos on how to make a Minecraft IRL video
10 Easy Shape Crafts for Kids | DIY Paper Toys
4 Videos
10 Easy Shape Crafts for Kids | DIY Paper Toys
Easy Crafts for Kids with NO GLUE! - 30 MIN COMPILATION
Mind-Blowing DIY Crafts Your Kids Will Actually Love
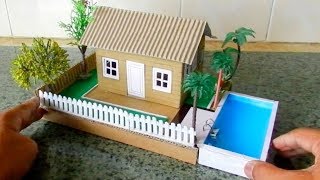
Mini Cardboard House For Kids #112 | Easy Crafts Project
Facts about crafts and model-making for kids
🟩 Minecraft's blocks each represent a 1×1×1 meter cube in the game — making a life-size block is a fun, big project!
🎬 Stop-motion animation goes back to the late 1800s — people have been animating toys and models for over a century!
📦 Cardboard is lightweight, cheap, and super sturdy when layered or folded, which is why it's perfect for building Minecraft-style blocks.
✂️ Papercraft uses printable 'nets' that fold into 3D shapes — you can design and print your own Minecraft mob or block skin to fold up.
🎥 Short, clear how-to videos with step captions or a friendly voiceover help viewers follow your build — quick demos often get lots of views.
How do I make a Minecraft IRL video by building a scene from boxes and paper?
What materials do I need to make a Minecraft IRL video from boxes and paper?
What ages is making a Minecraft IRL video suitable for?
What are safety tips and creative variations for a Minecraft IRL box-and-paper video?
