Make a DIY Minecraft Arena
Build a DIY Minecraft arena from cardboard, paint, and paper blocks; design pixel patterns, measure grid squares, and arrange safe play areas for battles.


Step-by-step guide to make a DIY Minecraft arena
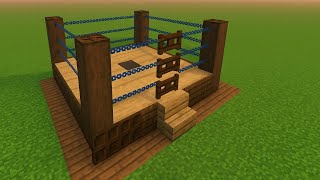
Minecraft Tutorial: How To Make A Tennis Court Arena
Step 1
Decide how big your Minecraft arena will be and pick a grid square size (for example 1 inch or 2 cm).
Step 2
Place the cardboard sheet flat and use the ruler and pencil to draw a neat grid across the whole base.
Step 3
Sketch a pixel pattern on a separate piece of paper using the same grid size to plan colors and designs.
Step 4
Mark each grid square on the cardboard base that will be painted for your pixel design using your pencil.
Step 5
Gather your paints brushes a cup of water and a paper towel plus glue or tape so everything is ready.
Step 6
Paint the marked squares on the cardboard base following your paper pixel pattern.
Step 7
Let the painted base dry completely before touching it.
Step 8
Cut four cardboard strips the same length as each side of the base to make the arena walls.
Step 9
Attach the four strips upright around the base with glue or tape to form the arena border.
Step 10
Draw and cut a cube net (a cross of six equal squares) on scrap cardboard for each paper block you want.
Step 11
Fold the cube nets along the lines and tape them closed to make sturdy paper blocks.
Step 12
Decorate each paper block to look like Minecraft blocks using paint or markers.
Step 13
Arrange the decorated blocks inside your arena to create obstacles and cover spots.
Step 14
Use strips of paper or tape to mark safe play zones and spawn points on the arena floor.
Step 15
Take a photo or write about your finished DIY Minecraft arena and share your creation on DIY.org
Help!?
What can I use if I don't have a large cardboard sheet or paint?
If you don't have a large cardboard sheet, tape together flattened cereal or shipping boxes to make the base, and if you don't have paint you can glue colored construction paper squares or use washable markers to fill the grid squares marked in the 'Paint the marked squares' step.
My paint is bleeding over the grid and the arena walls keep wobbling — how do I fix that?
Prevent paint bleeding by using thin coats and letting the painted base dry completely (or speed-dry with a hairdryer), and make the four cardboard strips sturdier by reinforcing the bottom seams with extra tape or a thin line of glue before attaching them upright.
How can I change the activity for younger or older kids?
For younger kids, use a larger grid size from step 1, pre-draw or pre-mark the squares and let them stick colored paper or stickers instead of paint while an adult cuts and attaches the cardboard strips, and for older kids increase grid detail, design complex pixel patterns, and add timed challenges when arranging blocks and spawn points.
How can we personalize or make the arena more advanced?
Personalize and extend the arena by decorating paper cube nets with LED tea lights inside some blocks, adding magnetic strips so blocks stick to the walls, creating stacked multi-level platforms from taped cubes, and inventing custom safe-zone and spawn-point rules before you take a photo or write about your finished DIY Minecraft arena to share.
Watch videos on how to make a DIY Minecraft arena
🔥 ULTIMATE Minecraft ARENA Build Guide! | Step-by-Step Tutorial | KadichurGaming
4 Videos
🔥 ULTIMATE Minecraft ARENA Build Guide! | Step-by-Step Tutorial | KadichurGaming
Minecraft | How to build a PVP Arena (Colosseum) | Tutorial
Minecraft: Chicken Jockey Arena Tutorial
How To Make A Outdoor Ice Hockey Arena | How To Build a City
Facts about cardboard and paper crafts
🎮 Minecraft has sold over 200 million copies, making it one of the best-selling video games ever — perfect inspiration for your arena!
🟩 Pixel art treats each square like a tiny block, just like Minecraft — excellent for designing colorful arena patterns.
📐 Graph paper and simple grids make scaling a pixel design easy: many builders use 1 square = 1 block to plan layouts.
📦 Corrugated cardboard gets strength from a fluted middle layer, which is why it's great for sturdy DIY arena pieces.
🛡️ Marking clear safe zones and walkways in your arena helps prevent collisions — a rule used in real events and kid tournaments.
How do I build a DIY Minecraft arena from cardboard, paint, and paper blocks?
What materials do I need to make a DIY Minecraft arena?
What ages is a DIY Minecraft arena suitable for?
How can I make the DIY Minecraft arena safe for kids during play battles?
