Make A DIY Air Cooler
Build a DIY air cooler using a small fan, ice packs, and cardboard; learn about airflow, heat transfer, and safe assembly while experimenting.


Step-by-step guide to make a DIY air cooler
Step 1
Gather all materials into your workspace.
Step 2
Clear a flat table or floor area.
Step 3
Lay the towel down to protect the surface.
Step 4
Ask an adult to help before you use scissors craft knife or plug in the fan.
Step 5
Measure the fan and mark a cardboard panel slightly larger than the fan using the ruler and marker.
Step 6
With adult help cut the cardboard panel to the marked size using scissors or a craft knife.
Step 7
With adult help cut a hole in the center of the cardboard sized for the fan's airflow.
Step 8
Attach the fan to the cardboard by taping its edges over the hole with strong tape.
Step 9
Place the shallow plastic tray on the towel behind the taped fan to catch melting water.
Step 10
Put the frozen ice packs into the tray behind the fan so air will blow over them.
Step 11
Secure the ice packs in place with tape so they do not slide.
Step 12
Check that no ice pack touches the fan blades and ask the adult to adjust if any do.
Step 13
Turn on the fan while an adult watches.
Step 14
Hold your hand in the airflow to feel if the air is cooler and try moving the ice packs to see which setup feels coolest.
Step 15
Share your finished DIY air cooler on DIY.org.
Final steps
You're almost there! Complete all the steps, bring your creation to life, post it, and conquer the challenge!


Help!?
What can we use instead of frozen ice packs or a shallow plastic tray if those are hard to find?
Use frozen water bottles or a sealed bag of ice inside a shallow baking dish as substitutes for the frozen ice packs and the shallow plastic tray, and place them behind the taped fan exactly as the instructions say.
What should we do if the fan gets wet or the airflow doesn’t feel cool?
Make sure the fan is taped firmly to the cardboard with strong tape, confirm no ice pack touches the fan blades, and reposition the frozen ice packs and the shallow tray behind the taped fan while an adult watches so water won’t reach the plug or blades.
How can we adapt this project for younger kids or older kids?
For younger children have an adult do the measuring, cutting with scissors or a craft knife, and taping while the child places the frozen ice packs and feels the airflow, and for older kids let them measure, cut, assemble the taped fan-to-cardboard mount, experiment with ice-pack placement, and turn the fan on under supervision before sharing on DIY.org.
How can we improve or personalize our DIY air cooler?
Decorate or paint the cardboard panel before attaching the fan, add extra frozen water bottles or a scented cloth behind the taped fan for longer or nicer-smelling cool air, or angle the cardboard to change airflow and then share your finished setup on DIY.org.
Watch videos on how to make a DIY air cooler
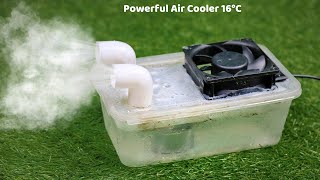
How to Make a Personal Mini Air Cooler from Cardboard | Homemade Air Cooler for Science Project
4 Videos
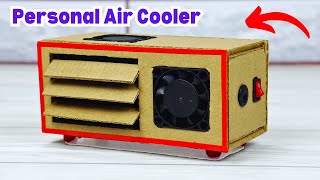
How to Make a Personal Mini Air Cooler from Cardboard | Homemade Air Cooler for Science Project
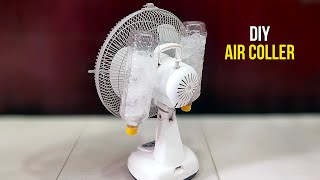
Simple Trick to Make Air Cooler | DIY Cooling Fan | Homemade AC
How to make air cooler from cardboard - DIY at home / homemade cooling device
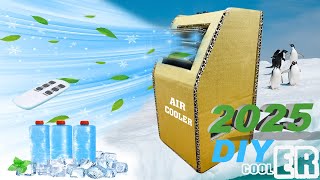
How To Make Mini Powerful Air Cooler At Home - DIY Air Conditioner
Facts about heat transfer and airflow
❄️ Melting ice soaks up a lot of heat — the latent heat of fusion for water is about 334 joules per gram, which helps your DIY cooler take heat out of the air.
🌬️ Fans don't lower room temperature much on their own; they make you feel cooler by increasing evaporation from your skin (that breeze feels great!).
💧 Blowing air over ice or cold water is a form of heat exchange and works best in dry climates — high humidity makes evaporative cooling less effective.
⚡ Many small USB fans use only a few watts (around 2–5 W), so mini air coolers can be low-power and energy-efficient when built safely.
📦 Corrugated cardboard traps air in its flutes, giving it insulating and structural properties — perfect for shaping and directing airflow in a DIY cooler.
How do I build a DIY air cooler with a small fan, ice packs, and cardboard?
What materials do I need to make a DIY air cooler at home?
What ages is this DIY air cooler suitable for?
What safety tips should I follow when kids build this DIY air cooler?


