Make A Crystal!
Grow colorful sugar crystals (rock candy) using simple household ingredients with adult help, observe crystal shapes form, and record observations.

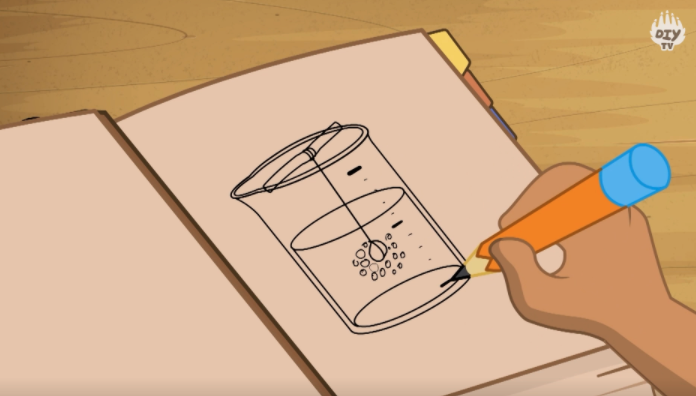

Step-by-step guide to make a crystal (grow sugar crystals / rock candy)
Step 1
Wash the jar with soap and water and let it dry completely.
Step 2
Lightly wet the wooden skewer or string with a little water.
Step 3
Roll the wet skewer or string in a small sprinkle of sugar so sugar sticks to it and set it aside to dry.
Step 4
Measure 1 cup of water into the measuring cup and pour it into the saucepan.
Step 5
With an adult, heat the water in the saucepan until it begins to simmer.
Step 6
With an adult, slowly add 3 cups of sugar one spoonful at a time while stirring until all the sugar dissolves and the solution looks clear and glossy.
Step 7
With an adult, remove the pan from heat and stir in about 6 drops of food coloring until the color is even.
Step 8
Let the sugar solution cool until it is warm to the touch about 15 minutes.
Step 9
Pour the cooled sugar solution carefully into the clean jar leaving a little space at the top.
Step 10
Lower the sugar-coated skewer or string into the jar so it hangs in the middle without touching the sides or bottom.
Step 11
Rest a clothespin or pencil across the top of the jar to hold the skewer or string steady.
Step 12
Cover the jar with a paper towel or coffee filter and place the jar somewhere quiet and undisturbed.
Step 13
Check the jar once every 24 hours to look for crystal growth and watch how the shapes change.
Step 14
Each day write or draw what you see on your paper and when the crystals are as big as you like ask an adult to lift the skewer or string out and let it drip onto wax paper to dry.
Step 15
Share a photo and your observations of your finished colorful crystal creation on DIY.org.
Help!?
What can I use instead of a wooden skewer if I don't have one?
If you don't have a wooden skewer, use a clean piece of cotton string tied to a pencil or a wooden chopstick and follow the same step of lightly wetting and rolling it in sugar so crystals can start to form.
Why is my solution cloudy or why aren't crystals forming?
If the solution stays cloudy or no crystals form, reheat with an adult and slowly add more sugar one spoonful at a time while stirring until the solution looks clear and glossy as instructed.
How can I adapt this crystal activity for different age groups?
For younger children, have them do the jar cleaning, wetting and sugar-rolling of the skewer and the daily drawing while an adult handles the simmering and pouring steps, whereas older kids can measure temperatures, grow multiple jars, or vary the number of food-coloring drops to compare crystal outcomes.
How can we make the finished crystals more special or eye-catching?
To personalize your colorful crystals, grow multiple jars with different food-coloring amounts or temperatures, then when you lift the skewer as instructed let it drip on wax paper and add paint or edible glitter to create unique displays to photograph for DIY.org.
Watch videos on how to make a crystal (grow sugar crystals / rock candy)
Grow Your Own Crystals at Home! Easy DIY
4 Videos

Grow Your Own Crystals at Home! Easy DIY
Grow Your Own Crystals at Home! Supplies & steps in the description. Subscribe for more fun ideas!

Grow Crystals at Home Fun Kids Science Experiment | Try Think Box With Aras
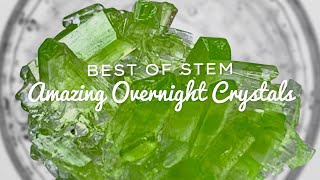
Grow Incredible CRYSTALS Overnight with AMAZING RESULTS!
Facts about crystallization and basic chemistry for kids
🍭 Rock candy is just giant sugar (sucrose) crystals—basically the same table sugar you use, grown bigger!
🔬 Crystals usually start from a tiny “seed” (even a dust speck or a sugar grain) that gives molecules a place to stack up.
🧪 A supersaturated sugar solution holds more sugar than normal; when it cools or is disturbed, the excess sugar rushes out as crystals.
🌈 Adding food coloring or flavorings tints the crystals but doesn’t change the way their molecular structure forms.
⏳ Patience pays off: rock candy can take several days to a week to grow large, clear crystals—slow growth makes clearer crystals.
How do you grow sugar crystals (rock candy) at home with kids?
What materials do I need to make sugar crystals (rock candy)?
What ages is growing sugar crystals suitable for?
What safety tips and variations can make crystal growing better?


