Make a construction set
Build your own wooden or cardboard construction set with connectors, dowels, and pieces. Measure, cut safely with supervision, and assemble models to explore engineering.

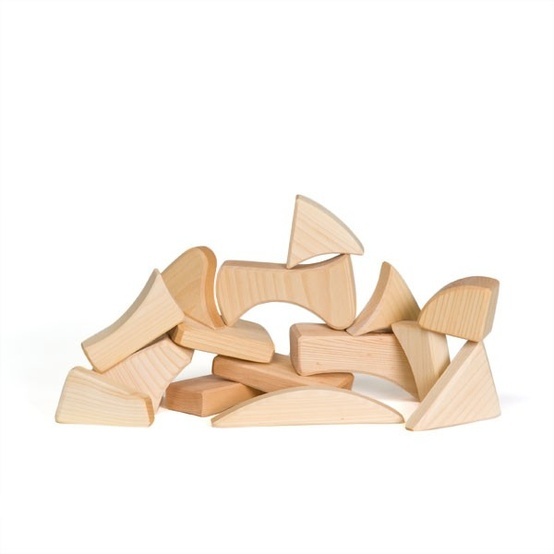

Step-by-step guide to make a construction set
DIY Creative Construction Activity for Kids | The Children's Museum of Sonoma County
Step 1
Gather all the materials and clear a flat workspace where you can build.
Step 2
Draw a simple plan of your model on paper showing the shapes and where connectors will go.
Step 3
Use the ruler and pencil to measure and mark each piece shape on your cardboard or wood.
Step 4
Cut out the marked pieces with scissors or a craft knife while an adult helps.
Step 5
Smooth any rough edges with sandpaper until the pieces feel safe to touch.
Step 6
Mark the connector hole spots on each piece with your ruler and pencil.
Step 7
Make the holes at your marks using a drill or awl while an adult helps.
Step 8
Cut dowels or skewers to the connector lengths you need with an adult's help.
Step 9
Prepare your connectors by bending pipe cleaners or cutting straws or zip ties to size.
Step 10
Insert dowels and connectors into the holes to start assembling your model and check that it holds together.
Step 11
Secure any loose joints with glue or strong tape and let glue set if you used it.
Step 12
Decorate your finished model using colouring materials to make it look awesome.
Step 13
Share your finished creation on DIY.org
Help!?
What can I use instead of wood, dowels, or a drill if those materials or tools are hard to find?
Use thick cardboard or foam board instead of wood, bundled chopsticks or rolled paper tubes for dowels/connectors, and a thick nail with a hammer or a screwdriver to make the holes described in the 'Make the holes' step while an adult helps.
My pieces keep wobbling or not fitting together—what should I check and fix?
Re-measure following the 'Use the ruler and pencil to measure and mark' step, slightly widen or realign holes made in the 'Make the holes' step, sand rough edges from the 'Smooth any rough edges with sandpaper' step, and secure joints per the 'Secure any loose joints with glue or strong tape' step while the glue sets.
How can I adapt this activity for younger children or make it more challenging for older kids?
For younger children pre-cut the shapes and use straws or pipe cleaners and strong tape instead of drilling, while older kids can follow a more detailed 'Draw a simple plan', work with wood, and use supervised drilling and precise sanding to build complex models.
How can we enhance or personalize the finished model before sharing it on DIY.org?
Add moving parts by shortening dowels to act as axles, reinforce joints with hot glue as in 'Secure any loose joints', paint and add stickers during the 'Decorate your finished model' step, or attach small LED lights to make it interactive before sharing on DIY.org.
Watch videos on how to make a construction set
What Do Construction Trucks DO? Fun & Educational Video for Kids!
3 Videos
What Do Construction Trucks DO? Fun & Educational Video for Kids!
Build a House | Learn How to Build a House | Learning Construction for Kids
Blippi leans about safety with construction vehicles | Blippi Wonders Educational Videos for Kids
Facts about engineering and woodworking for kids
🛠️ Meccano, one of the first popular metal construction sets, was created by Frank Hornby and inspired generations of young engineers.
📏 Dowels are simple cylindrical rods used in joinery — they make strong, hidden connections for wooden models.
📦 Cardboard is lightweight, inexpensive, and highly recyclable, which makes it ideal for prototype parts and safe kid projects.
🧠 Studies link play with construction toys to better spatial reasoning and problem-solving skills in children.
🔩 Using standard connectors and modular pieces lets you build dozens of different models from the same set of parts.
How do I build a DIY wooden or cardboard construction set with connectors and dowels?
What materials and tools do I need to make a homemade construction set?
What ages is a homemade dowel-and-connector construction set suitable for?
What are the benefits of making a DIY construction set with my child?
