Make a Bird
Make a colorful paper bird using recycled paper, scissors, glue, and feathers; learn shapes, patterns, and simple construction while decorating your own bird.


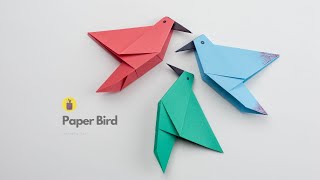
Step-by-step guide to make a colorful paper bird
Easy Paper Bird Craft for Kids | Easy Origami Bird | How to Make Paper Bird Step by Step Tutorial
Step 1
Gather all your materials and clear a flat workspace so you can craft comfortably.
Step 2
Fold one sheet of recycled paper in half to make a symmetrical bird body.
Step 3
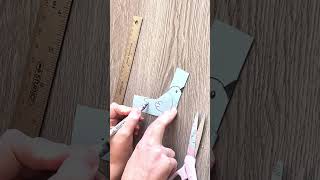
Use a pencil to draw half of a bird shape along the folded edge.
Step 4
Carefully cut along your pencil line to cut out the bird body while the paper is still folded.
Step 5
Unfold the cut paper to reveal the full symmetrical bird body.
Step 6
Draw a wing shape and a tail shape on a scrap piece of recycled paper.
Step 7
Cut out the wing and tail shapes from the scrap paper.
Step 8
Draw fun shapes and patterns on the bird body using your coloring materials.
Step 9
Color in the shapes and patterns neatly with your coloring materials.
Step 10
Glue the wing pieces and the tail piece onto the bird body where they fit best.
Step 11
Glue feathers onto the wings and tail to give your bird texture.
Step 12
Cut a small triangle from scrap paper to make a beak.
Step 13
Glue the paper triangle beak onto the bird's face area.
Step 14
Draw an eye on your bird with a coloring tool from your coloring materials.
Step 15
Share a photo of your finished colorful paper bird on DIY.org
Help!?
What can we use instead of recycled paper or craft feathers if we don't have them?
Use scrap newspaper, magazine pages, wrapping paper, or lightweight cereal-box cardboard for the folded bird body and substitute tissue paper, crepe paper strips, yarn, or torn paper for the feathers.
Why did my bird tear or look uneven when cutting and how can I fix glue that won't hold the wings or feathers?
If the folded cut rips or is lopsided, re-fold the paper, redraw a clear half-bird line along the folded edge and cut slowly with sharp scissors, and if wings or feathers won't stick, switch to white craft glue or a stronger glue stick and press pieces in place until set.
How can I adapt this Make a Bird activity for younger or older kids?
For preschoolers, pre-cut the bird body, wing, tail, and beak and let them color and glue feathers, while older kids can add detailed patterns, layered textured feathers, moveable wings with a brad, or create contrasting recycled-paper mosaics.
How can we extend or personalize the paper bird after completing the basic steps?
Make a whole flock by repeating the folded-body method with different recycled papers, add yarn feet, googly eyes, or a string loop to hang the bird, or mount several birds on a painted cardboard branch for a display to photograph and share on DIY.org.
Watch videos on how to make a colorful paper bird
Easy Paper Bird Craft - Fun & Simple DIY with Miss Daisy!
4 Videos
Easy Paper Bird Craft - Fun & Simple DIY with Miss Daisy!
Origami Bird for Kids: Create a Beautiful Paper Bird (Step-by-Step Tutorial)

How to Make Paper Birds | Easy Paper Bird Craft | DIY Colourful Birds with Paper | origami birds
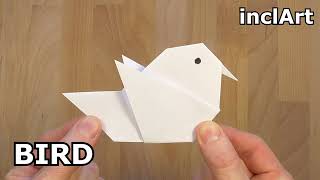
HOW TO MAKE A PAPER BIRD EASY - ORIGAMI BIRD TUTORIAL INCLART
Facts about recycled paper crafts for kids
🐦 There are about 10,000 living bird species — from tiny hummingbirds to big ostriches.
🪶 Feathers are made mostly of keratin, the same protein in human hair and fingernails.
♻️ Recycling one ton of paper can save roughly 17 trees and a lot of energy compared to making new paper.
✂️ The paper crane is a famous origami shape — in Japan folding 1,000 cranes is a traditional wish-making practice.
🎨 Cutting, folding, and gluing help kids build fine motor skills, pattern recognition, and creativity.
How do you make a colorful paper bird?
What materials do I need for Make a Bird?
What ages is this activity suitable for?
What are the benefits of making a paper bird?
