Make a beach using LEGO®
Build a miniature beach scene using LEGO® bricks, including sand, waves, palm trees, and beachgoers; plan layout, choose colors, and test stability.


Step-by-step guide to make a beach using LEGO®
Step 1
Choose a baseplate to build your miniature beach on.
Step 2
Draw a simple map showing where the sand water palm trees and beachgoers will go.
Step 3
Pick the color scheme you want for the sand and the water.
Step 4
Gather the tan and beige pieces you will use for the sand area.
Step 5
Cover the sand zone on the baseplate with the tan and beige pieces.
Step 6
Gather the blue and light blue pieces you will use for the water.
Step 7
Place the blue pieces next to the sand to form the shoreline.
Step 8
Add white or translucent pieces on top of the blue near the shore to make waves.
Step 9
Stack brown bricks where you want palm tree trunks to stand.
Step 10
Attach green leaf pieces to the top of each trunk to make palm fronds.
Step 11
Use small plates and tiles to build umbrellas towels and other beach accessories.
Step 12
Place mini figures and accessories on the sand and in shallow water to create beachgoers.
Step 13
Look closely at each section to spot any pieces that feel loose.
Step 14
Gently nudge parts to test the stability of your beach scene.
Step 15
Share a photo and a short description of your finished LEGO beach on DIY.org.
Help!?
What can we use if we don't have enough tan/beige pieces or a baseplate?
If you don't have enough tan/beige pieces or a baseplate, substitute with yellow or light‑gray plates for the sand area or glue tan construction paper to any flat board and attach your tan studs and tiles to cover the sand zone.
My palm trees and shoreline pieces keep falling over—how can I make the beach more stable?
To stop palm trees and shoreline pieces from toppling, firmly interlock the brown trunk bricks into thicker stacks, anchor trunks and loose tiles to the baseplate using extra plates underneath, and follow the 'gently nudge parts' step to test and re-tighten weak spots.
How can I change this activity for younger kids or older kids?
For younger children, simplify by having them draw the map and use larger Duplo-style bricks and pre-made palm pieces, while older kids can plan a detailed color scheme, use small plates and tiles for umbrellas and accessories, and build more realistic waves with blue/light-blue and white/translucent pieces.
What are some fun ways to extend or personalize our LEGO beach?
Enhance your beach by adding a sunset mosaic with extra colored plates behind the shoreline, using clear studs and translucent pieces for splash effects, customizing mini figures' outfits with small tiles, and then sharing a photo and description on DIY.org as the instructions suggest.
Watch videos on how to make a beach using LEGO®
How to Build an Awesome LEGO Beach
4 Videos
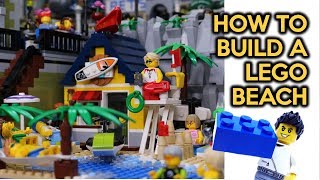
How to Build an Awesome LEGO Beach
How to Build a LEGO Beach | Use in Your Brickfilms and MOCs | #shorts #lego #bricklife #legocreation

LEGO Beach Vacation with Friends! 🌴☀️🏖️
Build a LEGO Beach Lounger with LEGO Classic Bricks | Creative and Fun #short
Facts about LEGO building for kids
🧱 LEGO introduced the classic minifigure in 1978 — they're about 4 cm (1.6 in) tall and instantly make scenes feel alive.
🏖️ Beaches are always changing: waves, tides, and storms can reshape coastlines in hours, days, or years.
🏝️ Coconut palms can grow over 30 meters tall and coastal communities have used palms for food, shelter, and tools for centuries.
🏗️ Scale models help builders spot stability and layout problems early — a tiny test model can save big fixes later.
🎨 Color choices change the mood of a scene: bright blues and tans feel sunny and playful, while soft pastels can make a calm sunset beach.
How do you build a miniature beach scene with LEGO bricks?
What materials do I need to make a LEGO beach scene?
What ages is building a LEGO beach scene suitable for?
What are some fun variations and safety tips for a LEGO beach project?
