Magic Meets Physics
Make a magical floating-coin illusion using thread and a cup, then explore physics of balance, tension, and motion with safe hands-on experiments.


Step-by-step guide to Magic Meets Physics
The magic of physics - with Felix Flicker
Step 1
Lay out all your materials on a flat workspace so everything is easy to reach.
Step 2
Use the ruler to measure and mark about 30 cm of thread and cut it with scissors.
Step 3
Tie one end of the thread tightly around the coin with a small secure knot.
Step 4
Ask an adult to help you make a tiny hole near the top rim of the cup using the pencil point.
Step 5
Push the free end of the thread through the hole from inside to outside so the coin can hang inside the cup.
Step 6
Pull the thread so the coin hangs about 1–2 cm below the cup rim.
Step 7
Tape the outside end of the thread flat to the cup so the thread lies along the rim and is hidden.
Step 8
Cover the rim with your hand so the thread stays hidden and show the cup so the coin looks like it is floating.
Step 9
Gently pull the taped thread end to lift the coin and make it “float” higher.
Step 10
Move the tape point closer or farther to change the hanging length and repeat pulling to compare how the coin’s motion changes.
Step 11
Measure the coin height with the ruler for each test and write down the numbers to explore how length affects motion.
Step 12
Take a photo or short video of your floating-coin illusion and share your finished creation on DIY.org
Help!?
I don’t have a coin, a 30 cm ruler, or a plastic cup—what can I use instead of those critical materials?
Use a metal washer, button, or flat stone instead of the coin, dental floss or fishing line instead of the thread, and a paper/yogurt cup or small plastic container in place of the cup while still measuring about 30 cm of thread with the ruler step.
The thread keeps showing or the coin keeps rubbing the cup—what should I check or redo?
Make the tiny hole carefully with the pencil point as instructed, re-tie the knot so the coin hangs 1–2 cm below the rim, press the tape firmly so the thread lies flat along the outside rim, and trim any excess free thread so it won’t rub the cup.
How can I adapt the steps for different age groups so the child is safe and still learns from the experiment?
For ages 3–5 have an adult pre-punch the hole and pre-cut the ~30 cm thread and help tie the coin while the child practices hiding the rim, for 6–9 let kids measure and thread with supervision, and for 10+ encourage experimenting with different coin weights and recording ruler measurements to explore how length affects motion.
What are simple ways to extend or personalize the floating-coin illusion after finishing the basic routine?
Decorate the cup and use colored thread or multiple coins to create cascading floats, move the tape point to compare hanging lengths as you measure with the ruler, and take slow-motion video to analyze and share your results on DIY.org as suggested.
Watch videos on how to perform Magic Meets Physics
Magic Pot Trick Revealed! | Nope—Just Physics!
4 Videos
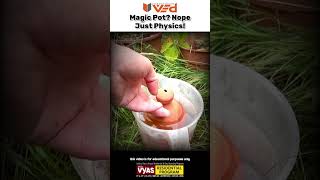
Magic Pot Trick Revealed! | Nope—Just Physics!
Magic Numbers | Experimental Evidence of Magic Number | doubly magic number
The Magic Trick That Fooled Albert Einstein - Revealed

Magic or Science? 🌈 The Hidden Physics Behind the Rainbow Trick! ⚡ | Real Light Experiment
Facts about physics experiments for kids
🪙 A modern U.S. penny weighs about 2.5 grams — light enough that a thin thread or fishing line can move or suspend it!
🧵 Strong monofilament fishing line can hold dozens of kilograms even though it's nearly invisible at a distance—perfect for stealthy supports.
⚖️ Balance depends on the center of mass: move the support just a tiny bit and an object that seemed steady can topple instantly.
🎩 Stage levitation tricks usually rely on clever tension, concealed threads, or hidden supports — not real supernatural forces.
🧪 Tiny pulls create noticeable motion: small forces acting on light objects lead to quick accelerations (hello Newton's laws!).
How do you make the floating-coin illusion in the Magic Meets Physics activity?
What materials do I need for the Magic Meets Physics floating-coin experiment?
What ages is the Magic Meets Physics activity suitable for?
What safety precautions should parents follow for Magic Meets Physics?
