Learn Zentangle Art with DIY Mentor @ArtWithSmita
Create your own Zentangle art tile by drawing repeated patterns, practicing line control, shading, and mindful focus guided by a DIY mentor.

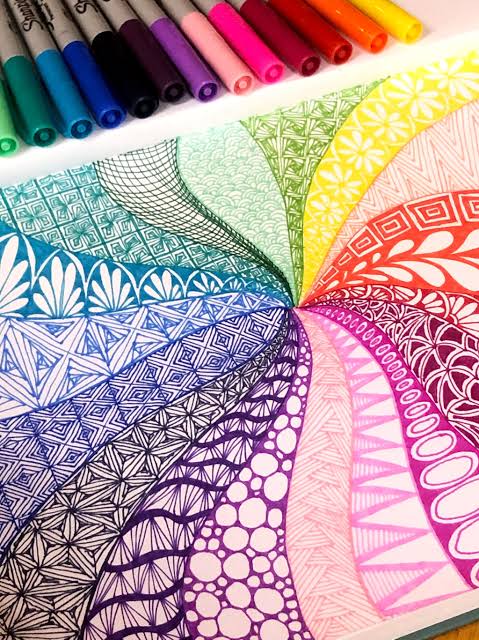

Step-by-step guide to create your own Zentangle art tile
Step 1
Gather your materials and place them where you can reach them easily
Step 2
Find a quiet spot where you can concentrate without distractions
Step 3
Take three slow deep breaths to calm your mind and focus
Step 4
Watch the DIY Mentor @ArtWithSmita demonstration to learn patterns and shading tips
Step 5
Place your square tile flat on the surface in front of you
Step 6
Use your pencil to draw a light border about 1 cm from the edge of the tile
Step 7
Lightly draw a simple curved or straight string across the tile to make sections
Step 8
Lightly draw repeated pencil patterns in each section using gentle strokes
Step 9
Carefully trace over your pencil patterns with your black fineliner or pen
Step 10
Gently erase any visible pencil lines left on the tile
Step 11
Use your pencil to add soft shading next to lines and shapes where shadows would fall
Step 12
Blend the shaded areas with your blending stump or a cotton bud for smooth tones
Step 13
Sign and date your Zentangle tile in a small corner to make it yours
Step 14
Share your finished Zentangle art tile on DIY.org
Help!?
What can I use if I don't have a square tile, black fineliner, or blending stump?
Use a thick index card or heavy watercolor paper cut to a square as your tile, a fine-tip ballpoint or felt-tip pen instead of the black fineliner for tracing, and a clean cotton bud, tissue, or fingertip in place of a blending stump to smooth pencil shading.
My pen smudged when I erased the pencil lines—what should I do?
Let the fineliner ink dry completely before gently erasing with a soft kneaded eraser, or practice on a scrap tile to check drying time and trace more lightly as suggested in the tracing and erasing steps.
How can I adapt this Zentangle activity for different ages?
For younger children simplify by using larger squares, bold patterns, washable markers, and an adult-drawn 1 cm border and string, while older kids can use the original small tile size, finer fineliners, more intricate tangles from the DIY Mentor demo, and detailed pencil shading and blending.
Any ideas to extend or personalize our finished Zentangle tiles?
Enhance your tile by adding colored-pencil or watercolor accents over dry ink with a waterproof fineliner, vary the 1 cm border style, sign and date as instructed, assemble multiple tiles into a collage, and share the set on DIY.org.
Watch videos on how to create a Zentangle art tile
Cool Art Experiments | Art For Beginners | Art Lessons For Kids | Art Challenges To Do With Friends
4 Videos

Cool Art Experiments | Art For Beginners | Art Lessons For Kids | Art Challenges To Do With Friends

Top 10 How To Draw Art Lessons From 2022 - Art For Kids Hub
Back-To-School Art Lessons - Art For Kids Hub Collection
Arts and Crafts: 101 Tutorials for Beginners to Create Own ART 🎨🖌️
Facts about Zentangle art and pattern drawing
🟦 Zentangle tiles are traditionally 3.5 inches (about 9 cm) square — a tiny canvas perfect for focused practice.
👩🎨 Zentangle was created by Rick Roberts and Maria Thomas in the early 2000s and quickly grew into a worldwide art method.
🌀 Each Zentangle pattern is called a "tangle" — there are hundreds of named tangles that artists mix and remix.
🧘♀️ Many people use Zentangle as a mindful-art practice because repeating simple strokes helps focus attention and ease stress.
✏️ Simple shading with a pencil and a blending stump can turn flat patterns into lifelike, 3D-looking designs.
How do you create a Zentangle art tile with a DIY mentor?
What materials do I need for a Zentangle session?
What ages is Zentangle suitable for?
What are the benefits of learning Zentangle with a DIY mentor?
