Learn to Make a Pen Stylus
Make a simple touchscreen stylus using a pen, conductive foam or aluminum foil, and tape, then test it on a tablet while learning about conductivity.


Step-by-step guide to make a pen stylus
Step 1
Gather your materials and find a clear workspace with good light.
Step 2
Take off the pen cap and pull the ink cartridge straight out of the pen so the barrel is empty.
Step 3
Tear a small square of aluminum foil about 4 cm across or take a marble-size piece of conductive foam.
Step 4
Shape the foil or foam into a soft rounded tip that will touch the screen.
Step 5
Push the rounded tip into the open end of the pen barrel so it fills the tip area.
Step 6
Pull a little extra foil back along the barrel so the foil can reach where your hand will hold the pen.
Step 7
Wrap tape around the pen tip area to hold the tip tightly and keep the foil flat against the barrel.
Step 8
Make sure part of the foil is exposed and that when you hold the pen your finger can touch the foil.
Step 9
Put the pen cap back on or cover any sharp edges with more tape for safety.
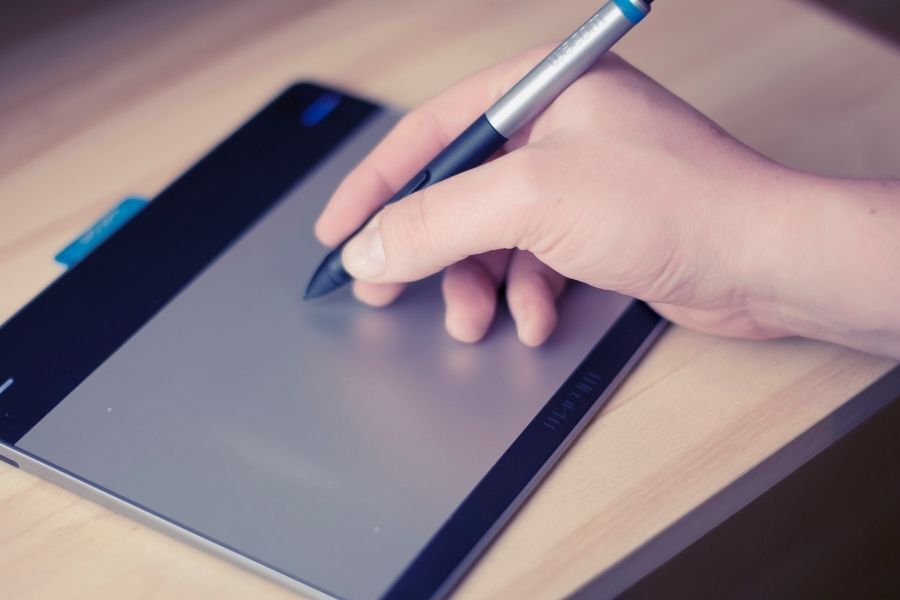
Step 10
Hold the pen so your finger touches the foil and gently tap the tablet screen with the stylus tip to test it.
Step 11
If the screen does not respond try pushing the foil further into the barrel or smoothing the foil so it makes better contact with your hand and test again.
Step 12
Share a photo or video of your finished stylus and what you learned on DIY.org.
Help!?
What can I use instead of the 4 cm aluminum foil square if I don't have any foil?
If you don't have aluminum foil, use the marble-size conductive foam from step 3 or substitute a small square of conductive fabric or copper tape shaped into a rounded tip and inserted into the pen barrel like in step 4.
My stylus doesn't work when I tap the tablet—what should I check or fix?
If the screen doesn't respond, confirm the ink cartridge was fully removed (step 2), push the foil tip further into the pen barrel and smooth the foil so part lies flat against where your finger contacts it (steps 4–7), then test again.
How can I adapt this activity for a preschooler versus an older child?
For preschoolers have an adult remove the cartridge and pre-shape/insert the foil and wrap the tape (steps 2–7) while older children can do those steps independently and try different tip shapes themselves (steps 3–4).
How can we improve or customize the stylus after we've made the basic version?
To enhance precision and comfort, make different-sized rounded tips from foil or foam (steps 3–4), add cushioned or decorative tape around the barrel for grip and safety (steps 7 and 9), and share your finished design on DIY.org as in the final step.
Watch videos on how to make a pen stylus
How to make Stylus at home in zero cost |DIY no cost digital pen/stylus at home |DIY no cost stylus
4 Videos
How to make Stylus at home in zero cost |DIY no cost digital pen/stylus at home |DIY no cost stylus
DIY stylus| Make your own apple pencil at home!!! |Digital Pen at home |Student tips
Engineer Your Own Stylus
How to Make a Stylus Pen at Home in Just 5 Minutes!
Facts about conductivity and electronics for kids
🖊️ Many capacitive touchscreens sense the tiny electrical charge from your finger — that's why metal or conductive tips can work as styluses.
📱 'Capacitive' touchscreens detect changes in capacitance (electric charge), not pressure, so a soft conductive tip can register a touch.
⚡ Aluminum foil is a good conductor of electricity, which is why it helps carry your finger's charge to the stylus tip.
🧠 Your body is slightly conductive — touching a touchscreen shifts its electric field and lets the device know where you touched.
🛠️ A simple DIY stylus (pen + foil or conductive foam + tape) often works in just a few minutes and helps kids learn about conductivity.
How do I make a simple touchscreen stylus with a pen and foil?
What materials do I need to make a pen stylus for a tablet?
What ages is a DIY pen stylus activity suitable for?
What are the benefits and safety tips for making a DIY touchscreen stylus?
