Learn to Draw Realism with Pencil with DIY Mod @CreateWithXenia
Use pencils and a simple DIY blending tool to learn realistic shading, proportions, and textures while drawing a small realistic animal portrait step by step.

Drawing Apps
Step-by-step guide to draw a small realistic animal portrait with pencil using a DIY blending tool
Step 1
Set up a clean flat workspace and place your paper and the reference photo side by side.
Step 2
Sharpen the pencils you will use so the tips are crisp.
Step 3
Make a DIY blending tool by wrapping a small piece of tissue around the tip of a pencil and securing it with tape.
Step 4
Look carefully at the reference photo for one minute to notice the animal's big shapes and where the light hits.
Step 5
Lightly sketch the main shapes of the animal on your paper using an HB pencil.
Step 6
Hold your pencil at arm's length to measure one key distance on the photo by aligning the tip and thumb.
Step 7
Lightly mark that same distance on your drawing to help keep proportions correct.
Step 8
Refine the outlines of important features like the eyes nose and mouth with slightly darker but still light lines.
Step 9
Erase any extra guide lines that you no longer need.
Step 10
Apply a first layer of light shading with the HB pencil following the form of the animal using gentle even pressure.
Step 11
Use your DIY blending tool to gently smooth those light shaded areas following the direction of the fur or form.
Step 12
Add darker values and deeper shadows with the 2B or 4B pencil using short strokes where the photo shows the deepest tones.
Step 13
Create fine fur textures and whiskers with quick controlled pencil strokes to match the reference.
Step 14
Use the eraser to lift tiny highlights like the light in the eye and to clean any smudged edges.
Step 15
Share your finished animal portrait on DIY.org.
Help!?
What can we use instead of the tissue and tape for the DIY blending tool or if we don't have 2B/4B pencils?
If you don't have tissue or tape to make the DIY blending tool, wrap a small cotton ball or cosmetic pad around the pencil tip and secure it with a small piece of tape or use a blending stump, and if you lack 2B/4B pencils use a softer HB or a 3B to build darker values.
My drawing looks out of proportion after the measuring step; how do I fix it?
Re-check the key distance by sharpening your HB pencil, hold it at arm's length aligning the tip and thumb again over the reference photo, then lightly mark and adjust the main shapes before refining outlines to correct proportions.
How can I adapt this activity for younger children or make it more challenging for older kids?
For younger children, print a larger reference photo or provide a pre-drawn light outline and let them use only the HB and the DIY blending tool, while older kids can extend observation time, add 2B/4B layers for deeper shadows, and focus on creating fine fur textures and whiskers with short controlled strokes.
What are simple ways to extend or personalize my finished animal portrait?
Personalize the portrait by experimenting with toned paper or a soft background, lifting tiny highlights with your eraser like the light in the eye, adding signature details to the fur, and then share the finished animal portrait on DIY.org.
Watch videos on how to draw a small realistic animal portrait with pencil using a DIY blending tool
Want to Learn the Secrets of Drawing?
4 Videos
Want to Learn the Secrets of Drawing?
Turning Kids Drawings Into Real Toys
How To Use A Pencil For Drawing
Easy Drawing And Painting Tutorials For Beginners
Facts about pencil drawing and shading for kids
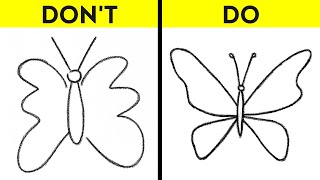
🐾 Animal fur and whisker directions are unique — drawing them in the right direction makes portraits look alive!
✏️ Pencil cores are made from graphite mixed with clay; more clay = harder lead (higher H), more graphite = softer/darker (higher B).
🌀 A tortillon (blending stump) is simply rolled paper — artists use it to smooth graphite and create soft gradients.
👁️ When drawing realism, value (light vs. dark) matters more than outlines — matching values makes things look three-dimensional.
🖼️ Old masters like Leonardo used a technique called 'sfumato' — subtle blending of tones to create soft, realistic edges.
How do I teach my child to draw realistic animal portraits with pencil step by step?
What materials do I need for pencil realism and a DIY blending tool?
What ages is this realistic pencil drawing activity suitable for?
What are the benefits of learning pencil realism with a DIY blending tool?
