Launch a weather balloon
Under adult supervision, build and safely launch a small model weather balloon with a thermometer and tracker to collect temperature and altitude data.
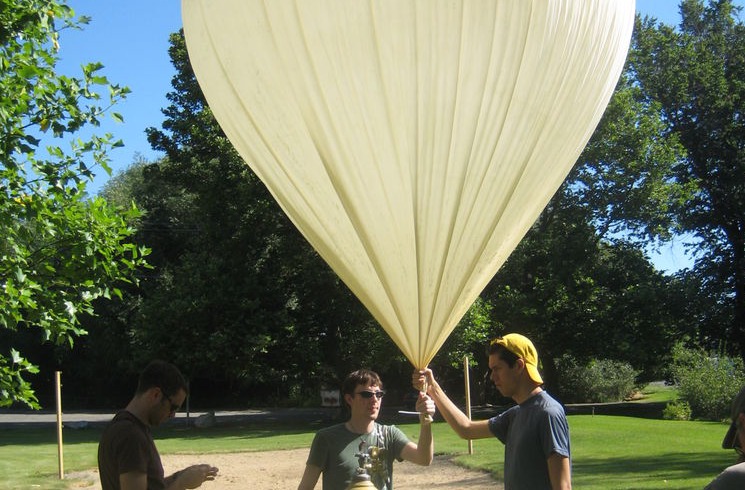
About this activity
Under adult supervision, build and safely launch a small model weather balloon with a thermometer and tracker to collect temperature and altitude data.
What you need
Step by step
- 1
Step 1
Ask an adult to check local rules and to contact the nearest aviation authority or airport to make sure launching a small weather balloon is allowed and safe.
- 2
Step 2
Gather all the materials listed and put them on a clear workspace so everything is ready.
- 3
Step 3
Assemble the payload by placing the digital thermometer and the GPS tracker inside the payload container and positioning them so the sensors can work.
- 4
Step 4
Add padding around the instruments inside the container so they will stay safe during flight.
- 5
Step 5
Seal the payload container shut and tape all edges so nothing can fall out.
- 6
Step 6
Attach one end of the string securely to the payload container so it will hang straight and not come loose.
- 7
Step 7
Place the sealed payload on the kitchen scale and write down its weight so you know how much lift you need.
- 8
Step 8
Ask the adult to use the balloon packaging or the helium tank instructions to calculate how much helium is needed for your payload weight.
- 9
Step 9
Have the adult attach the regulator and carefully fill the balloon with helium to the calculated lift amount.
- 10
Step 10
Have the adult tie the balloon neck securely so helium cannot escape before launch.
- 11
Step 11
Turn on the GPS tracker and the thermometer and confirm each device is logging data and has fresh batteries.
- 12
Step 12
Go with the adult to a chosen open launch site and check that wind is calm and the area is clear of people and obstacles.
- 13
Step 13
Have the adult release the balloon now while you watch from a safe distance and note the launch time.
- 14
Step 14
Use the GPS tracker to follow the flight and, after the tracker shows the payload has landed, go with your adult to retrieve the payload.
- 15
Step 15
Download the temperature and altitude data and share your finished creation and findings on DIY.org
Fun facts
How do you launch a small model weather balloon safely with a child?
Plan with your child: choose a calm day, check local airspace rules, and get adult supervision. Assemble a lightweight insulated payload with a thermometer and GPS tracker, secure batteries, and attach a small parachute. Inflate the balloon outdoors with helium from a supplier, confirm the tracker has a GPS fix, then release when clear of people and power lines. Follow recovery procedures and retrieve the payload together, discussing observations and data.
What materials do I need to launch a child-friendly weather balloon?
You’ll need a small latex weather balloon, access to helium, a lightweight insulated payload box, a digital thermometer/data logger, a GPS tracker or smartphone tracker, a small parachute, strong but light string, tape, zip ties, lightweight batteries, gloves and eye protection, and a recovery kit. Also prepare paper forms, permission from authorities if required, and a charged phone to track and communicate during recovery.
What ages is launching a model weather balloon suitable for?
This activity suits children about 8 and up with close adult supervision. Younger children (4–7) can participate in planning, decorating the payload, and reading simple data. Older kids and teens (12+) can help build wiring, program a data logger, and coordinate safety checks. Always assign age-appropriate tasks, keep adults responsible for inflating helium and handling tools, and use this as a learning opportunity about science and safety.
What safety tips and benefits should families know about weather balloon launches?
Safety first: check airspace rules, avoid launches near airports, choose calm weather, secure batteries, and use biodegradable materials when possible. Keep adults in charge of helium and sharp tools, maintain distance from power lines, and ensure the tracker works before release. Benefits include hands-on learning about atmospheric science, team problem-solving, and STEM skills. Contact local aviation authorities or hobby groups for guidance and required permissions.
Watch & Learn
Need help?
What can we use if a helium tank or regulator is hard to find?
If a helium tank or regulator is hard to find, use a store-bought party helium canister and have an adult follow the balloon packaging instructions to calculate lift and fill the balloon safely.
What should we do if the balloon doesn't lift or the payload seems unstable?
If the balloon doesn't lift or the payload hangs unevenly, re-check the payload weight on the kitchen scale, redistribute or add padding inside the payload container, and have an adult add small amounts of helium per the packaging lift calculation with the regulator until it lifts.
How can we adapt the activity for different age groups?
For ages 5–8 have the adult handle the helium tank, regulator, and launch while the child assembles and pads the payload container and notes the launch time, for ages 9–14 let the child weigh the payload on the kitchen scale and follow the balloon packaging lift calculation with supervision, and for 15+ let them operate the GPS tracker, download the temperature and altitude data, and lead retrieval planning with an adult.
How can we extend or personalize the weather balloon project?
Enhance the project by adding a lightweight camera or extra sensors inside the payload container with additional padding, attaching a small parachute to improve landing recovery, and sharing your photos plus downloaded temperature and altitude data on DIY.org.