Invent an experimental instrument
Design and build an experimental musical instrument from household items to explore sound, pitch, and rhythm by testing different materials and shapes.


Step-by-step guide to design and build an experimental musical instrument
How to Make Musical Instruments for Kids! | Welcome to Nana's
Step 1
Draw a simple sketch of your experimental instrument showing where strings shakers and any horn will go.
Step 2
Gather all the materials from the Materials Needed list and bring them to your workspace.
Step 3
Cut and flatten the cardboard box to make a sturdy flat base for your instrument.
Step 4
Wrap rubber bands around the box widthwise to create strings and space them apart.
Step 5
Pluck one rubber band to hear the sound it makes.
Step 6
Slide a pencil under a rubber band to increase its tension and raise the pitch.
Step 7
Pluck the tightened rubber band again to compare its pitch to before.
Step 8
Fill each glass jar with a different amount of rice or beans and seal the lids to make shakers.
Step 9
Tap each jar with the wooden spoon to listen to how the pitch changes with more or less filler.
Step 10
Attach a cardboard tube to the side of the box with tape to act as a horn for louder or changed tones.
Step 11
Decorate and label parts of your instrument using paper and colouring materials to make it look awesome.
Step 12
Create and play two short rhythm patterns using the strings and shakers to explore rhythm and timing.
Step 13
Write down which materials and shapes made higher or lower sounds on your paper as notes from your experiment.
Step 14
Share your finished creation on DIY.org.
Help!?
What can we use instead of rubber bands or glass jars if they're hard to find?
If you don't have rubber bands, use strong string, hair ties, or elastic strips stretched widthwise across the flattened cardboard base (step 4), and swap glass jars for plastic food containers or sealed paper cups filled with rice or beans for the shakers (step 8).
Why does my instrument sound dull or the rubber bands keep slipping, and how do I fix it?
If bands sound dull or slip, slide the pencil under the band to raise tension as in step 6, move the band to a tighter section of the box, and secure ends with tape or a small cardboard bridge to stop slipping.
How can I change this activity for younger children or make it more challenging for older kids?
For younger children have an adult pre-cut and flatten the cardboard and seal shakers so they can safely decorate and tap patterns (steps 3, 8, 11, 12), while older kids can experiment with different band widths, clothespin bridges, measure pitch changes, and write detailed results on paper (step 13).
How can we make the instrument louder, change tones more, or personalize it further?
Attach a longer or cone-shaped cardboard tube as a horn (step 10), add bridges or clothespins to fine-tune each rubber band, try different jar fillers and label them (steps 8, 13), then decorate and share the finished creation on DIY.org (final step).
Watch videos on how to design and build an experimental musical instrument
5 DIY Musical Instruments That Actually Work - Make Music at Home
4 Videos

5 DIY Musical Instruments That Actually Work - Make Music at Home
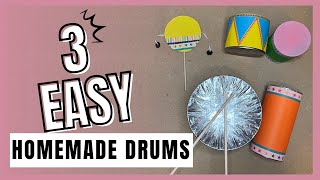
How To Make Drums - 3 EASY DIY Instruments For Kids
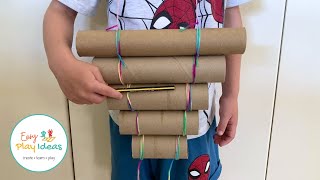
How to Make your Own Musical Instruments using Recycled Materials | DIY Musical Instruments
Homemade Instruments for Kids
Facts about acoustics and instrument building
🥁 Street musicians often turn buckets, spoons, and pots into percussion instruments — you can make a loud drum from a tin can and balloon.
🎵 Pitch is how high or low a note sounds and is determined by vibration frequency; humans generally hear from about 20 to 20,000 Hz.
🔊 A hollow box or tube can amplify sound through resonance — that's why guitars and cajóns have soundboxes.
📏 Changing length, tension, or thickness of a vibrating object changes its pitch — shorter or tighter strings vibrate faster and sound higher.
🔧 Experimental tinkering with found objects helped shape new musical instruments and styles in experimental music.
How do you make an experimental musical instrument at home?
What materials do I need to build an experimental instrument from household items?
What ages is this instrument-building activity suitable for?
What are the benefits of building experimental instruments with kids?
