How to draw hands - a free hands drawing guide
Draw realistic hands step by step using simple shapes, proportions, and shading; practice sketching palms, fingers, joints, and different poses to build skill.

Drawing Apps
Get inspired with these


Instructions
LEARN TO DRAW A HAND EASY WITH BLOCKS! (ART LESSONS FOR KIDS)
Step 1
Sit at a table and place your hand in a comfortable pose or use a mirror to see it clearly.
Step 2
Lightly block in the palm and wrist using a simple oval for the palm and a short rectangle for the wrist.
Step 3
Draw a gentle curved line across the top of the palm to mark the knuckle line.
Step 4
From the knuckle line draw four straight guide lines for the fingers with the middle finger guide the longest.
Step 5
Add an angled guide for the thumb starting lower on the palm to show its direction.
Step 6
Divide each finger guide into three equal segments with small marks to show the joints.
Step 7
Sketch each finger as a rounded cylinder following the joint marks.
Step 8
Sketch the thumb as a tapered cylinder attached to its base.
Step 9
Add simple fingernails and the main palm creases with light lines.
Step 10
Refine the outer contours by smoothing the finger edges and adding small knuckle bulges.
Step 11
Erase the light construction lines so the refined drawing looks clean.
Step 12
Decide where the light is coming from so you know which areas will be in shadow.
Step 13
Shade the hand with light strokes and gently blend with a tissue or stump to show volume.
Step 14
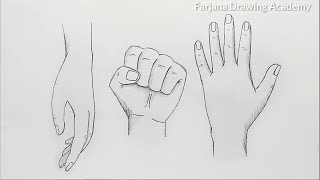
Draw five different hand poses repeating the earlier steps to practice finger movement and variety.
Step 15
Take a photo of your five finished hand drawings and share your creation on DIY.org
Help!?
What can I use if I don't have a blending stump or tissue for shading?
Use a folded cotton ball, a clean fingertip, or a torn corner of a paper towel to gently blend the light strokes when you shade the hand instead of a stump or tissue.
My fingers look stiff—what step might I be doing wrong and how do I fix it?
If fingers look stiff, soften the four straight finger guide lines by slightly curving them along the knuckle line and then place the three joint marks unevenly before sketching rounded cylinders and adding small knuckle bulges to suggest natural bends.
How can I change the activity for different age groups?
For younger kids simplify to a larger oval palm, a short rectangular wrist, and two big finger segments with no shading, while older kids should complete all steps—three joint divisions, refined contours, shading with a tissue or stump—and draw five varied poses.
How can we extend or personalize the hand-drawing project after finishing the five poses?
Extend it by drawing the hands under different light directions, adding personal details like rings or nail polish, coloring with colored pencils after blending with a tissue or stump, and photographing the five finished drawings to share on DIY.org.
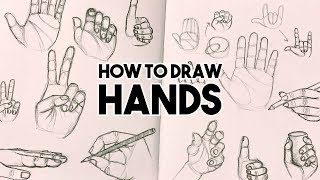
Related videos
How to Draw Hands Step by Step Easy for Beginners - Simple Hand Drawing Tutorial
4 Videos
How to Draw Hands Step by Step Easy for Beginners - Simple Hand Drawing Tutorial
How to Draw Hands | starting with just 3 simple shapes
hands drawing tutorial for beginners / 3 Different Ways
How To Draw Hands (EASY tutorial) - Draw Cartoons!
Fun Facts
🖐️ The human hand has 27 bones: 8 carpals, 5 metacarpals, and 14 phalanges.
✍️ Fingers themselves have no muscles — muscles in the forearm pull tendons to move them, which influences how joints look in drawings.
🎨 Leonardo da Vinci made dozens of detailed hand studies because artists consider hands one of the trickiest parts to draw.
⏱️ Artists often do quick 30–120 second gesture sketches of hands to capture pose and movement before refining details.
📐 A simple drawing shortcut is to treat the palm as a box and each finger as a tapered cylinder to get proportions and shading right.
How do I teach my child to draw realistic hands step-by-step?
What materials do I need to help my child draw hands?
What ages is this hand-drawing activity suitable for?
What are the benefits of practicing hand poses and what variations can we try?
