How to draw a suit - a free suit drawing guide
Draw a complete suit step by step, sketching jacket, lapels, collar, shirt, tie, and trousers. Practice proportions, shading, and adding simple patterns.


Drawing Apps
Photos of suit drawing examples


Step-by-step guide to draw a suit
How to draw a suit and tie easy Drawing coat step by step tutorial for beginners | Clothes drawing
Step 1
Lightly draw proportion guide lines by drawing a vertical center line and horizontal marks for head shoulder waist and hips to help keep the suit balanced.
Step 2
Sketch a simple mannequin shape using an oval for the head a short neck and a rectangle or hourglass for the torso to show where the jacket will sit.
Step 3
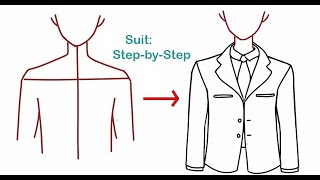
Draw the jacket outline over the mannequin by sketching shoulder lines sleeve shapes and the jacket hem to match the torso width.
Step 4
Shape the jacket lapels by drawing two mirrored triangular or curved strips from the neckline down toward the button area.
Step 5
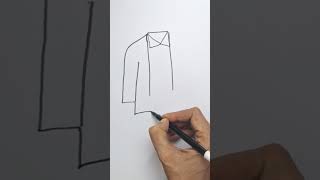
Add the collar by drawing the shirt collar peeking out above the jacket neckline with two small pointed flaps.
Step 6
Draw the tie by sketching a small knot under the collar and a tapered tie shape that ends near the waist guide line.
Step 7
Sketch the trousers by drawing two straight or slightly tapered pant legs from the hip marks down to the ankle guide.
Step 8
Add jacket details like a line of buttons and a simple pocket flap on one or both sides of the jacket front.
Step 9
Draw shirt details by adding a vertical button placket and a couple of small shirt buttons between the collar and the tie.
Step 10
Add seams and small creases by drawing thin lines at sleeve joints the crotch area and pant creases to make the suit look more real.
Step 11
Lightly add patterns like stripes checks or dots on the tie or jacket using faint repeated shapes to practice pattern spacing.
Step 12
Shade your suit by deciding on a light source and adding darker pencil tones on the opposite side then blend with a stump or tissue for smooth shadows.
Step 13
Clean up your drawing by erasing guidelines darkening final lines and adding color with your colouring materials.
Step 14
Share your finished suit drawing on DIY.org so others can see your stylish creation.
Help!?
What can I use if I don't have a blending stump, special pencils, or colouring materials listed in the steps?
Use a clean tissue or cotton swab to blend the shading in the 'Shade your suit' step, a regular HB pencil to draw the vertical center line and mannequin shapes, and crayons or washable markers instead of specialized colouring materials when you 'add color with your colouring materials.'
My lapels and jacket sides look uneven—how can I fix this while following the instructions?
Darken the vertical center line and the head/shoulder/waist/hip guide marks, redraw the mirrored lapel strips slowly using the center line as a symmetry guide, and keep all lines light so you can erase and 'clean up your drawing' as instructed.
How can I adapt this suit-drawing activity for younger or older children?
For younger kids, simplify by providing a pre-drawn mannequin and using bold markers for the jacket outline and tie, while older kids can follow the full instructions to add thin seams, subtle creases, faint patterns, and detailed shading with a stump for more realism.
What are easy ways to extend or personalize the finished suit drawing beyond the basic steps?
Personalize it by lightly adding different fabric patterns like stripes or checks on the tie and jacket as in the 'Lightly add patterns' step, experimenting with pocket flap and button styles from the 'Add jacket details' step, and then photograph and 'Share your finished suit drawing on DIY.org.'
Watch videos on how to draw a suit
How to Draw a Suit: Step by Step Drawing Tutorial for ALL ages!
4 Videos
How to Draw a Suit: Step by Step Drawing Tutorial for ALL ages!
Draw a suit and tie easy

How to Draw how to draw Suit and Tie Easy
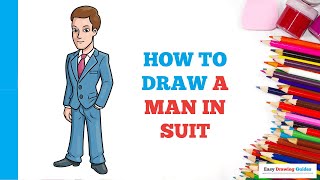
How to Draw a Man in Suit in a Few Easy Steps: Drawing Tutorial for Beginner Artists
Facts about drawing clothes and proportions for kids
👔 The modern suit evolved in the 19th century; Beau Brummell helped make tailored simplicity stylish.
✂️ Tailors take precise shoulder, chest, and waist measurements — tiny changes can transform the whole fit.
🎨 Fashion illustrators often lengthen legs and slim waists on paper to show garments more dramatically.
🧵 Lapels come in three main styles — notch, peak, and shawl — and each style changes how formal a jacket feels.
🔲 Vertical pinstripes can make someone look taller, while horizontal patterns tend to make them appear wider.
How do I teach my child to draw a complete suit step by step?
What materials do we need to draw a suit with a child?
What ages is drawing a suit suitable for and how can I adapt it?
What are the benefits of practicing suit drawing with children?
