How to draw a shooting star - a free shooting star drawing guide
Draw a shooting star step by step using pencil, eraser, and markers while practicing shapes, motion lines, shading, and simple color blending.


Step-by-step guide to draw a shooting star
Magical Shooting Star Drawing - Easy 6-Step Guide for Kids & Beginners
Step 1
Place your paper on a flat surface and put your pencil eraser and markers within reach.
Step 2
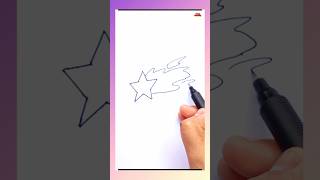
Lightly draw a small circle where you want the shooting star to be.
Step 3
Inside the circle draw a light five-point star shape with your pencil.
Step 4
From the right side of the star draw three long curved tapered lines trailing behind it for the tail.
Step 5
Draw tiny sparkles and dots around the star to show twinkle.
Step 6
Erase the light guide circle and any extra pencil lines you don’t need.
Step 7
Trace the star and tail outlines once with a marker to make the shape bold.
Step 8
Lightly shade one side of each star point with your pencil to add depth.
Step 9
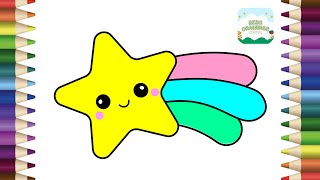
Color the center of the star with a bright yellow marker.
Step 10
Color the outer edges of the star with an orange marker and slightly overlap the yellow to blend the colors.
Step 11
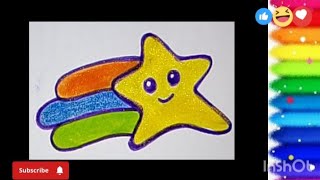
Color the tail lines starting with yellow near the star and switch to orange toward the end to make a color fade.
Step 12
Leave tiny white spots uncolored near the top points of the star for shiny highlights.
Step 13
Share your finished shooting star on DIY.org.
Help!?
What can I use instead of the yellow and orange markers or if I don't have an eraser?
If you don’t have yellow or orange markers, use yellow and orange colored pencils or crayons to color the center and edges of the star and blend by lightly overlapping, and if you lack a pencil eraser, lift graphite gently with a clean corner of tissue after erasing the light guide circle in step 5.
My tail lines look uneven or the star looks messy after erasing—how can I fix that?
If the three long curved tapered lines in step 3 look stubby or messy, redraw them very lightly with a sweeping wrist motion from thick near the star to thin at the ends, then erase extras and trace only the best line with your marker in step 7 to keep the shape bold and clean.
How can I adapt this activity for younger children or make it more challenging for older kids?
For younger children, simplify by pre-drawing the light circle and five-point star and letting them trace with a broad-tip marker and skip shading, while older kids can add the pencil shading on each star point and more refined color fades along the tail as in steps 8–11.
What are easy ways to enhance or personalize the shooting star before sharing it on DIY.org?
To personalize and enhance your finished shooting star, add a dark blue or purple background with marker or paint, sprinkle glitter or use a white gel pen for the tiny white highlight spots mentioned in step 12, and sign your name near the corner before sharing on DIY.org.
Watch videos on how to draw a shooting star
How to draw a cute shooting Star simple & easy step by step for kids | Star drawing
4 Videos
How to draw a cute shooting Star simple & easy step by step for kids | Star drawing

How to Draw A Shooting Star Easy Drawing for Kids
How to Draw a Shooting Star | Easy Step-by-Step Tutorial @PinkyDrawing
Draw Shooting star 🌠 easy step by step for beginners and kids
Facts about basic drawing techniques for kids
🌠 Shooting stars are actually meteors — tiny space rocks burning up in Earth's atmosphere at speeds up to about 160,000 mph!
✏️ Artists often begin with simple shapes (circles, triangles, lines) to map out a drawing before adding details.
💫 Meteor showers like the Perseids can produce dozens of visible meteors per hour, making the sky full of streaks to copy!
🎨 Marker color blending works best by layering light-to-dark tones and using short, overlapping strokes or a blending marker.
💨 A few quick motion lines behind your star instantly make it look like it's zooming across the page—comic artists use them all the time.
How do you draw a shooting star step by step?
What materials do I need to draw a shooting star?
What ages is this shooting star drawing suitable for?
What are the benefits of drawing a shooting star?
