How to draw a scroll - a free scroll drawing guide
Draw a decorative parchment scroll using pencil and shading. Practice curved edges, rolled ends, and simple ornamental borders step by step.


Drawing Apps
Photos of decorative parchment scroll examples


Step-by-step guide to draw a decorative parchment scroll
How to Draw a Scroll | Easy Step by Step Drawing Guide Tutorial
Step 1
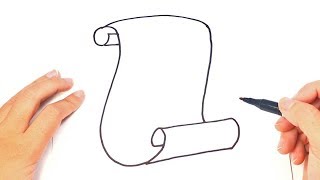
Place your paper landscape and lightly draw a long horizontal rectangle in the center for the main body of the scroll.
Step 2
Soften each corner and draw gentle waves along the top and bottom edges to make the parchment look old and curved.
Step 3
On the left short side sketch a spiral roll by drawing a small circle that connects to the edge and a curved inner line to show the paper wrapping.
Step 4
Repeat the same spiral roll on the right short side so both ends look like rolled parchment.
Step 5
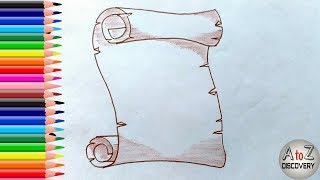
Draw a thin inner border that follows the wavy edges inside the rectangle to create a decorative frame.
Step 6
Add simple corner ornaments like tiny leaves or diamonds inside the inner border by drawing small shapes at each corner.
Step 7
Lightly erase extra construction marks outside your final lines to clean up the drawing.
Step 8
Choose a light direction by imagining where the light comes from and remember it before shading.
Step 9
Shade the outer edges and the curved parts with soft pencil strokes leaving the areas facing the light lighter.
Step 10
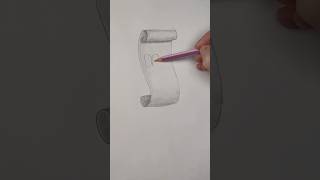
Darken the shading inside the spiral rolls and under the inner border to make strong shadows and depth.
Step 11
Use a blending stump or tissue to softly blend the shaded areas along the curves for smooth shadows.
Step 12
Lift tiny highlights with the eraser on the top of rolls and along edges where light would hit.
Step 13
Add small creases and paper texture by drawing short fine lines and dots across the parchment surface.
Step 14
Share your finished decorative parchment scroll on DIY.org
Help!?
I don't have a blending stump or tissue—what can I use to blend the shaded areas?
Use a clean cotton ball, cotton swab, folded tissue, or even your fingertip to softly blend the shaded outer edges and curved parts instead of a blending stump or tissue.
My spiral rolls look flat or unequal—how can I fix them?
Lightly mark center points on each short side, sketch the small circle and curved inner line using those guides, erase extra construction marks, then darken the final spiral rolls to create balanced, deep rolls as the instructions suggest.
How can I adapt this scroll drawing for younger or older kids?
For ages 3–6, pre-draw the long rectangle, wavy edges, and spiral outlines and let them color with crayons; ages 7–9 can follow the steps but simplify shading and texture; ages 10+ should complete full shading, blend with a stump or tissue, lift highlights with an eraser, and add finer creases and corner ornaments.
How can we personalize or extend the finished parchment scroll?
After shading and lifting highlights, add a watercolor wash inside the inner border, trace highlights with a white gel pen, glue a ribbon around the rolled ends, or write a title or short story on the parchment before sharing on DIY.org.
Watch videos on how to draw a decorative parchment scroll
Draw a scroll! Easy drawing lesson for beginners.
4 Videos
Draw a scroll! Easy drawing lesson for beginners.
How to draw a Scroll or Parchment

How to Draw Scroll Easy
Awesome Scroll | How To Draw A Scroll or Parchment step by step | simple and easy
Facts about pencil drawing and shading
📜 The Dead Sea Scrolls contain texts more than 2,000 years old and are some of the oldest known scrolls.
🐑 Traditional parchment is made from animal skins like sheep, goats, or calves — not plant paper!
🎨 Chiaroscuro is an art technique that uses light and shadow to make flat drawings look three-dimensional.
🪵 Many historical scrolls were mounted on wooden rods (staves) to make rolling, unrolling, and reading easier.
✨ Medieval illuminated manuscripts often used real gold leaf and bright pigments for decorative borders and initials.
How do I draw a decorative parchment scroll step by step?
What materials do I need to draw a parchment scroll?
What ages is this scroll-drawing activity suitable for?
What are the benefits, safety tips, and fun variations for drawing a parchment scroll?
