How to draw a road - a free road drawing guide
Learn to draw a straight or curved road on paper using pencil, ruler, perspective lines, lane markings, and simple signs to create a realistic scene.


Step-by-step guide to draw a road
How to Draw a Road in a Few Easy Steps: Drawing Tutorial for Beginner Artists
Step 1
Place your paper landscape on a flat table so you have wide space for a road.
Step 2
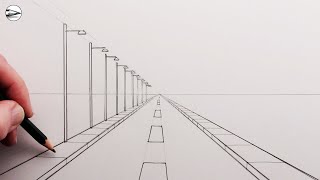
Lightly draw a horizontal horizon line about one third from the top across the page.
Step 3
Pick a vanishing point on the horizon and mark it with a small dot where the road will disappear.
Step 4
Decide whether your road will be straight or gently curvy so you know how to draw the edges.
Step 5
Draw the road edges from the bottom of the page toward the vanishing point using your ruler for straight edges or freehand gentle curves for a curved road.
Step 6
Draw a light center guideline from the bottom of the page toward the vanishing point to show the middle of the road.
Step 7
Add dashed lane markings along the center guideline with dashes that get shorter and closer together as they go toward the horizon.
Step 8
Sketch sidewalks or road shoulders by drawing parallel lines just outside each road edge.
Step 9
Draw at least two simple road signs on posts beside the road using basic shapes like circles triangles or rectangles.
Step 10
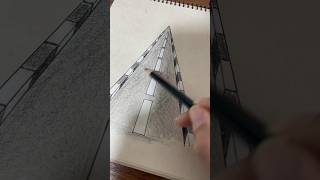
Sketch trees buildings and a car or two and make these objects smaller the closer they are to the vanishing point to show distance.
Step 11
Add small details like windows crosswalk stripes cracks or shadows to make your scene look realistic.
Step 12
Trace the final lines you want to keep with a black pen or a darker pencil so your road stands out.
Step 13
Gently erase the light construction lines and any stray pencil marks to clean up your drawing.
Step 14
Color your road and the surroundings using your colouring materials to bring the scene to life.
Step 15
Share your finished road drawing on DIY.org so everyone can see your cool perspective scene.
Help!?
What can I use if I don't have a ruler, black pen, or fancy colouring materials?
Use a straight edge like a hardcover book or a strip of cardboard to draw the road edges, trace final lines with a dark pencil or marker instead of a black pen, and use crayons or colored pencils in place of other colouring materials.
My dashed lane markings don't look like they're shrinking toward the horizon—how can I fix that?
Lightly mark evenly spaced ticks along the center guideline with your ruler and make each dash a bit shorter as the ticks get closer to the vanishing point, then erase the ticks when you're done.
How can I adapt this drawing activity for different ages?
For ages 4–6 let them place the paper landscape and draw a straight wide road with big simple signs and color it, for ages 7–10 guide them to pick a vanishing point and use the ruler for dashed lane markings that shrink toward the horizon, and for 11+ encourage gentle curves, smaller buildings toward the vanishing point, extra details like shadows, and tracing final lines with a black pen.
How can we extend or personalize the road drawing once the basic scene is done?
Add streetlights, a moon or sunset, reflective white for lane markings, extra cars and personalized road signs that get smaller toward the vanishing point, then color the scene and share your finished road drawing on DIY.org.
Watch videos on how to draw a road
How to Draw a Simple Road using One-Point Perspective for Beginners
4 Videos
How to Draw a Simple Road using One-Point Perspective for Beginners
Easy One-Point Perspective: Draw Roads Like a PRO!
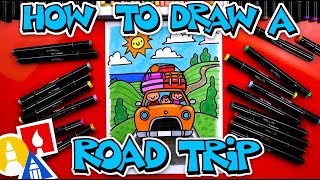
How To Draw A Family Road Trip
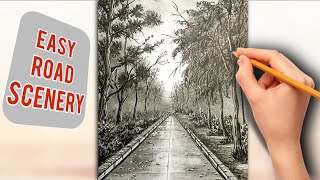
Easy Road Scenery Drawing for Beginners | Simple Pencil Sketch Landscape Step by Step
Facts about perspective drawing
🖼️ In the early 1400s, artist-engineer Filippo Brunelleschi demonstrated linear perspective, changing how artists drew realistic space.
🧭 Parallel edges of a road appear to meet at a single vanishing point on the horizon — a great trick for drawing distance.
📏 Using a ruler for edges and light pencil perspective lines makes both straight and curved roads easier to map out.
🚦 In many countries white road markings separate lanes going the same way, while yellow markings separate opposite directions.
⛔ The octagon-shaped stop sign is unique so drivers can recognize it quickly even from the back or in poor visibility.
How do I teach my child to draw a straight or curved road with perspective on paper?
What materials do I need to draw a realistic road with lane markings and signs?
What ages is this road-drawing activity suitable for?
What are the benefits of drawing roads, and how can I vary the activity or keep it safe for kids?
