How to draw a horse head - a free horse head drawing guide
Draw a horse head step-by-step using basic shapes, proportion guidelines, and simple shading techniques. Practice observation and controlled pencil strokes.


Drawing Apps
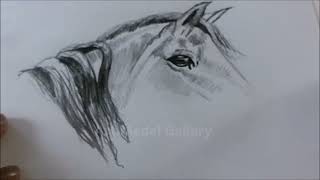
Photos of drawing a horse head


Step-by-step guide to draw a horse head
Learn How to Draw a Horse Easily! 🐴 | Step-by-Step Tutorial for Kids & Beginners | GG Kids Art
Step 1
Place your paper on a flat surface where you can draw comfortably.
Step 2
Put your reference photo or toy horse where you can see it easily.
Step 3
Look closely at your reference to notice the head tilt and where the eye and muzzle sit.
Step 4
Lightly draw a large circle to show where the horse’s skull will be.
Step 5
Lightly draw a smaller overlapping circle in front of the first circle to mark the muzzle.
Step 6
Draw a gentle center guideline from the top of the skull circle through the muzzle to set the head direction.
Step 7
Connect the two circles with a smooth curved line to create the cheek and jaw shape.
Step 8
Sketch two long curved lines from the back of the skull and under the jaw to make the neck.
Step 9
Draw two tapered ear shapes on top of the skull circle.
Step 10
Mark the eye position with a small dot on the side of the head using the guideline.
Step 11
Add a small curved nostril at the front of the muzzle circle.
Step 12
Sketch the mane with short controlled pencil strokes flowing along the top of the neck.
Step 13
Trace the final clean contours of the head with a slightly firmer pencil line.
Step 14
Add simple shading with light controlled pencil strokes under the jaw cheek and inside the ear to show shadow.
Step 15
Share your finished horse head drawing on DIY.org
Help!?
What can we use if we don't have a toy horse or a printed reference photo?
If you don't have a toy horse or photo for step 2, use a clear image on a phone or tablet, a book illustration, or a stuffed animal placed where you can see it easily as your reference.
My drawing looks wrong when I connect the circles—how do I fix the proportions?
If the muzzle or eye placement looks off after steps 4–8, lightly erase and resize the smaller overlapping muzzle circle and adjust the center guideline so the eye dot sits correctly relative to the larger skull circle before drawing the cheek and jaw curve.
How can I adapt this horse head activity for different ages?
For younger children, simplify by tracing two paper plates or circles for the skull and muzzle and using stickers for eyes, while older kids can refine the tapered ears, controlled mane strokes, and add the light shading under the jaw, cheek, and inside the ear as described.
What are simple ways to extend or personalize the finished horse head drawing?
To enhance the outcome, try varying the head tilt from your reference, add color or texture to the mane after tracing the final contours, or extend the two neck lines into a full body before sharing your finished horse head on DIY.org.
Watch videos on how to draw a horse head
How To Draw A Horse's Head (Easy Drawing Tutorial)
4 Videos

How To Draw A Horse's Head (Easy Drawing Tutorial)
how to draw a horse step by step for kids !
How to draw a horse | Master the Art of Horse Head Drawing: Step-by-Step Tutorial
How to Draw a Horse Easily Step-by-Step Tutorial for Kids And Toddlers | Drawing For Baby
Facts about drawing for kids
🐴 Horses have nearly 360° vision because their eyes are on the sides of their head — a neat reason to be careful with eye placement in your drawing.
✏️ The modern pencil became popular after a large graphite deposit was found in Borrowdale, England, in the 1500s.
👀 Many artists start by blocking in basic shapes (circles, ovals, rectangles) — the exact trick you'll use to map a horse's skull and muzzle.
📏 Dividing the head into halves or thirds is a simple measuring trick artists use to place the eye, nostril, and mouth accurately.
🎨 Hatching, cross-hatching, and gentle blending are classic shading methods that help show fur texture and roundness.
How do I draw a horse head step-by-step using basic shapes and proportion guidelines?
What materials do I need to draw a horse head with simple shading?
What ages is drawing a horse head step-by-step suitable for?
What are the benefits and safe variations of practicing horse head drawing?
