How to draw a floor plan - a free floor plan drawing guide
Draw a simple floor plan for a bedroom or small house using measurements, scale, symbols, and labels to practice spatial thinking and planning.


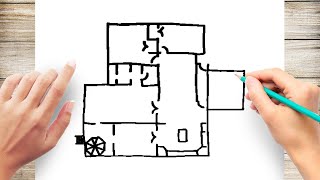
Step-by-step guide to draw a simple floor plan for a bedroom or small house
How to Sketch a Floor Plan | COMPLETE Beginner's Guide!! Step by Step (2021)
Step 1
Choose whether you will draw a bedroom or a small house and pick the real room you will measure.
Step 2
Walk around the room and use the measuring tape to measure the length of each wall and write each number down.
Step 3
Measure the width and position from a corner of each door and window and write those numbers down.
Step 4
Pick a scale for your drawing and write it at the top of your paper (for example 1 square = 50 cm or 1 cm = 50 cm).
Step 5
Using the ruler and your scale convert the wall measurements and draw the outer walls on the paper to scale.
Step 6
Mark the doors and windows on your paper using the ruler and your scale.
Step 7
Measure any big furniture pieces like a bed desk or wardrobe and write their sizes down.
Step 8
Draw each furniture piece to scale on the floor plan using the ruler and simple rectangle or square shapes.
Step 9
Arrange the furniture shapes on the plan to show how they will sit in the room.
Step 10
Make a small legend on the side using sticky notes or scrap paper and draw a simple symbol for each item like bed table window or door.
Step 11
Label each room area and write the scaled dimensions for the walls on your floor plan.
Step 12
Use your ruler to measure walkways on the plan and check that they are at least 60 cm wide in your chosen scale.
Step 13
Move or redraw any furniture on the plan if the walkways are too narrow until the paths look comfortable.
Step 14
Add colour or shading for fun and then share your finished floor plan on DIY.org
Help!?
What can we use if we don't have a measuring tape or a ruler?
Use a piece of string to measure each wall and then lay the string along a household ruler or use a phone measuring app to write down the lengths as in the step 'Walk around the room and use the measuring tape to measure the length of each wall and write each number down.'
My scaled drawing looks wrong — how can I correct placement or conversion errors for doors and windows?
Re-measure each door and window from the nearest corner exactly as the instructions say ('Measure the width and position from a corner of each door and window'), re-calculate those numbers using the scale you wrote at the top of your paper, and then redraw the outer walls and mark doors/windows with your ruler to fix placement.
How can I adapt the activity for younger kids or make it harder for older kids?
For younger kids, have them choose a bedroom, use graph paper with a simple scale like '1 square = 50 cm' and draw furniture as large colored blocks per 'Draw each furniture piece to scale'; for older kids, require a precise scale such as '1 cm = 50 cm', measure and draw all furniture to scale, check 60 cm walkways with the ruler, and create a detailed legend on sticky notes.
What are some ways to extend or personalize the finished floor plan?
Turn your scaled plan into a cardboard 3D model using measured boxes for furniture, add color or shading and the sticky-note legend from the instructions, personalize symbols for items, and then photograph and share your finished floor plan on DIY.org.
Watch videos on how to draw a simple floor plan for a bedroom or small house
How to Draw a Floor Plan Step by Step for Beginner
4 Videos
How to Draw a Floor Plan Step by Step for Beginner
How to draw a floor plan: The simple 7-step guide

How to draw floor plans (by hand)

Simple House Drawing For Kids Step by Step !
Facts about floor planning and spatial reasoning
🏠 Floor plans are bird's-eye views that show walls, doors, and furniture as if the roof were lifted off.
📐 Scales shrink real rooms so they fit on paper — common drawing scales are 1:50 or 1:100 (metric) and 1/4 inch = 1 foot (imperial).
🚪 Doors are usually drawn as arcs to show their swing; windows appear as gaps or thin lines in walls — symbols speed up reading a plan.
🧭 A 1 cm mistake on a 1:50 plan equals 50 cm in real life, so careful measuring really pays off!
🔵 The word 'blueprint' comes from an old cyanotype printing process that made white lines on blue paper.
How do you draw a simple floor plan for a bedroom or small house?
What materials do I need to draw a floor plan with measurements and scale?
What ages is this floor plan activity suitable for?
What are the benefits of drawing floor plans for kids?
