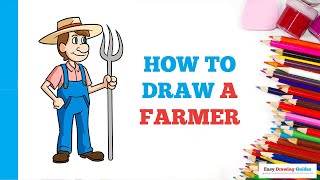
How to draw a farmer - a free farmer drawing guide
Draw a farmer using simple shapes, clothing details, and a pitchfork. Practice proportions, facial expressions, and light shading to bring them alive.


Drawing Apps
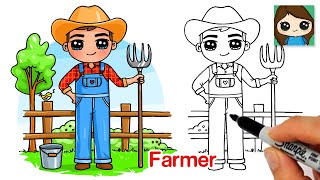
Photos of farmer drawing examples


Step-by-step guide to draw a farmer
How to Make Easy Farmer Drawing | Step-by-Step Tutorial for Kids & Beginners | SnehPankh's Art Zone
Step 1
Draw a light oval for the head and a rectangle or trapezoid below it for the torso to make the farmer’s basic body shape.
Step 2
Sketch a vertical line down the head and a horizontal eye line so the face will stay in the right place and look balanced.
Step 3
Add simple stick lines with small circles for shoulder joints and hip joints and straight lines for the arms and legs to set the farmer’s proportions.
Step 4
Draw two small circles for eyes a tiny oval or triangle for the nose and a curved line or smile to give your farmer a facial expression.
Step 5
Draw a hat on top of the head such as a rounded rectangle with a curved brim and add a few short hair lines under the brim.
Step 6
Turn the arm lines into thicker arm shapes by drawing around the arm guide on both sides.
Step 7
Draw a simple hand on one arm using a mitten or small U shape so the farmer can hold something.
Step 8
Draw a long straight handle from the hand and add three narrow tines at the top to make a pitchfork.
Step 9
Sketch overall straps from the shoulders to the torso a square pocket on the chest and short sleeve lines to add clothing details.
Step 10
Draw the legs beneath the torso with slightly wide pant lines and simple boot shapes at the bottom.
Step 11
Add a sun clouds or a small straw bundle in the background to make a farm scene.
Step 12
Erase the extra guide lines and darken the final outlines with your black pen or a firmer pencil so the drawing looks clean.
Step 13
Use a soft pencil to add light shading on one side of the farmer’s face clothes and pitchfork to give some depth.
Step 14
Color your farmer with your colouring materials and choose colors for the hat overalls skin and boots.
Step 15
Share your finished farmer drawing on DIY.org
Help!?
What can I use if I don’t have a black pen, a soft pencil, or coloring materials mentioned in the instructions?
Use a fine-tip marker or ballpoint pen to darken final outlines in place of a black pen, an HB or 2B pencil instead of a firmer or soft pencil for shading and guides, and crayons, colored pencils, or washable markers for the coloring step.
My farmer's face or proportions look wrong after erasing—what should I do?
Keep the light oval, vertical guide line and horizontal eye line from step 2 and the stick limb guides from step 3, adjust the eye, nose, and mouth placement before erasing extra lines, and redraw thicker arm shapes from step 7 if limbs feel off.
How can I adapt this drawing activity for different ages?
For younger kids simplify steps 1–4 to larger ovals and rectangles and let them use crayons to color, while older kids can refine clothing details from step 11, practice light shading in step 14, and add more realistic proportions or textures to the pitchfork and boots.
What are simple ways to extend or personalize the farmer drawing once it's finished?
Add a farm animal, the straw bundle or sun and clouds from step 12, decorate the chest pocket from step 11 with a name or pattern, try cross-hatching with the soft pencil in step 14 for depth, and then color and share the result on DIY.org.
Watch videos on how to draw a farmer
How to Draw a Farmer Easy
3 Videos
How to Draw a Farmer Easy
How to Draw a Farmer in a Few Easy Steps: Drawing Tutorial for Beginner Artists
How to draw farmer step by step for Kids | Farmer drawing simple easy
Facts about drawing people for kids
👨🌾 Farmers often wear overalls and wide-brimmed hats—these clothing items make a farmer character instantly recognizable in drawings.
🔱 A pitchfork (a tined farm tool) has been used for moving hay and straw for centuries—it's a classic prop to add action to your sketch.
✏️ Artists build believable people from simple shapes: a circle for the head, an oval for the torso, and rectangles or cylinders for limbs.
😄 Small changes to eyebrows, eyes, or mouth can flip a character's mood—try lifting an eyebrow or curving a smile to practice expressions.
💡 Light, gentle shading (2–3 pencil strokes to show shadow) can make a flat sketch look three-dimensional and bring the farmer to life.
How do I draw a simple farmer for kids?
What materials do I need to draw a farmer?
What ages is drawing a farmer suitable for?
What are the benefits of drawing a farmer with my child?
