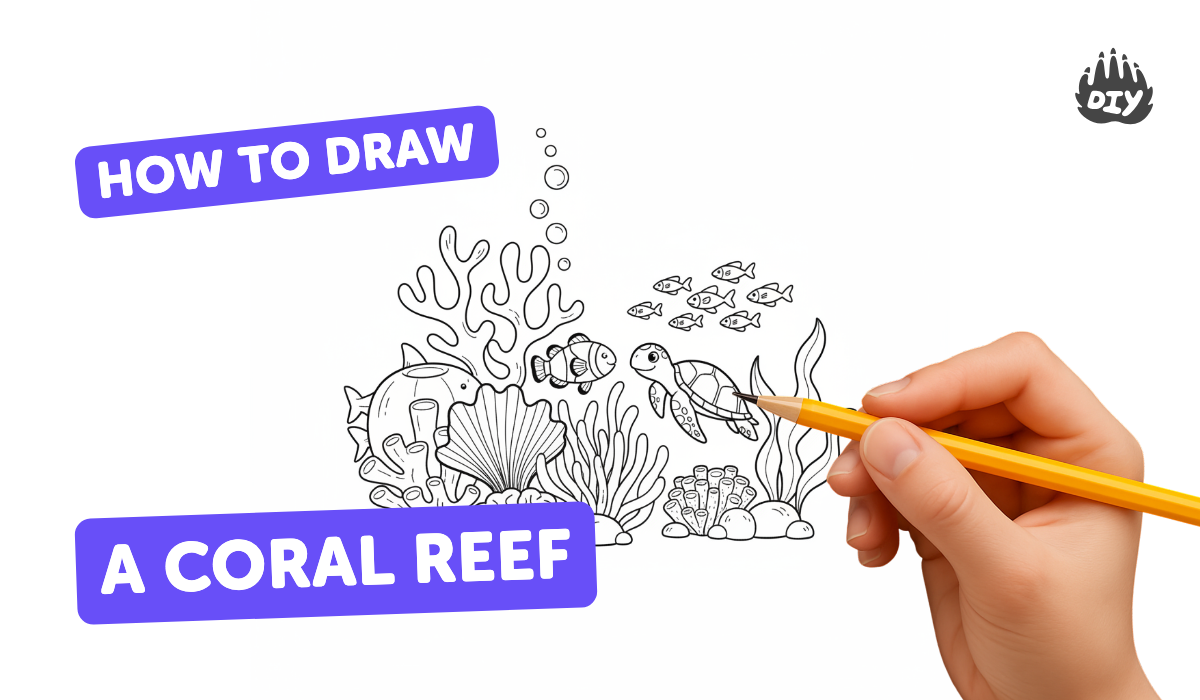
How to draw a coral reef - a free coral reef drawing guide
Draw a coral reef with corals, fish, and seagrass using simple shapes and colored pencils. Practice observation and simple shading to learn composition.

Drawing Apps
Photos of coral reef drawing examples


Step-by-step guide to draw a coral reef
How To Draw A Coral Reef
Step 1
Find a photo of a coral reef or imagine one and study the big shapes colors and where things sit for two minutes.
Step 2
Lightly draw a horizontal line across the page to show the sea floor and water surface so you have ground and water areas.
Step 3
Sketch three big coral groups using simple shapes like circles tubes and branching lines to place them around the page.
Step 4
Draw seagrass by adding several curved vertical lines of different heights between and behind the corals.
Step 5
Draw four to six fish using simple ovals for bodies and small triangles for tails and place them swimming around the corals.
Step 6
Add small details like coral bumps polyps fish eyes and fin lines using short curved or dotted marks.
Step 7
Use your pencil to add light shading on one side and under each coral fish and seagrass to show where the shadow falls.
Step 8
Gently blend the pencil shading with a tissue or your fingertip to soften the shadows.
Step 9
Color each coral fish and seagrass with flat base colors using colored pencils or crayons.
Step 10
Add a darker color on one side of each shape to create simple shading and make parts look closer or farther away.
Step 11
Trace important outlines and tiny details with a black marker so your shapes stand out and wait for the ink to dry.
Step 12
Erase any extra pencil lines carefully to tidy up your drawing.
Step 13
Take a photo of your finished coral reef and share it on DIY.org
Help!?
What can I use instead of colored pencils, a black marker, or a tissue if I don't have them?
Use washable markers or watercolor paints for the flat base colors (step 9), a fine‑tip pen for tracing important outlines (step 10), and a cotton swab or folded paper towel to gently blend pencil shading (step 8).
My shading keeps smudging or my marker is bleeding—how do I fix that?
Lighten your pencil strokes and blend gently with a tissue or fingertip to avoid heavy smudges, and always wait for the black marker ink to dry completely before erasing extra pencil lines so it doesn't bleed (steps 7–11).
How can I change the activity for different ages?
For younger children, simplify by studying the reef briefly, sketching big coral groups with crayons and using stickers for fish while skipping detailed shading and marker tracing, and for older kids add more coral groups, detailed polyps, layered shading with colored pencils, and careful marker outlines before photographing the finished reef to share.
What are some fun ways to extend or personalize my coral reef drawing?
Enhance your picture by adding a watercolor wash under the flat base colors, gluing on tissue‑paper or torn construction paper for textured corals, using a white gel pen for bubbles and highlights, tracing final details with the black marker, and then take a photo to post on DIY.org.
Watch videos on how to draw a coral reef
🖌️ HOW TO DRAW CORAL 🌊 | Step-by-Step Coral Reef Drawing Tutorial for Beginners & Kids #howtodraw
4 Videos
🖌️ HOW TO DRAW CORAL 🌊 | Step-by-Step Coral Reef Drawing Tutorial for Beginners & Kids #howtodraw
How to Draw a Coral Reef in a Few Easy Steps: Drawing Tutorial for Beginner Artists

How To Draw Corals Step By Step For Beginners | Easy Coral Reef Drawing Idea | Ocean. Drawing
How To Draw A Coral Reef | Corals Drawing Tutorial For Beginners
Facts about drawing for kids
🪸 Coral reefs cover less than 1% of the ocean but support about 25% of all marine species — lots to observe when you draw!
🐠 Many reef fish are made of simple shapes like ovals, triangles, and crescent tails — perfect for beginners to sketch.
🌊 Water absorbs red light first, so deeper or shaded parts of the reef look bluer — use cooler colors for depth.
🌱 Seagrass beds act like underwater meadows that store carbon and provide shelter — draw them with flowing, repeated strokes.
✏️ Colored pencils became widely available in the 19th century; layering and light pressure give smooth shading and texture.
How do I draw a coral reef step by step with simple shapes?
What materials do I need to draw a coral reef with colored pencils?
What ages is drawing a coral reef suitable for?
What are the benefits of drawing a coral reef and any safety tips or variations?
