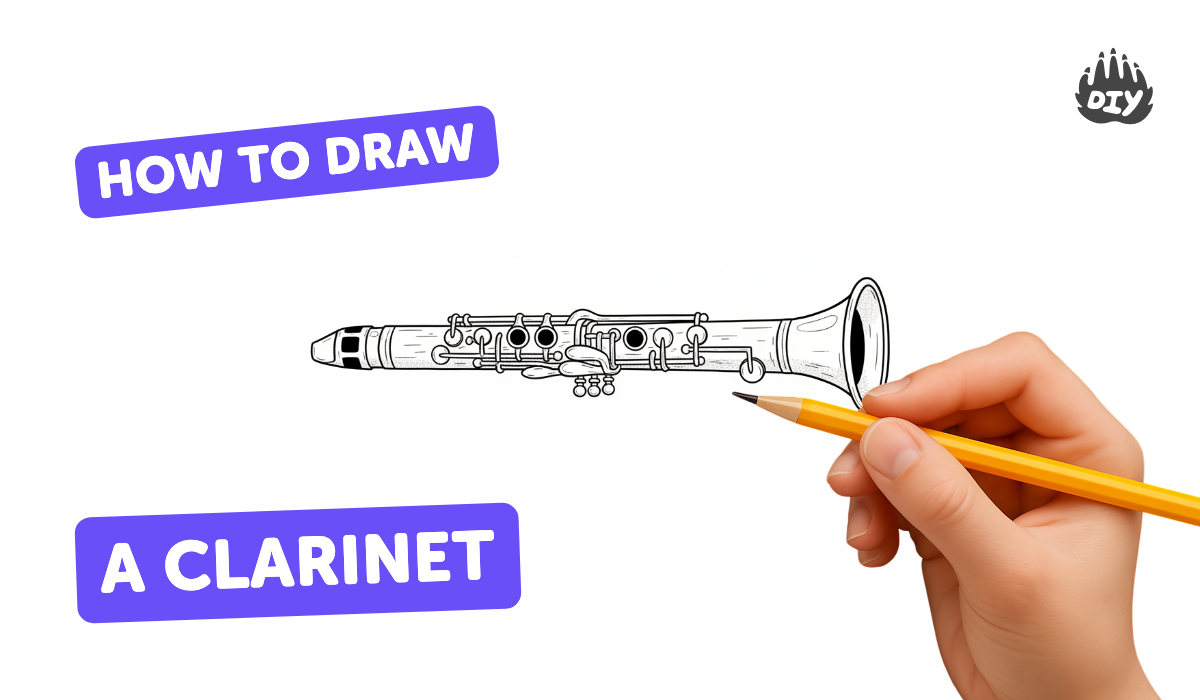
How to draw a clarinet - a free clarinet drawing guide
Draw a clarinet step by step using simple shapes, shading, and keys. Practice proportions and clearly label parts to learn instrument structure.

Drawing Apps
Photos of clarinet drawing examples


Step-by-step guide to draw a clarinet
Ex006 How to Play Clarinet - Clarinet Lessons for Beginners
Step 1
Draw a long vertical centerline down the middle of your paper to guide the clarinet's height.
Step 2
Draw a long narrow rounded rectangle along the centerline to make the clarinet's main body.
Step 3
Draw a small tapered rectangle at the top of the body to make the mouthpiece.
Step 4
Draw a thin oval ring just below the mouthpiece to show the barrel joint.
Step 5
Draw a flared bell shape at the bottom of the body for the clarinet's bell.
Step 6
Add thin horizontal lines where the instrument joins to show metal rings that connect sections.
Step 7
Draw groups of small circles and short rectangles along the body to make the keys and tone holes.
Step 8
Erase the centerline and any extra construction marks that you no longer need.
Step 9
Carefully trace the final outlines of your clarinet with the black marker.
Step 10
Shade the mouthpiece and the bell darkly with your pencil to show material differences.
Step 11
Add gentle curved pencil shading along one side of the body to show the clarinet's round shape.
Step 12
Draw short straight leader lines from the clarinet to empty space for labels.
Step 13
Write the part names next to each leader line: Mouthpiece; Barrel; Body; Keys; Tone holes; Bell.
Step 14
Share a photo of your finished clarinet drawing and labels on DIY.org.
Help!?
What can I use instead of the black marker, eraser, or a soft shading pencil if I don't have them?
If you don't have a black marker for the step 'Carefully trace the final outlines of your clarinet with the black marker,' substitute a dark fine‑tip pen, thick black crayon, or a dark colored pencil, and replace the soft shading pencil with a 2B–6B graphite or charcoal and use any clean white eraser for the 'Erase the centerline' step.
My long narrow rounded rectangle looks lumpy and the keys are uneven—how can I fix that?
Lightly redraw the 'long vertical centerline' with a ruler, mark even spacing with tiny dots where you will 'Draw groups of small circles and short rectangles along the body to make the keys and tone holes,' then connect the dots and erase the guide lines before tracing with marker to keep the body smooth and the keys aligned.
How do I change the activity for different age groups so it's not too hard or too easy?
For preschoolers, predraw the 'long narrow rounded rectangle' and let them add sticker dots for 'keys and tone holes,' elementary kids can follow the instructions step‑by‑step including 'Shade the mouthpiece and the bell darkly,' and older kids can add accurate key mechanics, stronger curved shading, and extra labels before sharing on DIY.org.
What are simple ways to enhance or personalize the finished clarinet drawing?
Add woodgrain texture with fine pencil strokes around the body, deepen highlights on the mouthpiece and bell as in the 'Shade the mouthpiece and the bell darkly' step, color or varnish the background, and include a small drawn musician or a facts box next to your 'Write the part names' labels before photographing for DIY.org.
Watch videos on how to draw a clarinet
How to play the Bluey Theme on Clarinet | Clarified
4 Videos

How to play the Bluey Theme on Clarinet | Clarified

HOW TO PLAY THE CLARINET
Clarinet Introduction Part 1: Assembling your Clarinet

Clarinet 101: Setting Up, Playing Your First Notes, and Caring for Your Instrument
Facts about clarinet anatomy and parts
🎵 The clarinet has a range of over three octaves, letting it play deep warm notes and bright high melodies.
🪶 The clarinet uses a single thin reed attached to the mouthpiece — that tiny reed is the part that vibrates to make sound.
🔑 A modern B♭ clarinet usually has around 17 keys and several rings that help change pitches quickly.
✏️ For drawing, start with a long cylinder for the body and simple circles for keys to get the proportions right.
🎨 Shading the curved sides and adding tiny highlights on the keys makes a flat sketch look three-dimensional.
How do you draw a clarinet step by step?
What materials do I need to draw a clarinet?
What ages is drawing a clarinet suitable for?
What are the benefits of drawing a clarinet?
