Hello, Future Engineers!
Build a popsicle stick bridge using craft sticks, glue, and simple measurements, test how much weight it holds, and improve your design.


Step-by-step guide to build a popsicle stick bridge
Step 1
Gather all the materials and clear a flat workspace.
Step 2
Place two sturdy books or boxes on the table to make the supports for your bridge.
Step 3
Measure the gap between the supports with your ruler and write the span down.
Step 4
Sketch a simple bridge plan showing a flat deck and triangular side trusses.
Step 5
Lay craft sticks side by side to make a flat deck the same length as your measured span.
Step 6
Glue two craft sticks across the bottom ends of the deck to hold the deck sticks together.
Step 7
Make two identical side trusses by gluing craft sticks into triangle shapes for each side.
Step 8
Let the glued pieces dry until they feel firm to the touch.
Step 9
Attach each truss to the deck by gluing them along the deck edges so the triangles face outward.
Step 10
Add diagonal bracing pieces between truss joints by gluing short craft stick pieces to strengthen the sides.
Step 11
Place the finished bridge onto the two supports so it sits centered and does not slide.
Step 12
Test the bridge by adding small weights one at a time to the middle until it bends or breaks and note how many weights it held.
Step 13
Glue extra sticks to any weak or bent spots you observed to reinforce the bridge.
Step 14
Repeat the weight test by adding small weights one at a time to see if your improvements helped.
Step 15
Share a photo and a short description of your finished popsicle stick bridge on DIY.org.
Help!?
If I can't find craft sticks or wood glue, what can I use instead?
Use sturdy cardboard strips or cut dowels/bamboo skewers in place of craft sticks and substitute strong school glue, hot glue, or doubled tape for the glue, and use heavy books or shoeboxes as the supports if you don't have boxes.
My bridge slides off the supports or the deck bends when I put weights on it—what should I check and fix?
Make sure the bridge sits centered on the two supports, let the glued joints (especially the deck cross-sticks and truss-to-deck attachments) dry until firm, and add diagonal bracing pieces or glue extra sticks to any weak or bent spots before retesting.
How can I adapt this project for younger kids or older kids?
For younger kids, simplify by pre-gluing the deck, using tape instead of glue and making fewer, larger triangle trusses, while older kids can increase the measured span, sketch more complex truss designs, and test for higher loads with more weights.
What are simple ways to make the bridge stronger or more personal after the first test?
Reinforce weak spots by gluing extra sticks and adding more diagonal bracing or a second deck layer, then personalize by painting the craft sticks, adding guardrails, trying different truss shapes, and sharing a photo and description on DIY.org.
Watch videos on how to build a popsicle stick bridge
Engineering Compilation: Crash Course Kids
3 Videos

Engineering Compilation: Crash Course Kids
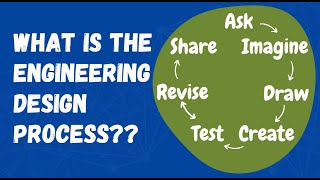
Engineering Design Process Explained (Step By Step)
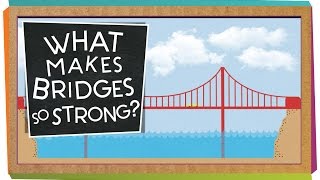
What Makes Bridges So Strong? | Engineering for Kids | STEAM | SciShow Kids
Facts about bridge building and simple engineering for kids
🏗️ Engineers use triangles in trusses because triangular shapes lock in place and help bridges carry heavy loads without bending.
🪵 Most craft (popsicle) sticks are made from birch wood — it's lightweight, flexible, and strong for tiny structures.
📏 Small measurement changes make a big difference: shifting a joint by just a few millimeters can change how much weight a bridge holds.
🧪 Testing and redesigning is how engineers improve things — student popsicle-stick bridges often hold dozens of times their own weight after tweaks.
👷 Isambard Kingdom Brunel was a famous 19th-century engineer whose bold designs (bridges and railways) still inspire builders today.
How do I build a popsicle stick bridge with my child?
What materials do I need to build a popsicle stick bridge?
What ages is a popsicle stick bridge activity suitable for?
What are the benefits, safety tips, and variations for building popsicle stick bridges?
