Grow micro greens - World Food Security Day
Grow nutritious microgreens in small containers using seeds, soil, and water; observe plant growth, learn food security basics, and harvest fresh greens.


Step-by-step guide to grow microgreens for World Food Security Day
How to Grow Microgreens | Step by Step for Beginners | Complete Guide
Step 1
Wash your hands so your seeds and soil stay clean and safe.
Step 2
Choose a sunny windowsill or bright spot where your microgreens will get light each day.
Step 3
Use the spoon to fill each container with soil to about 1 inch deep.
Step 4
Sprinkle the microgreen seeds evenly across the soil surface so they touch but are not piled up.
Step 5
Gently press the seeds into the soil with the back of the spoon or your fingertips.
Step 6
Mist the soil and seeds lightly with the spray bottle until the top is evenly damp but not soggy.
Step 7
Cover each container loosely with clear plastic wrap or a clear lid to keep humidity in for the first 2–3 days.
Step 8
Check the soil once every day to see whether it still feels damp to the touch.
Step 9
Mist with the spray bottle whenever the soil feels dry to keep it consistently moist.
Step 10
Remove the plastic cover as soon as tiny green shoots appear above the soil.
Step 11
When the microgreens are 1 to 2 inches tall cut them just above the soil with scissors to harvest.
Step 12
Share a photo and a short note about your harvested microgreens on DIY.org.
Help!?
What can we use if we don’t have a spray bottle, microgreen seeds, or a clear lid?
Use a clean teaspoon or cup to water gently at the container edge instead of a spray bottle, plant easy-to-find edible seeds such as radish or pea seeds in place of specialty microgreen mixes, and cover containers with clear plastic wrap or a cut plastic bottle top to hold humidity for the first 2–3 days.
My seeds aren’t sprouting or I see fuzzy mold—what should I check?
If seeds don’t sprout, make sure you pressed them lightly into moist soil and kept the cover only for the first 2–3 days, and if white fuzzy mold appears, remove the plastic cover, increase air flow to the sunny windowsill, and mist less frequently with the spray bottle.
How can I adapt this microgreen activity for younger children or older kids?
For younger children, pre-fill containers with 1 inch of soil and let them sprinkle larger seeds like peas and press them with a spoon while an adult handles misting and the scissors at harvest, whereas older kids can measure the soil depth, record daily growth on a chart, and test different light spots to compare outcomes.
How can we extend or personalize the activity after the basic harvest?
Label and decorate recycled containers, plant different seed varieties side-by-side to compare taste and height, keep a photo growth journal to post on DIY.org, and experiment with harvesting at 1 inch versus 2 inches to see which flavor and yield you prefer.
Watch videos on how to grow microgreens for World Food Security Day
What Are Microgreens? (Full Explanation)
4 Videos

What Are Microgreens? (Full Explanation)
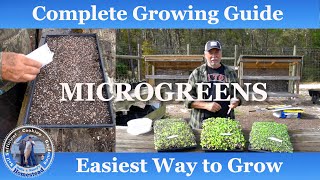
How to Grow Mircogreens from Seed to Harvest | Complete Growing Guide
Grow Microgreens from Start to Finish - A Complete Guide
Microgreens for BEGINNERS | 7 Top Tips for Growing Microgreens
Facts about indoor gardening for kids
🌱 Microgreens often pack more vitamins and antioxidants per gram than the same plant's mature leaves—some studies show much higher nutrient density.
⏱️ Most microgreens are ready to harvest in just 7–21 days, so you can grow fresh greens faster than regular salads.
🏙️ Microgreens are perfect for tiny spaces—you can harvest a week's worth of greens from a single windowsill tray.
💧They need surprisingly little water and soil compared with full-size crops, making them ideal for beginner gardeners and urban growers.
🥗 Popular microgreen varieties include radish, sunflower, pea shoots, and broccoli—each adds big flavor and nutrition to meals.
How do I grow microgreens at home for World Food Security Day?
What materials do I need to grow microgreens with kids?
What ages is this microgreens activity suitable for?
What are the benefits and safety tips when growing microgreens with children?
