Finger-Paint A Fab Artpiece
Create a vibrant finger-painted artwork using safe washable paints and paper, explore color mixing and texture, then display your finished masterpiece at home.


Step-by-step guide to Finger-Paint A Fab Artpiece
Finger Painting Colorful Seasons Tree Craft | Create with Bri Reads!
Step 1
Put on your smock or old shirt to keep clothes clean.
Step 2
Cover the table with newspaper or a plastic sheet to protect the surface.
Step 3
Place your sheet of paper in the center of the covered table.
Step 4
Squeeze small amounts of different paint colors onto the shallow dishes or plates.
Step 5
Dip a clean finger into one paint color.
Step 6
Make big blobs or swirls on the paper to create a colorful background.
Step 7
Dip a different clean finger into another paint color.
Step 8
Gently swirl that color into the first blobs on the paper to mix and create new shades.
Step 9
Use the tip of your finger to draw thin lines and small shapes.
Step 10
Use the flat of your finger to make bold wide strokes for texture.
Step 11
Tap your fingertip to add dotted patterns and fun textures across the page.
Step 12
Wash your hands with soap and water when you finish painting.
Step 13
Leave your painting flat to dry completely before moving it.
Step 14
Display your finished masterpiece at home on the fridge or a wall.
Step 15
Share your finished creation on DIY.org
Help!?
I don't have shallow dishes, a smock, or newspaper—what can we use instead?
Use clean paper plates or a muffin tin to hold the paint, wear an old oversized T‑shirt instead of a smock or old shirt, and cover the table with a trash bag or towel in place of newspaper or a plastic sheet.
My paper is buckling and the colors are turning muddy—how can we fix that?
Squeeze smaller amounts of paint into your shallow dishes and work with thinner layers so the paper won't buckle, and wipe your finger between colors when you 'dip a different clean finger' and 'gently swirl' to avoid muddy mixing.
How can we adapt this finger-paint activity for toddlers and older kids?
For toddlers, use heavy cardstock or cardboard and encourage big blobs and the 'flat of your finger' for bold strokes with close supervision for 'wash your hands', while older kids can use the 'tip of your finger' to draw thin lines, add dotted patterns, and create detailed textures before sharing on DIY.org.
How can we personalize or extend the finished painting to make it special?
While the paint is wet, press leaves or stencils into the blobs, sprinkle a little glitter or salt onto the 'tap your fingertip' dotted patterns for texture, then 'leave your painting flat to dry', sign it, and display it on the fridge or frame it before sharing on DIY.org.
Watch videos on how to Finger-Paint A Fab Artpiece
How to make Hand Painting for Kids | Easy Finger Painting | DIY | Crafts At Ease | Craftisode 31
4 Videos
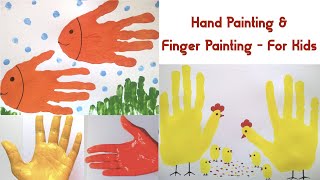
How to make Hand Painting for Kids | Easy Finger Painting | DIY | Crafts At Ease | Craftisode 31
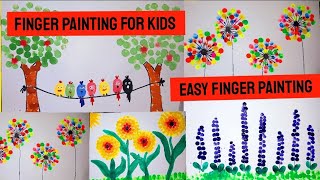
easy finger painting art for kids| 4 best finger printing art for kids
Finger Painting! | Fun Art Activity for Kids And Toddlers (Sensory Play)

DIY Easy Finger Print Painting For Kids | Kids Painting Ideas | DIY Kids Activities #fingerpainting
Facts about finger painting for kids
🎨 Finger painting is a fun sensory art activity that helps kids explore color, texture, and movement with their hands.
🧼 Many children's finger paints are water-based and washable, so they rinse off skin and most clothes easily.
🌈 Mixing two primary colors (red, blue, yellow) makes secondary colors—try red + yellow = orange, blue + yellow = green, red + blue = purple.
✋ Finger painting supports fine motor development and hand-eye coordination as children press, smear, and spread paint.
🖼️ Displaying a child's artwork at home can boost confidence and encourage them to keep creating.
How do I create a vibrant finger-painted artwork at home?
What materials do I need for a finger-painting activity?
What ages is finger-painting suitable for?
What are the benefits of finger-painting and safety tips?
