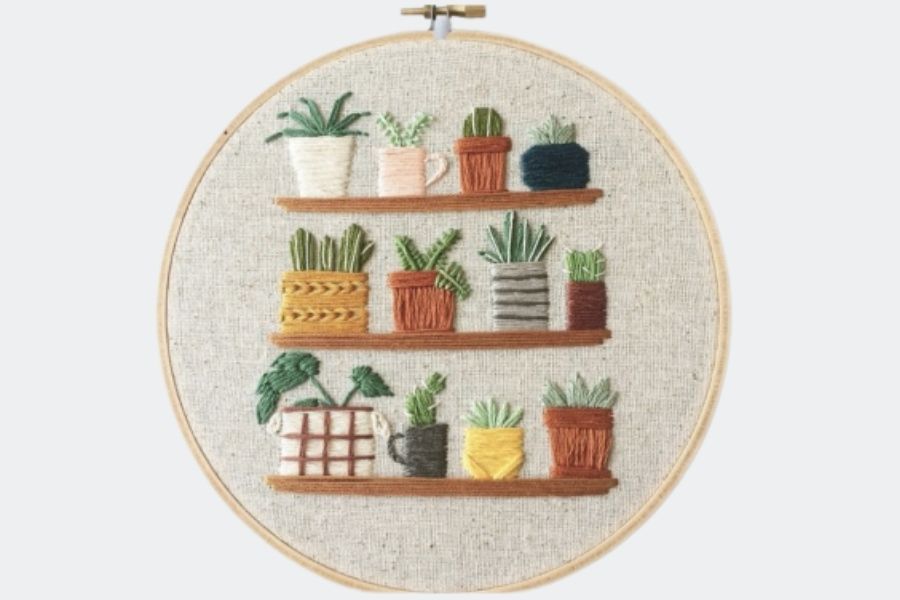
Embroidery: Potted Plants
Embroider a small potted plant design on fabric using basic stitches, a hoop, needle, and thread to practice sewing skills and creativity.


Step-by-step guide to Embroidery: Potted Plants
Step 1
Gather all your materials and sit at a clear table with good light.
Step 2
Loosen the screw on the embroidery hoop and separate the inner ring from the outer ring.
Step 3
Lay your fabric smoothly over the inner ring so the design area is centered.
Step 4
Place the outer ring on top of the fabric and tighten the screw until the fabric is snug and flat.
Step 5
Draw or trace a simple potted plant design onto the fabric with your pencil or fabric marker.
Step 6
Cut a length of embroidery floss about 18 inches long.
Step 7
Separate the floss into three equal strands to make your thread easier to stitch with.
Step 8
Thread the needle with the three strands and tie a small knot at the end of the thread.
Step 9
Sew the plant stem using backstitch: bring the needle up at the start then make a small stitch forward and bring the needle up ahead of that stitch then insert it back into the end of the previous stitch; repeat along the line.
Step 10
Fill each leaf using satin stitch: outline the leaf then make close parallel stitches from one edge to the other until the leaf is fully covered.
Step 11
Stitch the pot with running stitch by making even little in-and-out stitches along the pot outline and add extra lines to fill it if you like.
Step 12
Make tiny flowers or dots with French knots: bring the needle up through the fabric wrap the thread once around the needle hold the wrap tight and push the needle back down close to where it came up.
Step 13
Tie off your threads on the back with small secure knots and trim the extra thread with scissors.
Step 14
Share your finished embroidered potted plant on DIY.org.
Final steps
You're almost there! Complete all the steps, bring your creation to life, post it, and conquer the challenge!


Help!?
What can I use if I don't have an embroidery hoop or fabric marker?
If you don't have an embroidery hoop you can cut two rings from stiff cardboard and sandwich the fabric the same way as in step 2–4, and if you lack a fabric marker use a regular pencil to draw the potted plant in step 5 since pencil marks can be lightly erased.
My fabric is wrinkling or the stitches look uneven—what should I do?
If the fabric wrinkles or stitches pull unevenly, loosen the hoop screw, re-center and pull the fabric taut over the inner ring like a drum, retighten the screw (step 4), and check that you're using three separated strands of floss (step 8) for smoother stitching.
How can I adapt the activity for different ages or skill levels?
For younger kids offer a pre-drawn simple pot from step 5, a large plastic needle and thick yarn for easy running stitches, while older children can follow steps 8–12 to separate three-strand floss and practice backstitch, satin stitch, and French knots for more detail.
How can we extend or personalize the finished embroidered potted plant?
After tying off and trimming threads (step 14) personalize by sewing tiny seed beads into French knot centers (step 12), embroidering a name on the pot, or backing the fabric with felt and framing the hoop for display before sharing on DIY.org (step 15).
Watch videos on how to embroider potted plant designs
Embroidery Tutorial - Beginner's Guide by Craft Smith | PLANTS
3 Videos
Embroidery Tutorial - Beginner's Guide by Craft Smith | PLANTS
Tutorial on how to embroider trees with five easy stitches!
TUTORIAL: Holly Embroidery for Beginners | December's Birth Plant Embroidery | DIY Pattern
Facts about embroidery and basic sewing for kids
🧵 Embroidery has been practiced for thousands of years and appears in many cultures around the world.
🪡 Archaeologists have found bone sewing needles that are over 40,000 years old—people have been stitching for a long time!
🌱 A few simple stitches can be combined to make realistic leaves, petals, and tiny plant textures.
🪴 Embroidery hoops keep fabric tight so your stitches stay neat; they come in lots of sizes from tiny to very large.
🎨 With just basic stitches like running stitch, backstitch, satin stitch, and French knots you can stitch a whole potted-plant scene.
How do you embroider a small potted plant design on fabric?
What materials do I need for an embroidery: potted plants activity?
What ages is this potted plant embroidery activity suitable for?
What are some safe variations and adaptations for kids doing potted plant embroidery?


