Drawing Mickey Mouse
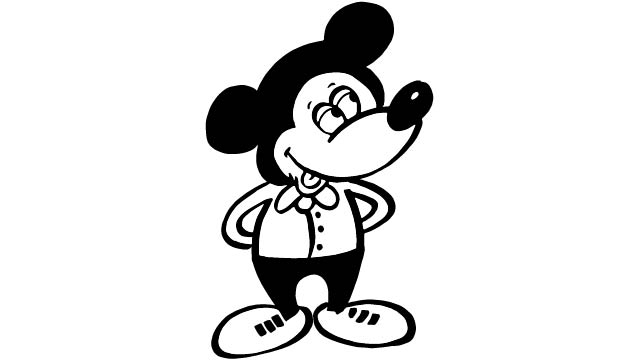
Learn to draw Mickey Mouse step-by-step using simple shapes, pencils, and markers; practice proportions, facial features, and coloring techniques on paper.
About this tutorial
Learn to draw Mickey Mouse step-by-step using simple shapes, pencils, and markers; practice proportions, facial features, and coloring techniques on paper.
What you need
Instructions
- 1
Step 1
Gather all materials.
- 2
Step 2
Lightly draw a large circle in the center of your paper for Mickey's head.
- 3
Step 3
Draw two equal circles that touch the top left and top right of the head circle to make Mickey's ears.
- 4
Step 4
Lightly draw one vertical line and one horizontal line that cross in the middle of the head circle to make placement guidelines.
- 5
Step 5
Draw a rounded oval overlapping the bottom center of the head circle to make Mickey's muzzle.
- 6
Step 6
Draw a vertical oval for the left eye above the muzzle along the horizontal guideline.
- 7
Step 7
Draw a vertical oval for the right eye above the muzzle along the horizontal guideline.
- 8
Step 8
Add a small filled circle near the inside edge of each eye to make the pupils.
- 9
Step 9
Draw a small oval at the top center of the muzzle for Mickey's nose.
- 10
Step 10
Draw a wide curved line under the nose to make Mickey's smile.
- 11
Step 11
Draw a short vertical line from the nose down to the top of the mouth to connect them.
- 12
Step 12
Carefully erase the extra guideline lines so only your clean pencil drawing remains.
- 13
Step 13
Trace your final pencil lines with the black marker to make a bold outline.
- 14
Step 14
Color Mickey by filling the head and ears black and coloring the muzzle a skin tone.
- 15
Step 15
Share your finished Mickey drawing on DIY.org.
Fun facts
How do I teach my child to draw Mickey Mouse step by step?
Start with a large circle for the head, then add two smaller circles on top for ears. Lightly draw a vertical center line and a horizontal eye line. Place two oval eyes on the horizontal line, a rounded nose on the vertical line, and a wide smiling mouth under the nose. Erase guidelines, refine lines, add simple body shapes (rounded torso, short legs, big shoes), then outline with a darker pencil or marker and color.
What materials do I need to draw Mickey Mouse with my child?
You’ll need plain paper or a sketchbook, a range of pencils (HB and a softer pencil like 2B), a good eraser, a sharpener, and a black fineliner or marker for outlines. Add colored pencils, markers, or crayons (black, red, yellow, skin-tone) for coloring. A ruler or circle templates can help with proportions but are optional. Keep a scrap sheet for practice and wipes for marker cleanup.
What ages is drawing Mickey Mouse suitable for?
Drawing Mickey is adaptable: toddlers (2–4) can enjoy tracing big circles and scribbling, preschoolers (4–6) can follow simple step drawings with adult help, and elementary kids (7–11) can work independently on proportions and shading. Teens can practice more detailed features and stylized versions. Supervise younger children with markers and encourage patience—break the process into small steps for better focus.
What are the benefits of drawing Mickey Mouse with my child?
Drawing Mickey practices observation, proportion, and facial feature placement while strengthening fine motor skills and hand–eye coordination. Following step-by-step instructions builds sequencing and patience, and coloring encourages color recognition and creativity. It’s a low-pressure bonding activity that boosts confidence as children see progress. Encourage personal touches to foster imagination and make every drawing feel like their own.
Watch & Learn
Need help?
What can we use if we don't have a black marker or a skin-tone color as listed in the materials?
If you don't have a black marker to trace your final pencil lines, use a dark pencil, black crayon, or permanent pen, and for the muzzle's skin tone use peach, light brown, or diluted watercolor when you color Mickey's muzzle.
My ear circles or eye ovals don't line up and my guidelines smudge—how do I fix that while following the steps?
To keep the two equal ear circles and the eye ovals aligned, use a cup or coin as a template for the head and ears, draw the vertical and horizontal placement guidelines very lightly so you can carefully erase the extra guideline lines before you trace with the marker, and wait for the ink to dry to avoid smudging when you color.
How can we adapt the drawing steps for younger children or make it more challenging for older kids?
For preschoolers, lightly pre-draw the large head circle, ear circles, and muzzle and let them add the eyes, pupils, nose, and color, while older children can add a full body, detailed shading on the muzzle, and vary black marker line thickness when tracing the final pencil lines.
What are simple ways to extend or personalize the Mickey drawing before sharing it on DIY.org?
Personalize your drawing by changing Mickey's smile or pupil placement for different expressions, adding a hat or outfit, creating a colorful background scene before you color the head and ears black and the muzzle a skin tone, and then photograph it to share on DIY.org.