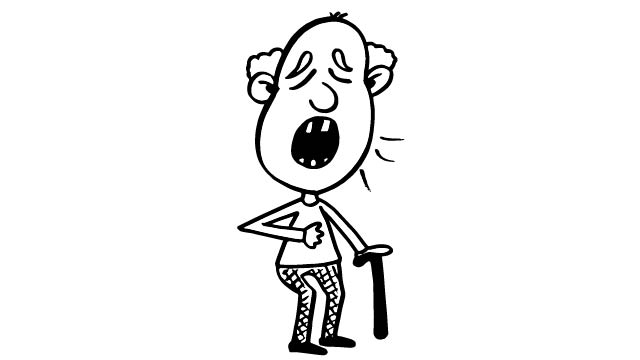
Drawing An Old Person
Draw an older person using simple shapes, adding wrinkles, hair, and posture. Practice observation, proportion, and shading with pencil and eraser.

Drawing Apps
Step-by-step guide to drawing an older person
Step 1
Place your paper and pencil on a flat table in a well-lit spot.
Step 2
Pick one photo or look in a mirror to use as your reference.
Step 3
Lightly sketch a simple oval for the head near the top of the paper.
Step 4
Draw a faint vertical line down the middle of the oval to mark the face center.
Step 5
Add a rounded rectangle under the head to show the torso.
Step 6
Mark small circles where the shoulders and hips will sit to plan the pose.
Step 7
Draw light lines from the shoulder and hip circles to make the arms and legs positions.
Step 8
Draw a horizontal guideline across the head for the eyes and another lower line for the nose and mouth.
Step 9
Using the guidelines draw eyes nose mouth and ears with simple shapes and make them a bit droopy to show age.
Step 10
Sketch hair with light strokes and make it thinner or a little receded if your character is older.
Step 11
Add small curved lines for wrinkles on the forehead around the eyes beside the mouth and a few lines on the neck.
Step 12
Gently erase the extra construction lines to clean up your sketch.
Step 13
Darken the main outlines to make the face and body shapes clearer.
Step 14
Add light shading on the side opposite your light source to give the face and clothes a round look.
Step 15
Share your finished older-person drawing on DIY.org.
Help!?
What can we use if we don't have a pencil, paper, or a mirror for the activity?
If you don't have a pencil use a soft B or colored pencil or charcoal (and an eraser to follow the 'erase construction lines' step), if you lack paper use printer paper or a sketch app on a tablet, and if you can't use a mirror grab a photo on your phone or tablet as your reference in the well-lit spot.
My drawing looks lopsided or the eyes are in the wrong place—how do I fix it?
If the face looks uneven or the eyes don't match the horizontal guideline, lightly remeasure distances with your pencil using the faint vertical and horizontal guidelines and adjust them before erasing construction lines and darkening the main outlines so the droopy eyes and nose sit correctly.
How can I change the activity for different ages so it's not too hard or too easy?
For younger kids simplify to one big oval head, a rounded rectangle torso, and dots for eyes while skipping many wrinkle lines, and for older kids add thinner or receded hair, multiple small curved wrinkles on the forehead and neck, and more subtle side shading before sharing on DIY.org.
What are some ways to extend or personalize the finished older-person drawing?
Personalize it by drawing clothing and accessories over the rounded-rectangle torso, using colored pencils to add shading on the side opposite your light source, and make an age-progressed series by repeating the steps with different amounts of hair recession and wrinkle lines.
Watch videos on how to draw an older person
How to draw a Grandpa (easy!) | Step by step drawings
4 Videos
How to draw a Grandpa (easy!) | Step by step drawings
How To Draw A Cartoon Grandma
How to Draw Old People - Realistic Portrait Study
How To Draw A Cartoon Grandpa
Facts about portrait drawing for kids
🖼️ Portraits have been created for thousands of years — ancient civilizations painted faces to remember family and leaders.
👵 Wrinkles show a story: they form from repeated facial expressions, sun exposure, and skin becoming thinner with age.
✏️ Graphite (what pencil lead is made of) started being used by artists in the 1500s and is still a sketching favorite.
👀 Drawing from life trains observation — artists spot tiny posture and shadow details that photos can miss.
📏 Artists often measure people in 'head' units — an adult is typically about 7–8 heads tall to keep proportions right.
How do I help my child draw an older person step by step?
What materials do we need to draw an older person?
What ages is this drawing activity suitable for?
What are the benefits of drawing an older person with my child?
