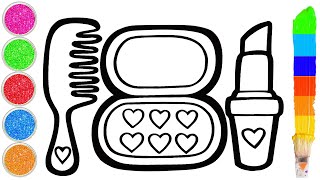
Draw with makeup
Use safe, washable makeup to draw colorful pictures on paper or perform simple face designs, learning blending, texture, and color mixing techniques.


Step-by-step guide to draw with safe, washable makeup
Kids' makeup drawing: Step-by-step guide for beginners
Step 1
Gather all Materials Needed and put them on a clean table.
Step 2
Lay a paper towel under your paper or sit in front of a mirror and open your palette so spills stay tidy.
Step 3
Decide whether you will draw on paper or do a simple face design and tell an adult your choice.
Step 4
Do a quick skin patch test by putting a tiny dot of makeup on the inside of your wrist and wait five minutes to check for irritation.
Step 5
If you chose paper sketch a light pencil outline of your picture to plan shapes.
Step 6
If you chose a face design mark small dots on the mirror where you want eyes cheeks or a nose design to plan placement.
Step 7
Put small amounts of the colors you want to use into separate wells in your palette or bowls.
Step 8
Mix two colors in the palette with a brush to make a new shade and stir until the color looks even.
Step 9
Test the mixed color on a scrap paper or the back of your wrist so you can see the shade before using it.
Step 10
Apply base colors to large areas of your paper or face using a brush or cotton swab to cover the main shapes.
Step 11
Blend color edges by lightly brushing or dabbing with a clean slightly damp brush or cotton swab to make smooth transitions.
Step 12
Add tiny details or texture by dotting or drawing small lines with the tip of a brush or a cotton swab.
Step 13
If you painted your face gently remove the makeup with wipes or cleanser and rinse your skin with water.
Step 14
Rinse your brushes and tools in water and dry them on a paper towel to clean up.
Step 15
Take a photo of your finished creation and share it on DIY.org.
Help!?
What can we use instead of a makeup palette, special brushes, or face wipes if we don't have them?
If you don't have a makeup palette or brushes, substitute a watercolor set or face-paint sticks for pigments, an egg carton or muffin tin for separate wells, and clean household paintbrushes or cotton swabs to follow the 'put small amounts...into separate wells' and 'apply base colors...using a brush or cotton swab' steps.
My colors look streaky or smudge on the skin/paper—what should I check or do differently?
If colors look streaky or won't blend, follow the 'blend color edges' step by lightly dabbing with a clean slightly damp brush or cotton swab and retest the shade on scrap paper or the back of your wrist after mixing, as described in the instructions.
How can we adapt this activity for younger or older kids?
For younger children use paper instead of a face, choose washable watercolor or face-paint sticks, pre-mix base colors in wells and have an adult help with the 'skin patch test' and mirror placement, while older kids can try finer details, mixing shades and 'adding tiny details' with small brushes.
What are simple ways to personalize or make the finished design more special?
To personalize the design, create a custom palette by 'mixing two colors' to make new shades, use simple stencils or the tip of a cotton swab for patterned 'tiny details,' and finish by photographing the result to 'share it on DIY.org'.
Watch videos on how to draw with safe, washable makeup
How To Draw An Eyeshadow Kit
4 Videos
How To Draw An Eyeshadow Kit
How To Draw cute makeup set. Easy Drawing, Painting & Coloring For Kids and Toddlers_🌈🎨
How to Draw and Paint a Cute Makeup Set | Step by Step Drawing Tutorial
How to Draw a Makeup Set | Step by Step
Facts about face painting and kid-safe cosmetics
🎨 Subtractive mixing: when you layer pigments (like eyeshadow) the colors mix by absorbing light, so mixing lots of colors often makes brown or gray!
🧼 Many washable, water-based face paints and kid-friendly makeup wash off with just soap and water—no harsh scrubbing needed.
🖌️ Different tools and strokes (dabbing, stippling, sweeping) make textures—try them to paint fur, clouds, or sparkly gradients.
🌈 You can create tons of shades from a few basics—mixing primary pigments (red, blue, yellow) gives you a rainbow of new colors.
👩⚕️ Always patch-test: even gentle, hypoallergenic makeup can irritate some people, so try a tiny spot first on clean skin.
How do I do the 'draw with makeup' activity step by step?
What materials are needed to draw with makeup safely at home?
What ages is drawing with makeup suitable for?
What are the benefits and safety tips for makeup drawing with kids?
