Draw Trees That Bloom In Various Seasons!
Draw four trees showing spring blossoms, summer leaves, autumn colors, and bare winter branches using pencils, markers, and simple shading techniques.

Drawing Apps
Step-by-step guide to draw trees that bloom in various seasons
Step 1
Gather the materials from the list and put them on your table.
Step 2
Clear a flat workspace so your paper can lie flat while you draw.
Step 3
Lightly draw a large plus sign with your pencil to divide the paper into four equal boxes.
Step 4
In the top-left box draw a simple tree trunk and branch shapes for spring.
Step 5
Add many small round blossom shapes on the spring branches.
Step 6
Color the spring blossoms with pinks or reds using your markers or coloured pencils.
Step 7
In the top-right box draw a thicker trunk and fuller branch shapes for a summer tree.
Step 8
Draw many leaf shapes on the summer branches to make the tree look full.
Step 9
Color the summer leaves using several shades of green.
Step 10
In the bottom-left box draw a tree trunk and branches that still have some leaves for autumn.
Step 11
Color the autumn leaves with reds oranges and yellows.
Step 12
In the bottom-right box draw a tree trunk and thin bare branches for winter.
Step 13
Use your pencil to add light shading on the trunks and under each tree to show depth and shadow.
Step 14
Share your finished four-season trees on DIY.org.
Help!?
What can we use if we don't have markers or coloured pencils from the materials list?
If you don't have markers or coloured pencils, use crayons or watercolor paints to color the blossoms and leaves and keep your pencil for the light shading step under each tree as instructed.
My trees look uneven or too crowded in the squares—how can I fix that?
If your boxes or trees are uneven or crowded, lightly redraw the large plus sign with a ruler, sketch each trunk and branch first in pencil as the steps say, then erase and adjust before adding many small blossoms or leaves and coloring.
How can I adapt this activity for younger or older kids?
For younger children, simplify the top-left and top-right steps by drawing chunky trunks and using big sticker blossoms or leaf shapes, while older kids can follow the instructions exactly and add extra details like several green shades on summer leaves and more pencil shading under each tree.
What are some ways to extend or personalize the four-season tree project?
To enhance the project, add seasonal backgrounds (spring rainclouds, summer sun, autumn falling leaves, winter snowflakes), glue on tissue paper for textured blossoms or leaves, label each season, and then share your finished four-season trees on DIY.org as the final step.
Watch videos on how to draw trees that bloom in various seasons
How To Draw A Fall Tree - Preschool
4 Videos

How To Draw A Fall Tree - Preschool
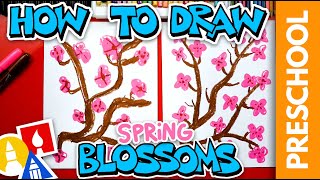
How To Draw Spring Blossoms - Preschool

How To Draw Trees | DIY Course

How to draw Trees in Park Nature Art || Easy Pencil Art
Facts about drawing trees and seasonal changes
🌸 Some cherry trees can produce hundreds to thousands of blossoms on a single tree each spring — a real flower parade!
🌿 A full-grown tree can carry thousands of leaves, each with tiny pores called stomata that help the tree breathe and cool itself.
🍂 Autumn colors appear when green chlorophyll fades and yellow, orange, and red pigments that were hiding all summer become visible.
❄️ Many deciduous trees drop their leaves in winter to save water and avoid damage from snow and freezing temperatures.
✏️ Artists use pencil grades (like 2B for light shading and 6B for dark tones) plus techniques like hatching and cross-hatching to create depth.
How do I draw four trees that show spring, summer, autumn, and winter?
What materials do I need to draw seasonal trees?
What ages is this four-season tree drawing activity suitable for?
What are the benefits of drawing trees that bloom in different seasons?
