Draw a meal for a wizard
Draw a magical meal for a wizard, sketching enchanted dishes, vibrant colors, textures, and labels while explaining ingredients and flavors in a short description.

Drawing Apps
Step-by-step guide to draw a magical meal for a wizard
Step 1
Gather the materials listed and place them where you can reach them easily.
Step 2
Sit at a table with good light so you can see your colors and details.
Step 3
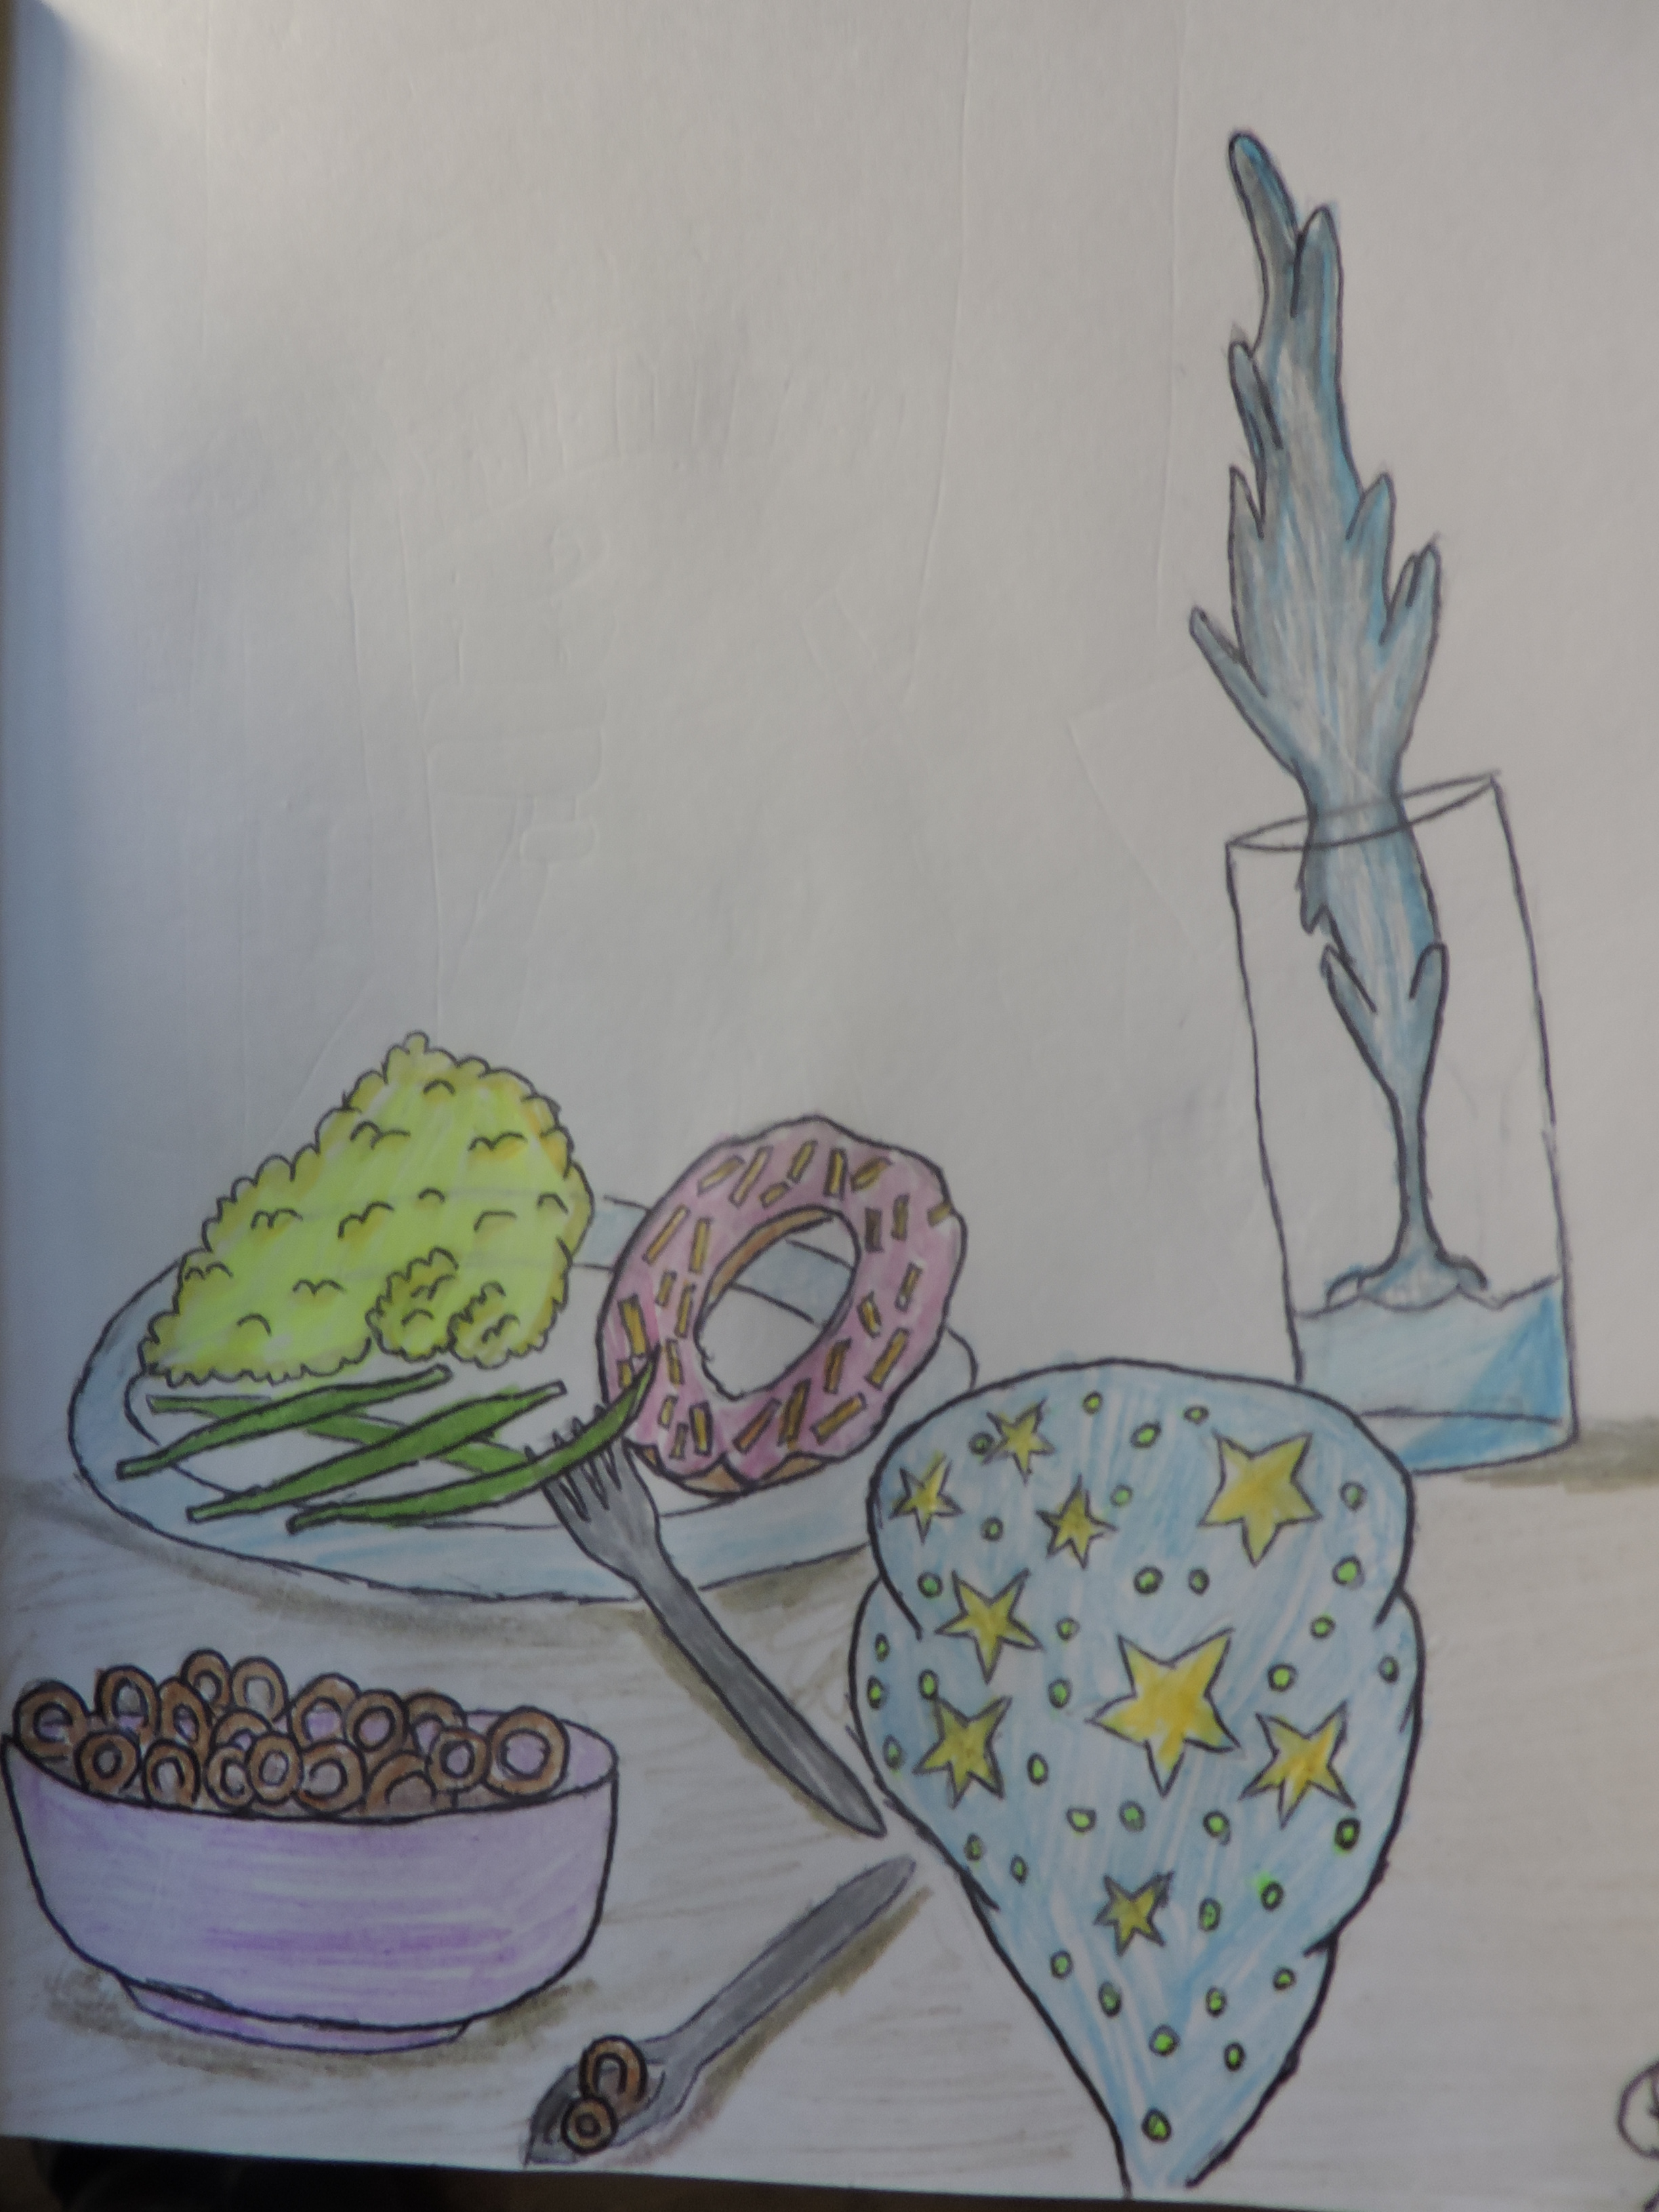
Decide what the wizard’s main dish will be and choose two side dishes to go with it.
Step 4
Lightly sketch a plate or platter on your paper using your pencil.
Step 5
Sketch the main dish on the plate with simple shapes to show its size and form.
Step 6
Sketch the two side dishes and any small toppings around the main dish.
Step 7
Add magical elements around or on the food like sparkles wings steam or floating herbs.
Step 8
Draw texture marks on each dish such as swirls for soup crumbs for bread or drips for sauce.
Step 9
Draw small lines or boxes pointing to each dish where you will write labels.
Step 10
Write a short 1–2 sentence description next to each label that explains the ingredients and flavors.
Step 11
Trace the important lines of your drawing with the black pen to make them stand out.
Step 12
Wait for the ink to dry completely before touching the page.
Step 13
Erase any remaining pencil lines carefully so your ink looks clean.
Step 14
Colour your drawing with bright vibrant colors and use different strokes to show textures.
Step 15
Share your finished magical meal on DIY.org
Help!?
What can we use if we don't have a black pen or certain colors listed in the materials?
If you don't have a black pen, trace important lines with a fine-tip permanent marker or a dark pencil as you 'Trace the important lines of your drawing with the black pen', and substitute missing colors with markers, crayons, or watered-down paint when you 'Colour your drawing with bright vibrant colors'.
My ink or eraser left smudges — how do I keep the drawing clean while following the steps?
To prevent smudging after you 'Trace the important lines of your drawing with the black pen', rest a scrap sheet under your hand, wait for the ink to dry completely before touching the page, and then gently 'Erase any remaining pencil lines carefully'.
How can this activity be changed for younger kids or older kids?
For younger kids, simplify by pre-sketching a plate and having an adult help write the 1–2 sentence labels so they can focus on adding 'magical elements' and coloring, while older kids can add detailed texture marks, realistic shading, and longer ingredient descriptions next to each label.
What are some ways to enhance or personalize the wizard meal after finishing the drawing?
Make a personalized menu by keeping the 'labels' and 1–2 sentence descriptions, add tactile 'magical elements' like glitter glue or layered paper for wings and steam, photograph the finished piece, and share it on DIY.org as instructed.
Watch videos on how to draw a magical meal for a wizard
How to draw a Wizard Step by Step | Wizard Drawing Lesson
4 Videos
How to draw a Wizard Step by Step | Wizard Drawing Lesson
Guide to Drawing Wizards | Dark Fantasy
How To Draw A Happy Meal | Easy Step-by-Step Tutorial for Beginners
How to Draw Food - A Step-by-Step Guide 🍴
Facts about food-themed drawing for kids
🧙♂️ In many tales, wizards serve magical feasts from bubbling cauldrons — a great idea for enchanted dishes!
🧁 Some fictional foods (like lembas or Butterbeer) inspired real-life recipes and yummy theme-park treats.
🎨 Warm colors (reds, oranges) can make food look cozy and tasty, while cool colors (blues, purples) feel mysterious.
🌿 Historically herbs were used both as seasonings and medicines — perfect ingredients for a wizard’s menu.
📝 Chefs write short tasting notes to explain flavors — kids can label their dishes with fun descriptions like “sparkle-sour” or “moon-butter.”
How do you draw a magical meal for a wizard?
What materials do I need to draw a wizard's magical meal?
What ages is this magical meal drawing activity suitable for?
What are the benefits of drawing a magical meal for a wizard?
