Draw a Back-to-school Comic Strip
Draw a four-panel back-to-school comic strip with characters, dialogue, and simple backgrounds. Plan scenes, practice storytelling, and add color to finish.


Step-by-step guide to draw a back-to-school comic strip
HOW TO MAKE COMIC STRIP FOR SCHOOL PROJECT / ACTIVITY
Step 1
Decide on a fun back-to-school idea and the main problem or joke your comic will show.
Step 2
Plan what happens in each of the four panels by writing one short sentence per panel.
Step 3
Draw four equal panels on your paper using your ruler and pencil.
Step 4
Sketch the main characters lightly in each panel with your pencil.
Step 5
Draw simple backgrounds in each panel to show where the action takes place.
Step 6
Draw speech bubbles for characters where you want them to talk.
Step 7
Write short dialogue inside each speech bubble in pencil so it fits the space.
Step 8
Add a title and your name somewhere on the comic page.
Step 9
Trace over your final pencil lines with a black pen or marker to make them bold.
Step 10
Wait for the ink to dry then erase the pencil lines gently with your eraser.
Step 11
Color your comic neatly using your colouring materials.
Step 12
Share your finished back-to-school comic strip on DIY.org
Help!?
What can we use if we don't have a ruler, black pen, or colouring markers?
Use the straight edge of a book or a folded paper to 'Draw four equal panels', trace final lines with a fine-tipped permanent marker or dark crayon instead of a black pen, and swap markers for coloured pencils, crayons, or washable paints as your colouring materials.
My speech bubbles and pencil sketches smudge or my panels look uneven—how do I fix that?
To prevent smudging, follow 'Wait for the ink to dry' before you 'erase the pencil lines' and use light pencil strokes when you 'Sketch the main characters' and a ruler or book edge to keep the panels straight and equal.
How can I adapt this four-panel comic activity for different ages?
For younger kids simplify the planning to one simple sentence per panel with stick figures and crayons for 'Colour your comic', while older kids can write more detailed dialogue, add backgrounds, shading, and trace final lines with a fine black pen for a polished look.
What are some ways to extend or personalize our back-to-school comic strip after it's finished?
Add a creative title and your name as instructed, include custom sound-effect words in the panels, experiment with border styles or mixed media when you 'Color your comic', and photograph or scan the finished page to share on DIY.org.
Watch videos on how to draw a back-to-school comic strip
How to Make Your Own Comic | Toontorial | @cartoonnetworkuk
4 Videos
How to Make Your Own Comic | Toontorial | @cartoonnetworkuk
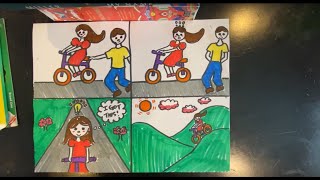
DIY Comic Strip | Visual Art | ArtistYear Create

Kids Make Comics #7: Making Comic Panels
EASY Comic Strip Tutorial for Beginners
Facts about comic strips and storytelling for kids
📰 The Yellow Kid (1890s) is often called the first popular American newspaper comic strip.
✍️ Comic artists usually start with tiny thumbnail sketches to plan pacing and jokes before drawing full panels.
📐 A four-panel comic format is called yonkoma in Japan and often follows a four-part rhythm: setup, development, twist, and conclusion.
🎒 School scenes are classic comic material — Peanuts used back-to-school stories many times with Charlie Brown and his friends.
🎨 Color choices affect mood: warm colors (reds, yellows) feel energetic, cool colors (blues, greens) feel calm.
How do I draw a four-panel back-to-school comic strip?
What materials do I need to make a back-to-school comic strip?
What ages is this comic strip activity suitable for?
What are the benefits and fun variations of drawing a back-to-school comic strip?
