DIY Jewelry: Solder Jewelry
Make simple soldered jewelry using copper wire, metal charms, and a soldering iron with adult supervision, learning safe techniques and basic metal joining skills.


Step-by-step guide to solder jewelry
The Basics of Soldering | Jewelry 101
Step 1
Put on your safety glasses so your eyes are protected.
Step 2
Place a heatproof surface where you will work.
Step 3
Open a window or turn on a fan for good ventilation.
Step 4
Put the soldering iron in its stand on the heatproof surface.
Step 5
Ask an adult to plug in the soldering iron and heat it to about 350°C (660°F).
Step 6
Ask an adult to tin the soldering iron tip by melting a little solder on it so it heats evenly.
Step 7
Cut a piece of copper wire to the length you want for your jewelry with wire cutters.
Step 8
Use round-nose pliers to bend and shape the wire into your chosen design.
Step 9
File the wire ends and the spots where pieces will join to remove any oxidation.
Step 10
Hold the charm and the wire together in the exact spot you want the joint using flat-nose pliers so they do not move.
Step 11
Apply a small amount of flux to the joint area with a tiny brush or cotton swab.
Step 12
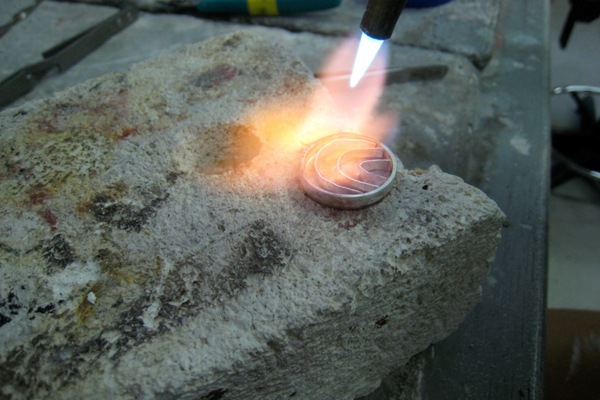
Ask an adult to solder the joint by heating the joint and adding a small amount of solder until it flows and makes a shiny connection.
Step 13
Let the piece cool completely without touching it so the metal hardens.
Step 14
Smooth any rough spots with a file and use pliers to attach a jump ring or chain so the piece is wearable.
Step 15
Share your finished soldered jewelry creation on DIY.org
Help!?
What can we use if a soldering iron, flux, or copper wire are hard to find?
If you can't find an electrical soldering iron or flux, ask an adult to use a low‑temperature butane soldering pen with rosin flux paste from a hobby store, and substitute brass or sterling silver wire for the copper wire if needed.
The solder won't flow or the joint looks dull—what should we check and fix?
If the solder won't flow or makes a dull blob, re‑file the joint area to remove oxidation, reapply flux to the joint, make sure the adult heats the joint (not just the solder) with a tinned soldering iron at about 350°C, and hold the pieces steady with flat‑nose pliers until the solder wets the metals.
How can we adapt this soldering activity for younger or older kids?
For younger children (about 5–8) let them design, cut, bend with round‑nose pliers, and file the wire while an adult does all heating and soldering, and for older kids (9+) let them help tin the tip, apply flux, and practice soldering under close adult supervision.
What are simple ways to extend or personalize our finished soldered jewelry?
After the piece cools, you can texture the wire before soldering with a hammer, add a patina or polish with a jewelry cloth, attach extra jump rings or beads to the chain, and then share the finished creation on DIY.org.
Watch videos on how to solder jewelry
Beginner Soldering: Huggie Pendants | Jewelry 101
4 Videos

Beginner Soldering: Huggie Pendants | Jewelry 101
5 Soldering Tips for Beginners: A Silversmithing Tutorial

how to soft solder jewellery | tiffany technique | for beginners | step by step

Master the Basics of Soldering 🔥 | Learn How to Solder Jewelry Like a Pro
Facts about metalworking for kids
🔥 Solder melts at relatively low temperatures (many common solders melt around 180–230 °C), so it joins metals without melting the main pieces.
🪙 Copper has been used for jewelry and tools for thousands of years—people were working copper as far back as 6,000+ years ago.
🧯 Safety first: soldering produces hot metal and fumes, so always work with adult supervision, ventilation, and safety glasses.
⚙️ Jewelers use different solders called hard, medium, and soft—each melts at a different temperature so you can join pieces in stages.
✨ With just copper wire, a few metal charms, and a basic soldering iron, you can create rings, pendants, and tiny metal sculptures in one session.
How do I teach my child to make simple soldered jewelry safely?
What materials and tools are needed for kid-friendly soldered jewelry?
What ages is soldered jewelry making suitable for?
What are the benefits and key safety tips for kids soldering jewelry?
