DIY Jewelry: Build a Jewelry Holder
Build a colorful jewelry holder using recycled materials, beads, and simple tools to organize necklaces and bracelets while learning measuring and decorating skills.


Step-by-step guide to build a colorful jewelry holder
Easy Wooden DIY Jewelry Organizer - How To Make Using Scrap Wood
Step 1
Gather all the materials and spread them out on a clean table so you can see everything.
Step 2
Use the ruler and pencil to draw a rectangle about 20 cm by 12 cm on the cardboard for the display panel.
Step 3
Cut out the rectangle carefully with scissors along your pencil lines.
Step 4
Draw a straight line 3 cm from the bottom edge across the full width of the rectangle.
Step 5
Fold along that 3 cm line to make a tab and crease it so the panel can stand up.
Step 6
Fold the tab back 90 degrees so the panel stands upright on the table like a little sign.
Step 7
Decorate the front of the panel with your coloring materials and make it bright and fun.
Step 8
Mark evenly spaced dots on the upper half of the panel where you want the skewers to go about 2 cm apart.
Step 9
With an adult, poke small holes through each marked dot using the pushpin.
Step 10
Trim the wooden skewers to about 8 cm lengths using scissors so they will stick out a little from the panel.
Step 11
Push each trimmed skewer into a hole until it holds steady and sticks out to make a hanger for jewelry.
Step 12
Slide a few beads onto each skewer to decorate them and tape or glue the skewer ends on the back for extra hold.
Step 13
Share your finished jewelry holder on DIY.org
Help!?
What can we use if we don't have wooden skewers or a pushpin?
If wooden skewers or a pushpin are missing, substitute trimmed bamboo chopsticks or 8 cm pieces of plastic drinking straw for the skewers and use a thumbtack, sewing needle (with adult help), or small awl to make the holes in the cardboard.
What should we do if the skewers wobble or fall out after pushing them into the panel?
If skewers wobble after the step 'Push each trimmed skewer into a hole', widen each hole slightly with the pushpin, add a drop of glue into the hole before inserting the 8 cm skewer, and tape or glue the skewer ends on the back for extra hold as the instructions suggest.
How can we adapt this activity for different ages?
For ages 3–5, have an adult pre-cut the 20 cm × 12 cm rectangle, fold the 3 cm tab, and make the pushpin holes while the child decorates and slides beads, whereas ages 8+ can measure, cut, poke holes themselves with supervision, and trim their own skewers to about 8 cm.
How can we extend or personalize the jewelry holder after finishing it?
To enhance the finished holder, glue felt or decorative paper to the front after the 'Decorate the front' step, add a second folded panel to create a double-sided stand, or label each skewer with a name or color pattern of beads to organize jewelry.
Watch videos on how to build a colorful jewelry holder
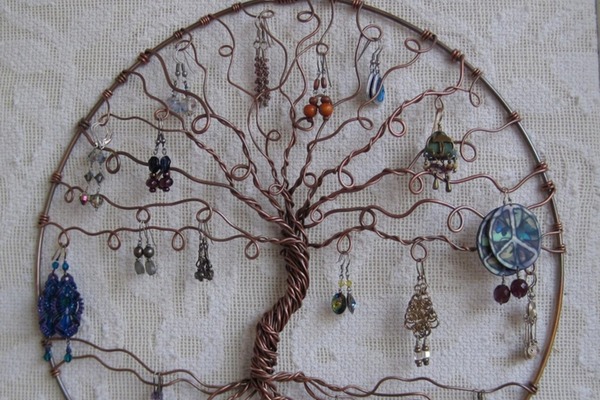
Make an Earring Holder!
4 Videos

Make an Earring Holder!

DIY - How to make Jewelry Organizer with waste Shoebox

DIY Bracelet Holder Stand | Tutorial | Jewelry stand Holder | Bangle Stand | How to make
DIY Popsicle Jewelry Box | Easy Handmade Mini Jewelry Organizer
Facts about recycled crafts for kids
♻️ Upcycling turns old stuff into new projects — global municipal solid waste is over 2 billion tonnes a year, so reusing materials helps reduce waste.
📿 Some of the oldest beads ever found are more than 100,000 years old, showing people have loved decorating themselves for a very long time.
🎨 Bright colors and contrast make it easier to spot jewelry — a colorful holder helps you find your favorite necklace faster.
📏 Many necklaces are around 40–50 cm long, so measuring hook spacing helps keep necklaces from tangling.
🧵 Cardboard, jars, and egg cartons are perfect recycled materials for jewelry holders — cheap, lightweight, and easy to decorate.
How do I build a DIY jewelry holder using recycled materials?
What materials do I need to make a colorful jewelry holder with beads?
What ages is a DIY jewelry holder activity suitable for?
What are the benefits and safety tips for making a DIY jewelry holder, and are there variations?
