Dinosaur Drawings
Draw and color different dinosaurs using reference pictures, learn proportions and scale, label body parts, and compare their sizes to modern animals.


Drawing Apps
Step-by-step guide to draw and color dinosaurs
How to Draw a Dinosaur for Kids! (Easy Step-by-Step Tutorial)
Step 1
Pick three dinosaur reference pictures you like and lay them side by side.
Step 2
Choose one dinosaur from your references to draw first.
Step 3
Look closely at that dinosaur and say the big body parts out loud (head neck body tail legs).
Step 4
Lightly sketch simple shapes (circles ovals rectangles) to block out the dinosaur’s body.
Step 5
Use your ruler to measure key parts on the reference picture and write those numbers on the picture.
Step 6
Decide a scale ratio for your drawing (for example 1 cm on the reference = 2 cm on your paper).
Step 7
Use your ruler to mark the scaled measurements on your sketch so each part matches the ratio.
Step 8
Connect the marked shapes to make a clean outline of the dinosaur and erase extra sketch lines.
Step 9
Add details like eyes spikes claws and skin texture to your dinosaur outline.
Step 10
Trace over important lines with a fine-tip pen or marker so the drawing stands out.
Step 11
Read the real-life length of your dinosaur from the reference and write that measurement on your page.
Step 12
Pick a modern animal to compare and write down its real-life length from a reference or memory.
Step 13
Draw a simple scaled outline of the modern animal next to your dinosaur using the same scale ratio.
Step 14
Color your dinosaur and the comparison animal with your colouring materials.
Step 15
Share your finished dinosaur drawing and size comparison on DIY.org.
Help!?
What can we use if we don't have a ruler, fine-tip pen, or certain colouring materials from the instructions?
Use any straight edge like a hardcover book or the edge of a cereal box to measure and mark scaled measurements, substitute a sharpened pencil or thin felt-tip marker for the fine-tip pen when tracing important lines, and use crayons, colored pencils, or washable markers in place of specialized colouring materials for the coloring step.
My dinosaur looks out of proportion after connecting the shapes—what should I check or redo from the steps?
If proportions are off, revisit the step 'use your ruler to measure key parts on the reference picture and write those numbers', confirm your chosen scale ratio, re-mark the scaled measurements on your sketch, and erase only the extra sketch lines before reconnecting the shapes for a cleaner outline.
How can I adapt this activity for very young children or older kids who want more challenge?
For younger kids simplify step 'lightly sketch simple shapes' by letting them trace big shapes and skip precise measurements, while older kids should follow the full measuring steps, choose a detailed scale ratio, add anatomical details in the 'add details' step, and write exact real-life lengths on the page.
What are simple ways to extend or personalize the finished dinosaur drawing beyond what's in the instructions?
Enhance the project by turning the inked and colored dinosaur and scaled modern animal into a labeled comparison poster using the 'read the real-life length' measurements, adding habitat background with your colouring materials, and photographing the result to share on DIY.org.
Watch videos on how to draw and color dinosaurs
Draw ALL These Dinosaurs! 🖍️ Easy & Fun Step-by-Step for Kids!
4 Videos
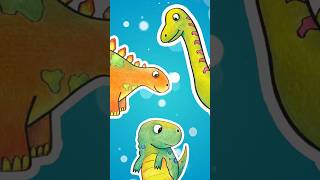
Draw ALL These Dinosaurs! 🖍️ Easy & Fun Step-by-Step for Kids!

How to Draw Dinosaurs 🦖 | Easy Step-by-Step Drawing Tutorial for Beginners & Kids
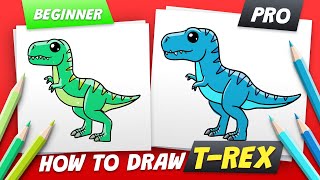
How to Draw Trex dinosaur (Draw for Kids) Beginner vs Pro - Easy Step By Step
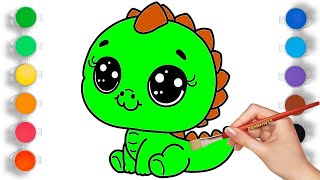
How to Draw a Cute Dinosaur Step by Step | Dinosaur Drawing Tutorial for Kids and Beginners
Facts about dinosaur anatomy and drawing
🦖 Tyrannosaurus rex had teeth that could reach about 30 cm (12 in) long — great detail to practice when drawing faces!
🐦 Modern birds are living dinosaurs, so studying bird shapes helps you imagine how dinosaurs might have looked in motion.
📏 Some sauropods grew over 30 meters (100 ft) long — imagine lining up three school buses to show their length!
🐊 Crocodilians are among a dinosaur's closest living relatives, so their skin and posture are useful reference for textures and stance.
🎨 Scientists can sometimes infer dinosaur colors from fossilized pigment structures called melanosomes — you can experiment with real palettes!
How do I guide my child to draw and color different dinosaurs?
What materials do I need for a dinosaur drawing activity?
What ages is this dinosaur drawing activity suitable for?
What are the benefits of drawing and labeling dinosaurs with children?
