Define surrealism
Create a surreal collage from magazine pictures, glue, and scissors, then write a short definition of surrealism based on your artwork and unusual combinations.
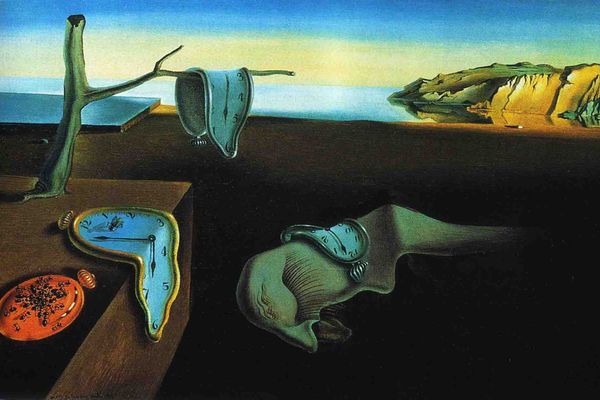
About this activity
Create a surreal collage from magazine pictures, glue, and scissors, then write a short definition of surrealism based on your artwork and unusual combinations.
What you need
Step by step
- 1
Step 1
Clear a flat workspace and lay your large sheet of paper there.
- 2
Step 2
Gather magazines scissors glue pencil and coloring materials.
- 3
Step 3
Flip through the magazines and choose 8 to 12 pictures that look strange interesting or fun.
- 4
Step 4
Cut out the chosen pictures carefully with scissors.
- 5
Step 5
Arrange the cut-out pictures on the paper to create unusual or dreamlike combinations without gluing them.
- 6
Step 6
Try different placements until you find a layout that surprises you or makes you smile.
- 7
Step 7
Glue each picture to the paper one at a time starting with the background pieces.
- 8
Step 8
Add small drawn details or color to connect the images and make the scene stranger.
- 9
Step 9
Write a short one or two sentence definition of surrealism that explains how your collage uses unusual combinations to create surprising images.
- 10
Step 10
Share your finished collage and your short definition on DIY.org.
Fun facts
How do I guide my child to create a surreal collage and write a short definition of surrealism from their artwork?
To make a surreal collage, spread old magazines and cut out images that catch your eye. On a sheet of cardstock arrange unexpected combinations—animals with houses, floating objects—until the composition feels strange or funny. Glue pieces in place, add drawn details if wanted, then write a short definition of surrealism inspired by your work: note surprising juxtapositions, dreamlike qualities, and how the images make you feel. Display and discuss what makes it "surreal."
What materials do I need to make a surreal collage with magazine pictures?
You'll need old magazines, catalogs, or printed photos; child-safe scissors; glue stick or liquid glue; a backing like cardstock or poster board; a pencil for planning; markers or crayons for labels and accents; optional: tissue paper, stickers, washi tape, glue mat, smock, and a tray for scraps. For younger children, pre-cut images or safety scissors are recommended. Keep a recycling bin nearby for waste.
What ages is making a surreal collage and writing a short definition suitable for?
This activity suits children roughly ages 6–12 for independent cutting and writing; younger children (3–5) can participate with adult help using pre-cut images or stickers. Teens can explore more complex surreal concepts and write longer definitions. Supervise scissors and glue with younger kids, and adapt language prompts to the child's reading level. The activity builds skills across elementary ages and can be simplified or extended for different maturity levels.
What are the benefits of making surreal collages for kids?
Making surreal collages encourages creative thinking, visual literacy, and problem-solving as children combine unrelated images. It strengthens fine motor skills through cutting and gluing, expands vocabulary when they describe unusual combinations, and supports emotional expression by letting kids explore dreams or odd ideas. Writing a definition afterward builds critical thinking and language skills. It's a low-cost, open-ended activity that sparks imagination and confidence.
Watch & Learn
Need help?
What can we use instead of magazines, scissors, or glue if we don't have them?
If you don't have magazines or a large sheet of paper, print images or use old photos, flyers, greeting cards, or tape several sheets together as your base, have an adult pre-cut or tear images if scissors aren't available, and substitute glue with a glue stick, double-sided tape, or rubber cement.
What should we do if the cut-outs shift or the layout doesn't look right when we start gluing?
Follow the instruction to 'Arrange the cut-out pictures on the paper... without gluing them', take a photo or lightly trace positions with pencil, then glue starting with the background pieces and press flat or use small amounts of adhesive to avoid wrinkles and use tape for heavier pieces.
How can we adapt the collage activity for different age groups?
For younger kids, simplify by choosing 4–6 pre-cut or torn images and using crayons on thicker paper, while older children can use the 8–12 pictures, add detailed drawn elements and mixed media as in 'Add small drawn details or color', and write a more developed definition than the one-to-two sentence requirement.
How can we extend or personalize the collage after finishing the basic steps?
Enhance your piece by adding paint, fabric scraps, or small found objects when you 'Glue each picture', create a themed series of collages, expand your one-to-two sentence definition into a short artist statement, and then share the variations on DIY.org.