Decoupage an object
Decorate a small wooden box using cut paper, glue, and sealant to practice design, patterning, and safe crafting techniques step by step.

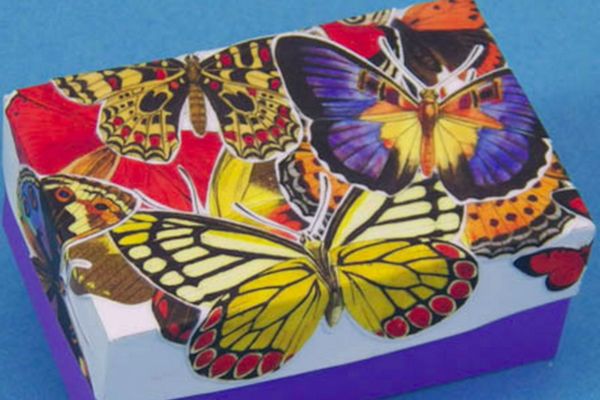

Step-by-step guide to decoupage a small wooden box
How to Decoupage for Beginners - DIY Tutorial | Hobby Lobby®
Step 1
Gather all the materials listed and bring them to your workspace.
Step 2
Cover your table with scrap paper to protect it from glue and sealant.
Step 3
Lightly sand the outside of the wooden box to make the surface smooth.
Step 4
Brush or wipe away sanding dust so the surface is clean.
Step 5
Cut the decorative paper into shapes and sizes you like for the box.
Step 6
Lay the paper pieces on the box without glue to plan your design.
Step 7
Brush a thin layer of glue onto a small area of the box where you will start.
Step 8
Press one paper piece onto the glued area and smooth from the center outward to remove air bubbles.
Step 9
Repeat applying glue and smoothing each paper piece until the box is covered with your design.
Step 10
Let the glued paper dry flat for 20 minutes.
Step 11
Trim any extra paper hanging over the edges with scissors so the edges look neat.
Step 12
Use the paintbrush to apply a thin coat of clear sealant over the entire box.
Step 13
Let the first coat of sealant dry for 1 hour.
Step 14
Apply a second thin coat of sealant and then let the box dry overnight.
Step 15
Share a photo of your finished decoupaged box and describe what you made on DIY.org.
Help!?
What can we use instead of a wooden box or decoupage glue if we can't find them?
If you don't have a wooden box, use a sturdy cardboard or tin box (skip heavy sanding) and substitute decoupage glue with a 1:1 mix of white PVA school glue and water, and use clear acrylic spray or polyurethane varnish as the sealant.
What should we do if the paper bubbles or starts to lift while we're smoothing it onto the box?
If paper bubbles or lifts during Step 7, gently lift that piece, add a thin layer of diluted PVA glue to the box, then press and smooth from the center outward with a paintbrush or credit card and let it dry flat for the 20-minute drying step.
How can we change the steps to make this decoupage project easier for little kids or more challenging for older children?
For younger kids, pre-cut large paper shapes and have them press pieces on with a paintbrush of diluted PVA glue while an adult handles sanding and the sealant coats, and for older kids let them do the light sanding, precise cutting, and both thin sealant coats for a neater finished box.
What are some ways to personalize or improve the finished decoupaged box after following all the steps?
To personalize the box after Step 13, paint the edges with acrylic before the second sealant, add glued-on beads or ribbons during Step 8 for texture, or line the interior with fabric and seal lightly for a custom finish.
Watch videos on how to decoupage a small wooden box
Decoupage for Beginners Tutorial | Hobbycraft
4 Videos
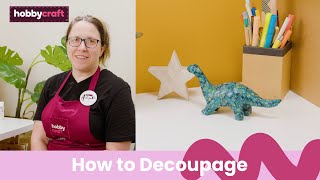
Decoupage for Beginners Tutorial | Hobbycraft
Easy Decoupage Art for Beginners: Step-by-step Tutorial with Mod Podge
Decoupage for Beginners | It's easy! | Learn how to do it and what to use | with Joan-Marie Domino
Easy Decoupage Beginner Ideas | Welcome to Nana's
Facts about decoupage and paper crafts
🎨 Decoupage comes from the French word "découper", which means "to cut out."
🏺 Paper-decorating techniques were used in China and Tibet centuries ago, long before decoupage became popular in Europe.
✂️ Thin papers like napkins and tissue blend into surfaces so your design can look more like paint than layered paper.
🪵 A good sealant protects a wooden box from water, dust, and fingerprints, helping your decorated box last for years.
♻️ Decoupage is perfect for upcycling—old magazines, gift wrap, and maps become colorful, one-of-a-kind art.
How do I decoupage a small wooden box step by step with a child?
What materials do I need to decoupage a small wooden box with my child?
What ages is decoupaging a wooden box suitable for?
What safety tips and fun variations can I try when decoupaging with kids?
