Create Stop Motion Character Art!
Make your own stop-motion character art by designing paper or clay figures, arranging small sets, photographing frame-by-frame, and compiling animations to tell a short story.


Step-by-step guide to create stop motion character art
How to Make a Stop-Motion Animation | Tate Kids
Step 1
Write a short 15 to 30 second story with a clear beginning middle and end on a scrap of paper.
Step 2
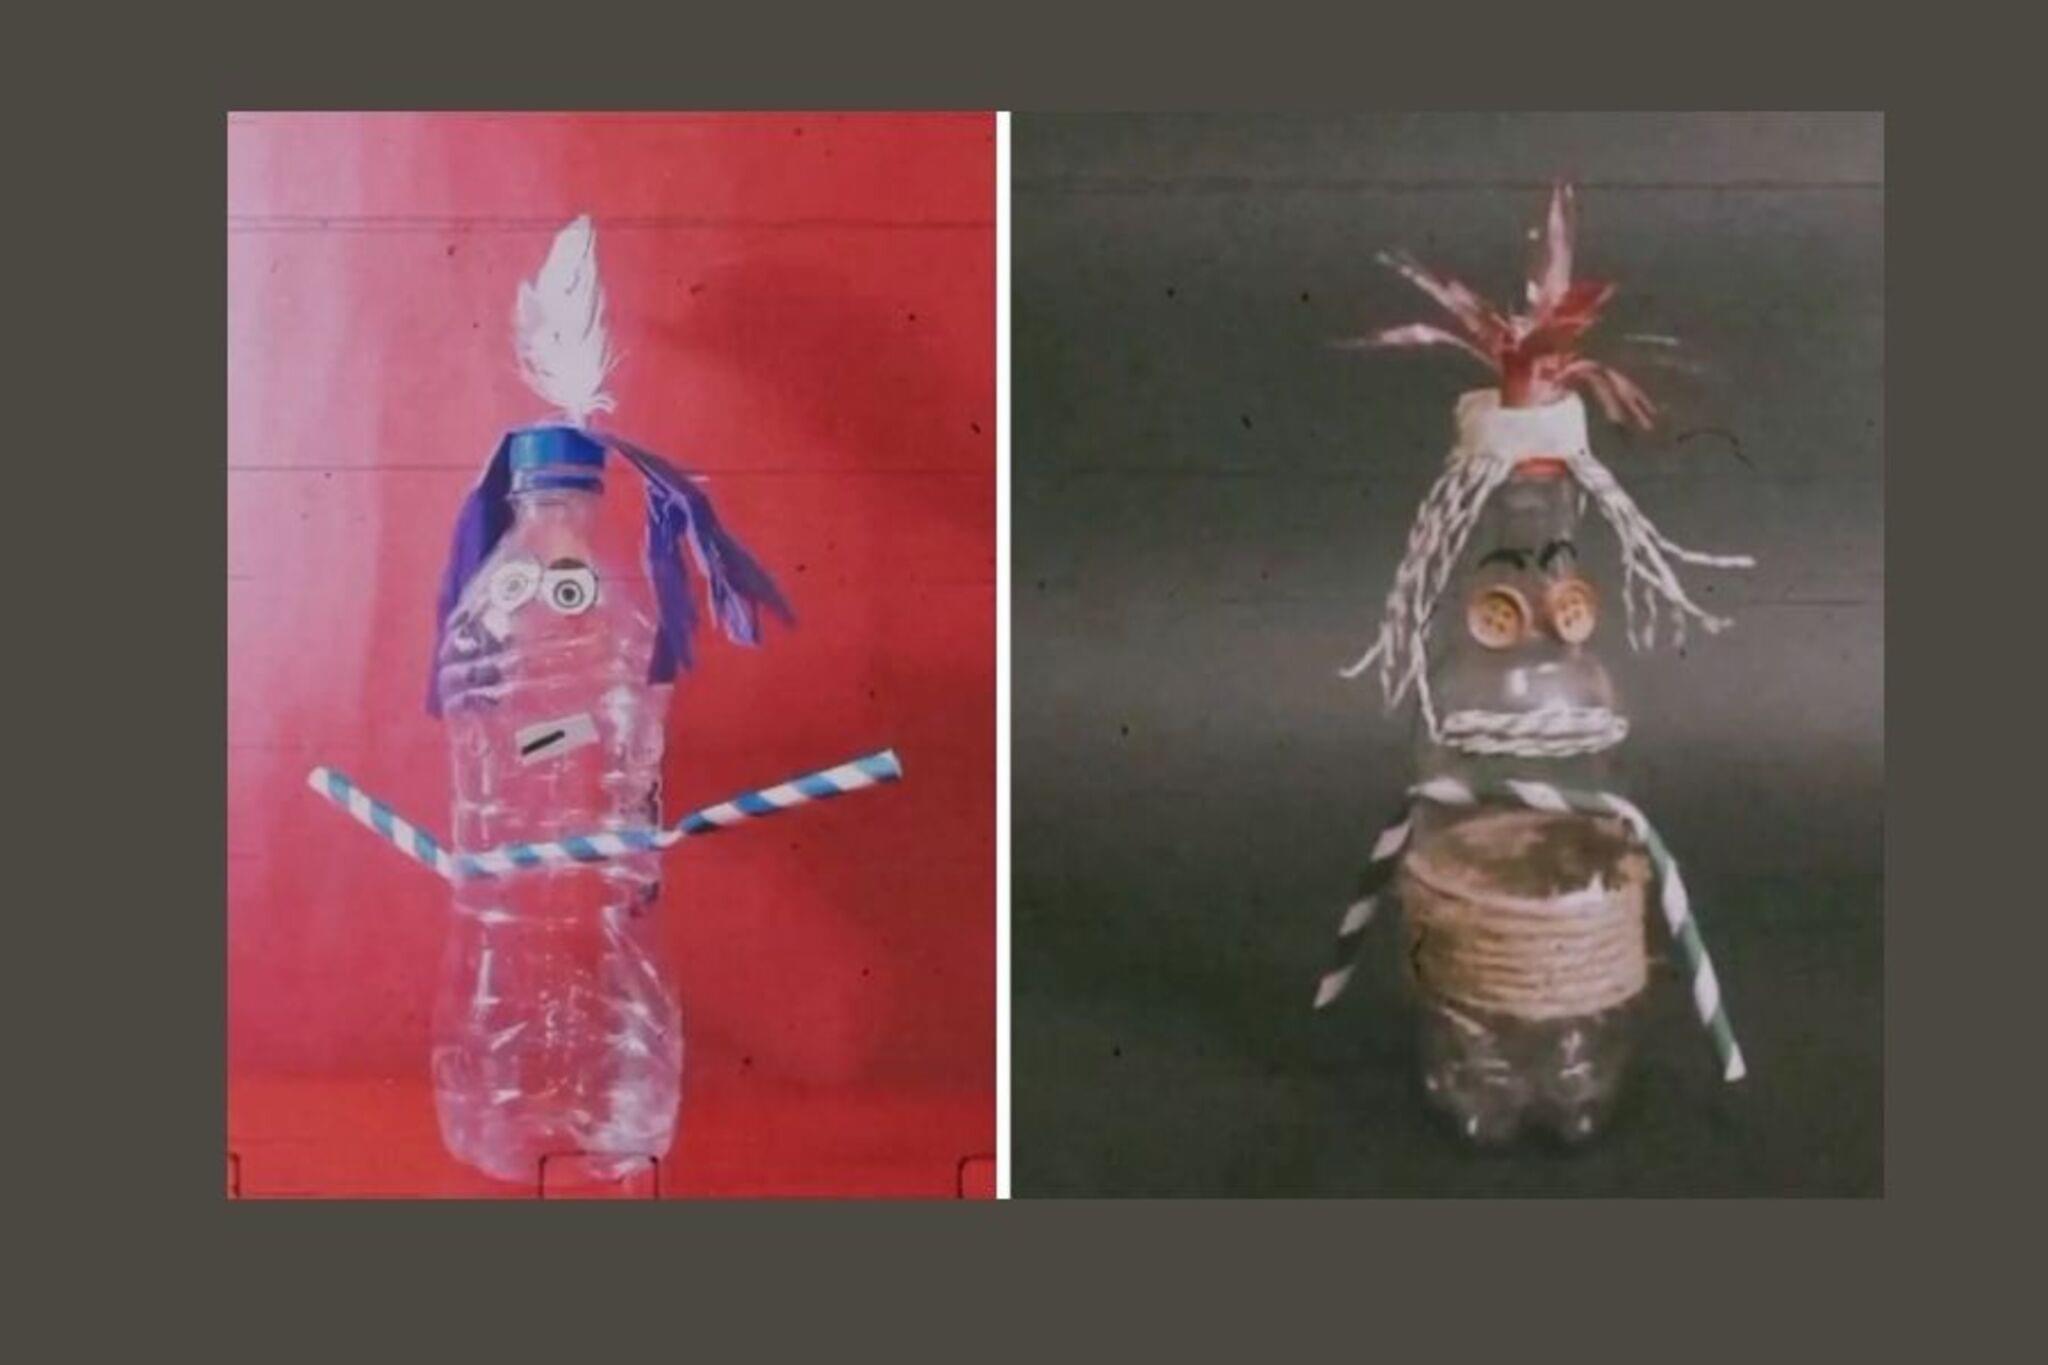
Draw or mold your main character and any friends using paper or clay and keep the designs simple.
Step 3
Cut out or shape separate parts like heads arms and legs so each part can move on its own.
Step 4
Attach parts with tape glue or by poking them onto toothpicks or pipe cleaners so the characters can stand or bend.
Step 5
Decorate a cardboard or shoebox background and arrange small props to make a tiny set for your story.
Step 6
Place your set on a flat sturdy surface and position the lamp to light the scene evenly without casting big shadows.
Step 7
Set a camera or phone on a stable base or tripod so the camera will not move and make sure the whole scene is in the frame.
Step 8
Take a test photo then move one part of your character a tiny amount about 1 to 3 millimeters and take another photo to practice steady moves.
Step 9
Photograph frame by frame by making one small movement then taking one photo until the scene is complete aiming for about 8 to 12 frames per second.
Step 10
Upload the photos to a stop motion app or video editor on a computer or tablet.
Step 11
Set the playback speed to about 8 to 12 frames per second and play your clip to check that the motion looks smooth.
Step 12
Add simple sound effects or music if you want to make your story more fun.
Step 13
Export the finished animation as a video file.
Step 14
Share your finished creation on DIY.org.
Help!?
What can we use if we don't have clay, a tripod, or pipe cleaners?
Use crumpled aluminum foil or rolled tissue wrapped with masking tape instead of clay, stack books or clamp your phone to a cup or binder clip instead of a tripod, and swap pipe cleaners for toothpicks or twist ties to attach movable parts.
My characters keep falling over or the motion looks jumpy — how can I fix that?
Stabilize characters with small bits of Blu-Tack or tape at the base, diffuse the lamp with a tissue to avoid big shadows, and follow the test photo step while moving parts only 1–3 millimeters with the camera on a stable tripod or book stack to prevent shifts.
How can I change the activity to suit different age groups?
For preschoolers have an adult write the 15–30 second story and provide pre-cut paper characters, for elementary kids let them cut separate parts and practice tiny 1–3 mm moves at about 8 fps, and for older kids encourage clay figures with toothpick or pipe cleaner armatures and editing sound in a stop motion app.
How can we make the stop motion more advanced or personal?
Personalize and enhance the project by decorating a cardboard or shoebox background with painted layers and textured props, adding cloth costumes or color gels on the lamp for mood, recording voiceovers or sound effects in your stop motion app before exporting, and then share the finished animation on DIY.org.
Watch videos on how to create stop motion character art
How to make Stop Motions for Beginners Part 1 (Stop Motion Tutorial)
4 Videos
How to make Stop Motions for Beginners Part 1 (Stop Motion Tutorial)
How to make Stop Motion Puppets or Doll: From Concept to Character - Tutorial #stopmotion #doll

Holly's One Day Build: How to create a stop motion puppet!
How to Make a Claymation Character | Easy Stop Motion Tutorial
Facts about stop-motion animation
🎬 It takes about 12 photos (frames) to make one second of stop-motion at 12 fps — a beginner-friendly speed for smooth motion.
🧱 Many clay animators use Plasticine, a modeling clay that doesn't dry out so characters stay squishy and re-posible.
🖨️ Studios like Laika 3D-print thousands of replacement facial pieces to give puppets super-detailed expressions.
🦖 Ray Harryhausen pioneered a technique called "Dynamation" to blend stop-motion creatures with live-action films.
📷 Tiny moves — often just a few millimeters per frame — are what make stop-motion look smooth and alive.
How do you make stop-motion character art?
What materials do I need to make stop-motion character art?
What ages is stop-motion character art suitable for?
What are the benefits of making stop-motion character art?
