Create a Paper-Cut Garden
Use safety scissors to cut and arrange colorful paper flowers, leaves, and insects into a layered paper-cut garden collage while practicing composition.


Step-by-step guide to create a paper-cut garden
Step 1
Collect all the materials.
Step 2
Choose one piece of cardboard or thick paper to be your garden base.
Step 3
Draw several simple flower shapes on the scrap paper with your pencil to practice.
Step 4
Cut out one flower template from the scrap paper using safety scissors.
Step 5
Use the scrap template to trace shapes onto different colored paper with your pencil.
Step 6
Carefully cut out the traced shapes from the colored paper using safety scissors.
Step 7
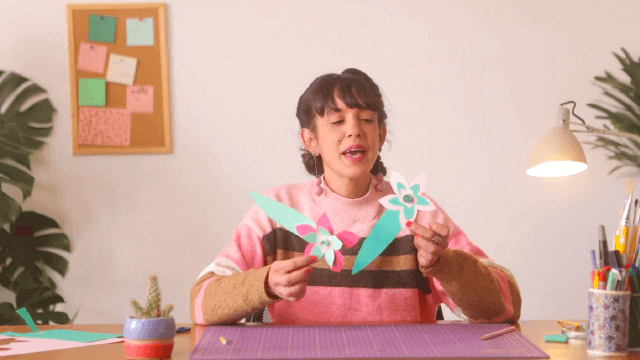
Decorate each cut shape with patterns and lines using your colouring materials or black marker.
Step 8
Lay the cut shapes on the base and move them until you like the composition.
Step 9
Fold small tabs on the back of some shapes so they will sit raised to make layers.
Step 10
Glue the background pieces onto the base.
Step 11
Glue the raised and foreground pieces onto the base on top of the background.
Step 12
Write a title for your garden and add your name on the base with the black marker.
Step 13
Share your finished Paper-Cut Garden on DIY.org.
Help!?
What can I use instead of the cardboard or colored paper if I don't have those materials?
Use a flattened cereal box or the back of a used poster as your garden base and substitute magazine pages or construction paper for the colored paper while still using safety scissors and your pencil for tracing.
My traced shapes tear or the folded tabs won't hold—what should I do during the cutting and tab-folding steps?
Cut slowly with a fresh pair of safety scissors and thicker paper, and score each 'fold small tabs' line with the blunt end of a pencil before folding and securing tabs with a small dab of tacky glue so raised pieces stay put.
How can I adapt this Paper-Cut Garden for younger children or make it more challenging for older kids?
For younger children pre-cut the flower templates and let them trace only and decorate with stickers, while older kids can design complex templates, use an X-Acto knife with adult supervision for detailed cuts, and add layered folds and intricate marker patterns.
What are some creative ways to enhance or personalize my finished Paper-Cut Garden before sharing it on DIY.org?
Personalize the composition by adding textured materials like tissue-paper petals or dried leaves glued to the base, use brads to make movable elements, seal any glitter with clear glue, and write a unique title with the black marker before photographing to share.
Watch videos on how to create a paper-cut garden
Paper Garden Craft
4 Videos
Paper Garden Craft

Mini Origami Pot Plant Tutorial - DIY - Paper Kawaii
How to make a Growing Paper Tree - Handcraft Tutorial
How to Make Paper Grass Step by Step Tutorial
Facts about paper crafts for kids
🌸 Kirigami (paper cutting) is the cut-and-fold cousin of origami and is often used to make delicate paper flowers and garden scenes.
✂️ Rounded-tip safety scissors let kids practice cutting skills with lower risk — many programs introduce them around age 3.
🐞 Beetles are the largest group of insects with over 350,000 described species — great inspiration for paper insect designs.
🎨 The rule of thirds is an easy composition trick: placing focal points off-center makes collages feel more dynamic.
🌱 Recycling one ton of paper can save about 17 mature trees — crafting from scrap paper helps reduce waste.
How do I make a layered paper-cut garden collage with my child?
What materials do I need for a paper-cut garden craft?
What ages is a paper-cut garden suitable for?
What are the benefits and safety tips for a paper-cut garden activity?
