Cosplay a literary character
Design and create a simple costume inspired by a favorite book character using fabric, cardboard, and craft supplies; practice research, gluing, and storytelling.


Step-by-step guide to Cosplay a literary character
How to make a Harry Potter or Hermione costume
Step 1
Pick one book character you want to cosplay and say their name out loud.
Step 2
Look through your book or pictures and write down three costume features to copy like colors shapes and one accessory.
Step 3
Collect the materials from the list that match the three features you wrote down.
Step 4
Draw a simple sketch on paper showing where the cape or tunic and the accessory will go on your body.
Step 5
Cut a rectangle of fabric to the right size for a cape or simple tunic.
Step 6
Cut a small slit or hole at the top of the fabric to make a neck hole or place for ties.
Step 7
Thread elastic or string through the slit and knot it so the cape or tunic can be worn.
Step 8
Trace the shape of one accessory onto cardboard with your pencil.
Step 9
Cut out the cardboard accessory along your pencil lines using safety scissors.
Step 10
Decorate the fabric cape or tunic with your colouring materials yarn and glue to match the character’s colors and symbols.
Step 11
Decorate the cardboard accessory with markers paint or yarn so it looks like your character’s prop.
Step 12
Attach tape glue or string to the accessory so you can hold or wear it comfortably.
Step 13
Put on your costume and practice a short scene or pose as the character for one minute.
Step 14
Share a photo and a short description of your finished cosplay on DIY.org
Help!?
What can we use instead of fabric, elastic, or cardboard if they're hard to find?
If fabric, elastic, or cardboard are hard to find use an old T‑shirt, pillowcase, or scarf cut into a rectangle for the cape, a shoelace or ribbon instead of elastic to thread through the slit, and a cereal box or thick paper for the accessory trace.
What should we do if the neck slit rips or the accessory tears while cutting?
If the neck slit rips or the cardboard accessory tears, reinforce the fabric slit with clear tape or a folded glued hem before threading the elastic and strengthen the cardboard prop edges with tape or an extra glued layer before cutting or decorating.
How can we adapt the steps for younger or older children?
For younger children, have an adult pre-cut the rectangle cape from a towel or old T‑shirt, pre-trace the accessory, and let them decorate with stickers and chunky crayons, while older children can trace complex props on thicker cardboard, sew or hot‑glue seams, add painted details, and stage a longer practiced scene.
How can we extend or personalize the cosplay activity after finishing the costume?
To personalize and enhance your cosplay, sew or glue a unique emblem with yarn onto the cape, add battery-powered LED tape along the edge before decorating, make a matching cardboard mask, and create a small backdrop to take the photo and practice a longer scene to share.
Watch videos on how to Cosplay a literary character
World Book Day costumes: The 9 easiest DIY book character costumes to make last minute
3 Videos
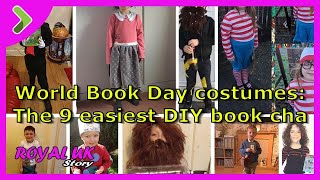
World Book Day costumes: The 9 easiest DIY book character costumes to make last minute
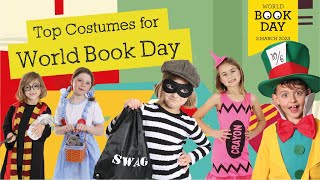
TOP World Book Day Costume Ideas for KIDS! 2023

DIY Harry Potter Costume - Robe Tutorial
Facts about costume design and cosplay for kids
🎭 The word "cosplay" was coined by Japanese reporter Nobuyuki Takahashi in 1984 after he saw fans in costumes at a U.S. science fiction convention.
🧵 Costume designers often begin with quick sketches and can make amazing outfits from fabric scraps, glue, and imagination—not just expensive materials.
📦 Corrugated fiberboard (cardboard) is light, strong, inexpensive, and one of the most recycled materials—great for making costume armor and props.
📚 Dressing up and acting out a character helps kids remember story details, build empathy, and improve reading comprehension.
✂️ You don’t need a sewing machine: felt, fabric glue, safety scissors, and simple stitches can make durable, kid-friendly costume pieces.
How do I help my child design and create a simple costume inspired by a favorite book character?
What materials do I need to cosplay a literary character using fabric, cardboard, and craft supplies?
What ages is this cosplay activity suitable for?
What are the benefits of cosplaying a book character for kids?
