Carve and emboss leather
Make a small leather bookmark by carving simple designs and embossing patterns into soft leather using safe tools and adult supervision.

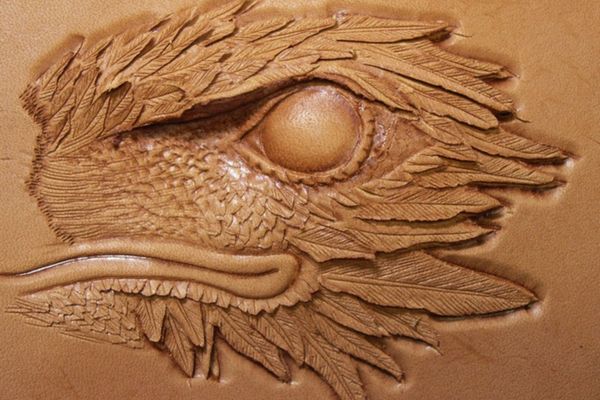

Step-by-step guide to make a leather bookmark by carving and embossing
Beginner's Guide to Leather Tooling: Simple Carving & Stamping in this Leather Cross Project
Step 1
Gather the Materials Needed and put them on a clean flat table.
Step 2
Lay the leather bookmark flat and smooth it with your hand so it sits steady.
Step 3
Choose a simple design and draw it once on a scrap of paper to practice.
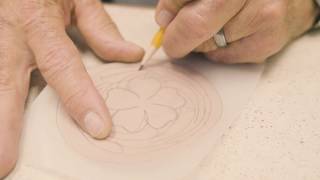
Step 4
Lightly draw your final design directly onto the leather with the pencil.
Step 5
Lightly mist the leather with the spray bottle or dab with a sponge until the surface looks dull.
Step 6
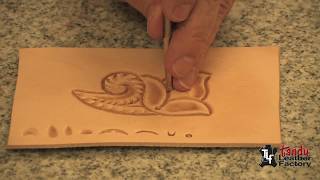
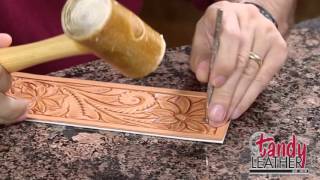
Trace firmly over each pencil line with the blunt stylus or bone folder to make shallow grooves.
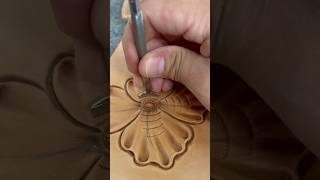
Step 7
Press the leather on each side of your lines with the rounded back of the spoon to push the background down and make the design stand out.
Step 8
Add small textured dots or patterns around the design by pressing the tip or back of the stylus into the leather.
Step 9
Leave the bookmark to dry flat until it feels completely dry to the touch.
Step 10
Decorate the carved and embossed areas with colouring materials and let any paint or marker dry.
Step 11
Rub a small amount of leather conditioner or beeswax onto the bookmark with the soft cloth to seal and protect it.
Step 12
Share your finished leather bookmark on DIY.org.
Help!?
What can we use if we can't find a leather bookmark or a blunt stylus/bone folder?
If a leather bookmark isn't available, use a 2–3 mm veg‑tanned leather scrap or thick faux leather and substitute a dull knitting needle, ball‑point pen cap, or the rounded end of a wooden dowel for the blunt stylus or bone folder.
Why did my design smudge or the leather feel damaged after pressing, and how can I avoid this?
If the design smudges or the leather tears, make sure you 'lightly mist' until the surface looks dull (step 5), practice pressure on a scrap, and trace firmly but gently with the blunt stylus (step 6) so you make grooves without cutting the leather.
How can I adapt this carving and embossing activity for different age groups?
For ages 4–6, use pre‑drawn simple shapes and have an adult handle misting and beeswax (steps 4 and 11), ages 7–10 can draw and press with the spoon (step 7) with supervision, and 11+ can attempt detailed designs, add textured dots (step 8), and experiment with layered colouring (step 10).
What are some ways to personalize or extend the finished bookmark?
To enhance the finished bookmark, punch a hole and add a tassel, apply leather dye before sealing with conditioner or beeswax (step 11), fill carved lines with metallic paint (step 10), or burnish the edges for a polished look.
Watch videos on how to make a leather bookmark by carving and embossing
Basic Leather Carving
4 Videos
Basic Leather Carving
Leather Carving for Beginners - Episode 1
Carving & Tooling a Flower in Leather - Quick Practice
Learning Leathercraft with Jim Linnell - Lesson 7: Backgrounding, Mulefoot, and Stop
Facts about leatherworking for kids
🐄 Vegetable-tanned leather (from animal hides) is the kind leatherworkers usually use for carving and tooling.
💧Leather needs to be slightly damp (called "casing") so carved designs hold their shape clearly.
🔨Embossing presses patterns into leather with stamps or rollers — it changes texture without cutting through the material.
📚 People have used bookmarks for centuries — simple markers and ribbons appear in ancient scrolls and early books.
♻️Small leather scraps can be upcycled into tiny charms, key fobs, or mini-bookmarks so nothing goes to waste.
How do you make a small leather bookmark by carving and embossing?
What materials do I need to carve and emboss a leather bookmark?
What ages is leather carving and embossing suitable for?
What safety tips and benefits should I know before doing leather carving with kids?
