Build a microscale scene with LEGO®
Design and build a tiny LEGO microscale scene using small bricks, plan layout, add details, and photograph your finished miniature landscape for storytelling.


Step-by-step guide to build a microscale scene with LEGO®
LEGO Microscale City (TUTORIAL)
Step 1
Clear a small table to use as your workspace.
Step 2
Gather the materials from the list and bring them to your workspace.
Step 3
Pick a theme for your microscale scene such as forest city beach or space.
Step 4
Choose a small baseplate or tile and place it in the center of your workspace.
Step 5
Sketch a simple layout on paper showing where the main features will go.
Step 6
Sort small LEGO pieces into color or type piles to make building easier.
Step 7
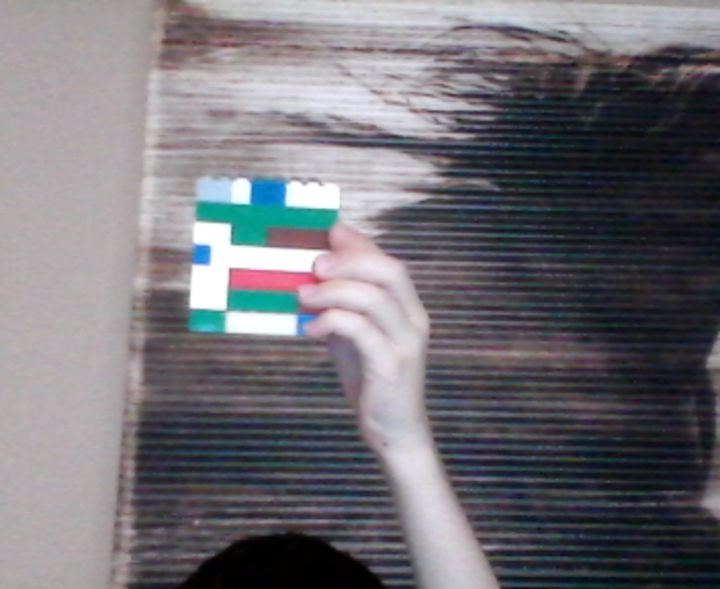
Build the main feature of your scene on the baseplate using small bricks.
Step 8
Add extra tiny details like plants windows signs or tiny animals to bring it to life.
Step 9
Make a backdrop by colouring a piece of paper and taping it behind the baseplate.
Step 10
Tweak the scene arrangement until you like how the elements look together.
Step 11
Adjust lighting by moving a lamp or using natural light so your scene is bright and clear.
Step 12
Take several close-up photos of your scene from different angles and heights.
Step 13
Pick your favorite photo and write a one or two sentence story about the scene.
Step 14
Share your finished creation on DIY.org
Help!?
If I don't have a small LEGO baseplate or enough tiny bricks, what can I use instead?
Use a small piece of sturdy cardboard, a 6x6 tile, or a shallow tray as your baseplate and replace very small LEGO details with craft beads, paper windows, or cut paper animals while following the build and backdrop steps.
My microscale pieces keep falling over or the scene collapses — how can I fix that?
Anchor the baseplate to the cleared table with a non-slip mat and secure loose tiny bricks or added details using small dabs of poster putty or double-sided tape during the 'build the main feature' and 'tweak the scene' steps.
How can I adapt this activity for younger children or older kids?
For younger children use a larger Duplo plate, pre-sorted color piles, and parent help for tiny details, while older kids can work with smaller tiles, more intricate micro builds, detailed colored-paper backdrops, and write a longer story to share on DIY.org.
What are some ways to enhance or personalize the microscale scene?
Personalize the scene by adding a colored-paper backdrop with LED tea lights behind tiny windows, custom-painted signs or mini props as extra tiny details, experiment with the 'adjust lighting' step for dramatic photos, and turn your close-up shots into a short stop-motion before sharing on DIY.org.
Watch videos on how to build a microscale scene with LEGO®
EASY LEGO MINI MICROSCALE VEHICLES Part 1 (Tutorial)
4 Videos
EASY LEGO MINI MICROSCALE VEHICLES Part 1 (Tutorial)
10 LEGO Micro Build IDEAS!
Making my LEGO City 100x SMALLER... (microscale 24-Ville)
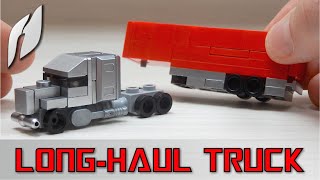
How to Build a Microscale Lego Long-Haul Truck with Semi-trailer (MOC - 4K)
Facts about LEGO building and miniature model-making for kids
🧱 Microscale LEGO lets you fit whole cities onto tiny baseplates by using small bricks and clever building tricks.
📏 Modelers often use scales like 1:87 (HO) and 1:160 (N); LEGO microscale uses a practical 'stud' scale to keep pieces consistent.
📷 Macro photography turns tiny builds into cinematic landscapes—smartphone macro modes or close-up lenses reveal surprising detail.
🌳 Tiny parts like 1x1 round tiles, plates, and cheese slopes can suggest trees, windows, and rooftops at microscale.
🎨 A single colored tile or micro-detail can tell a whole story in a miniature scene—perfect for photographed storytelling.
How do I design and build a LEGO microscale scene step by step?
What materials and LEGO pieces do I need to build a microscale scene?
What ages is building LEGO microscale scenes suitable for?
What are the benefits of building LEGO microscale scenes?
