Build a cardboard costume
Design and build a wearable cardboard costume using recycled boxes, safety scissors, tape, and paint; learn measuring, decorating, and safe crafting skills.


Step-by-step guide to build a cardboard costume
How to Make a Cardboard UFO Costume | Step By Step Tutorial with Makedo
Step 1
Clear a workspace on a table or the floor so you have lots of room to build.
Step 2
Lay out all your materials where you can reach them easily.
Step 3
Pick the costume type you want to make like a robot superhero or animal.
Step 4
Measure your torso height and width with the ruler so the costume will fit.
Step 5
Draw front and back panel outlines on the cardboard using your measurements.
Step 6
Mark where the head hole and arm holes should go on the front panel.
Step 7
Cut out the panels and the head and arm holes with safety scissors while an adult helps or watches.
Step 8
Smooth every cut edge by covering it with tape so nothing is sharp.
Step 9
Tape the front and back panels together at the shoulders and sides to make a wearable shape.
Step 10
Cut two lengths of string or elastic to use as shoulder straps.
Step 11
Attach the straps inside the shoulder corners by tying or taping them securely.
Step 12
Paint a base color over the costume and wait for it to dry completely.
Step 13
Add decorations and details with paint or markers and let them dry.
Step 14
Put on the costume and ask an adult to help trim or retape any spots that feel tight or sharp.
Step 15
Share your finished costume on DIY.org.
Help!?
What can we use instead of safety scissors or elastic if those are hard to find?
If you don't have safety scissors, have an adult use regular scissors while helping with the 'Cut out the panels' step, and for the 'Cut two lengths of string or elastic' step you can use ribbon, yarn, or strips cut from an old T-shirt.
The head or arm holes ended up too small or jagged—how can we fix that without ruining the panels?
Carefully trim the head or arm holes a little at a time during the 'Cut out the panels' step until they fit, then 'Smooth every cut edge by covering it with tape' to hide jagged edges.
How can I adapt this cardboard costume project for a toddler versus an older child?
For toddlers, an adult should do 'Measure your torso height and width' and all cutting while keeping decorations simple with markers, whereas older kids can measure themselves and add more complex features like layered cardboard or movable parts.
What are easy ways to enhance or personalize the costume after painting and decorating?
After 'Paint a base color' and adding decorations, reinforce the joins from 'Tape the front and back panels together' with extra tape, add battery LED strips or tin-foil accents for shine, and sew or tape on Velcro pockets for play.
Watch videos on how to build a cardboard costume
How to Make a Transformer Costume from Cardboard | Best Transformer Costume DIY Tutorial Part 1
4 Videos
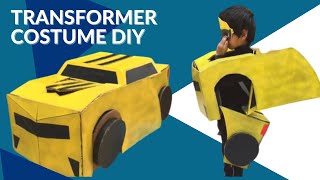
How to Make a Transformer Costume from Cardboard | Best Transformer Costume DIY Tutorial Part 1
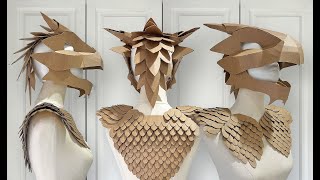
How to make a Cardboard Dragon Head
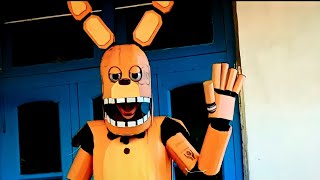
How to make Spring bonnie cardboard suit / Spring bonnie cosplay
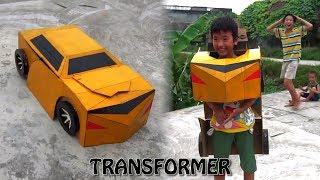
How to Make Cool Kids Transformer Costume Out of Cardboard
Facts about recycled crafts for kids
📦 Corrugated cardboard began replacing earlier packing materials in the late 19th century and changed how goods were shipped.
♻️ Paper fibers used in cardboard can usually be recycled around 6–7 times before the fibers wear out.
🎨 Designing and building costumes boosts fine motor skills, spatial planning, and creative problem-solving in kids.
✂️ Kid-safe scissors have rounded tips and blunt blades so children can cut paper and thin cardboard more safely (with supervision).
🧩 Cardboard costumes are popular at maker faires and cosplay events because they're lightweight, inexpensive, and super customizable.
How do I build a wearable cardboard costume with my child?
What materials do I need to build a cardboard costume?
What ages is a cardboard costume activity suitable for?
What are the benefits and safety tips for making cardboard costumes?
